


So with that out of the way, let's begin.
It isn't:
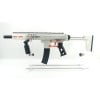
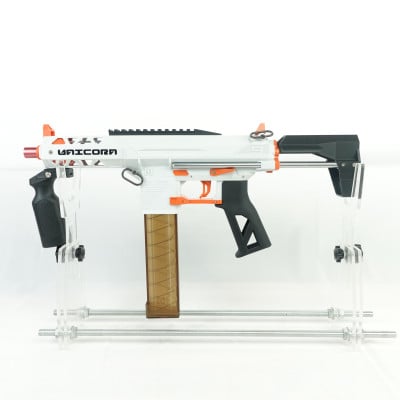
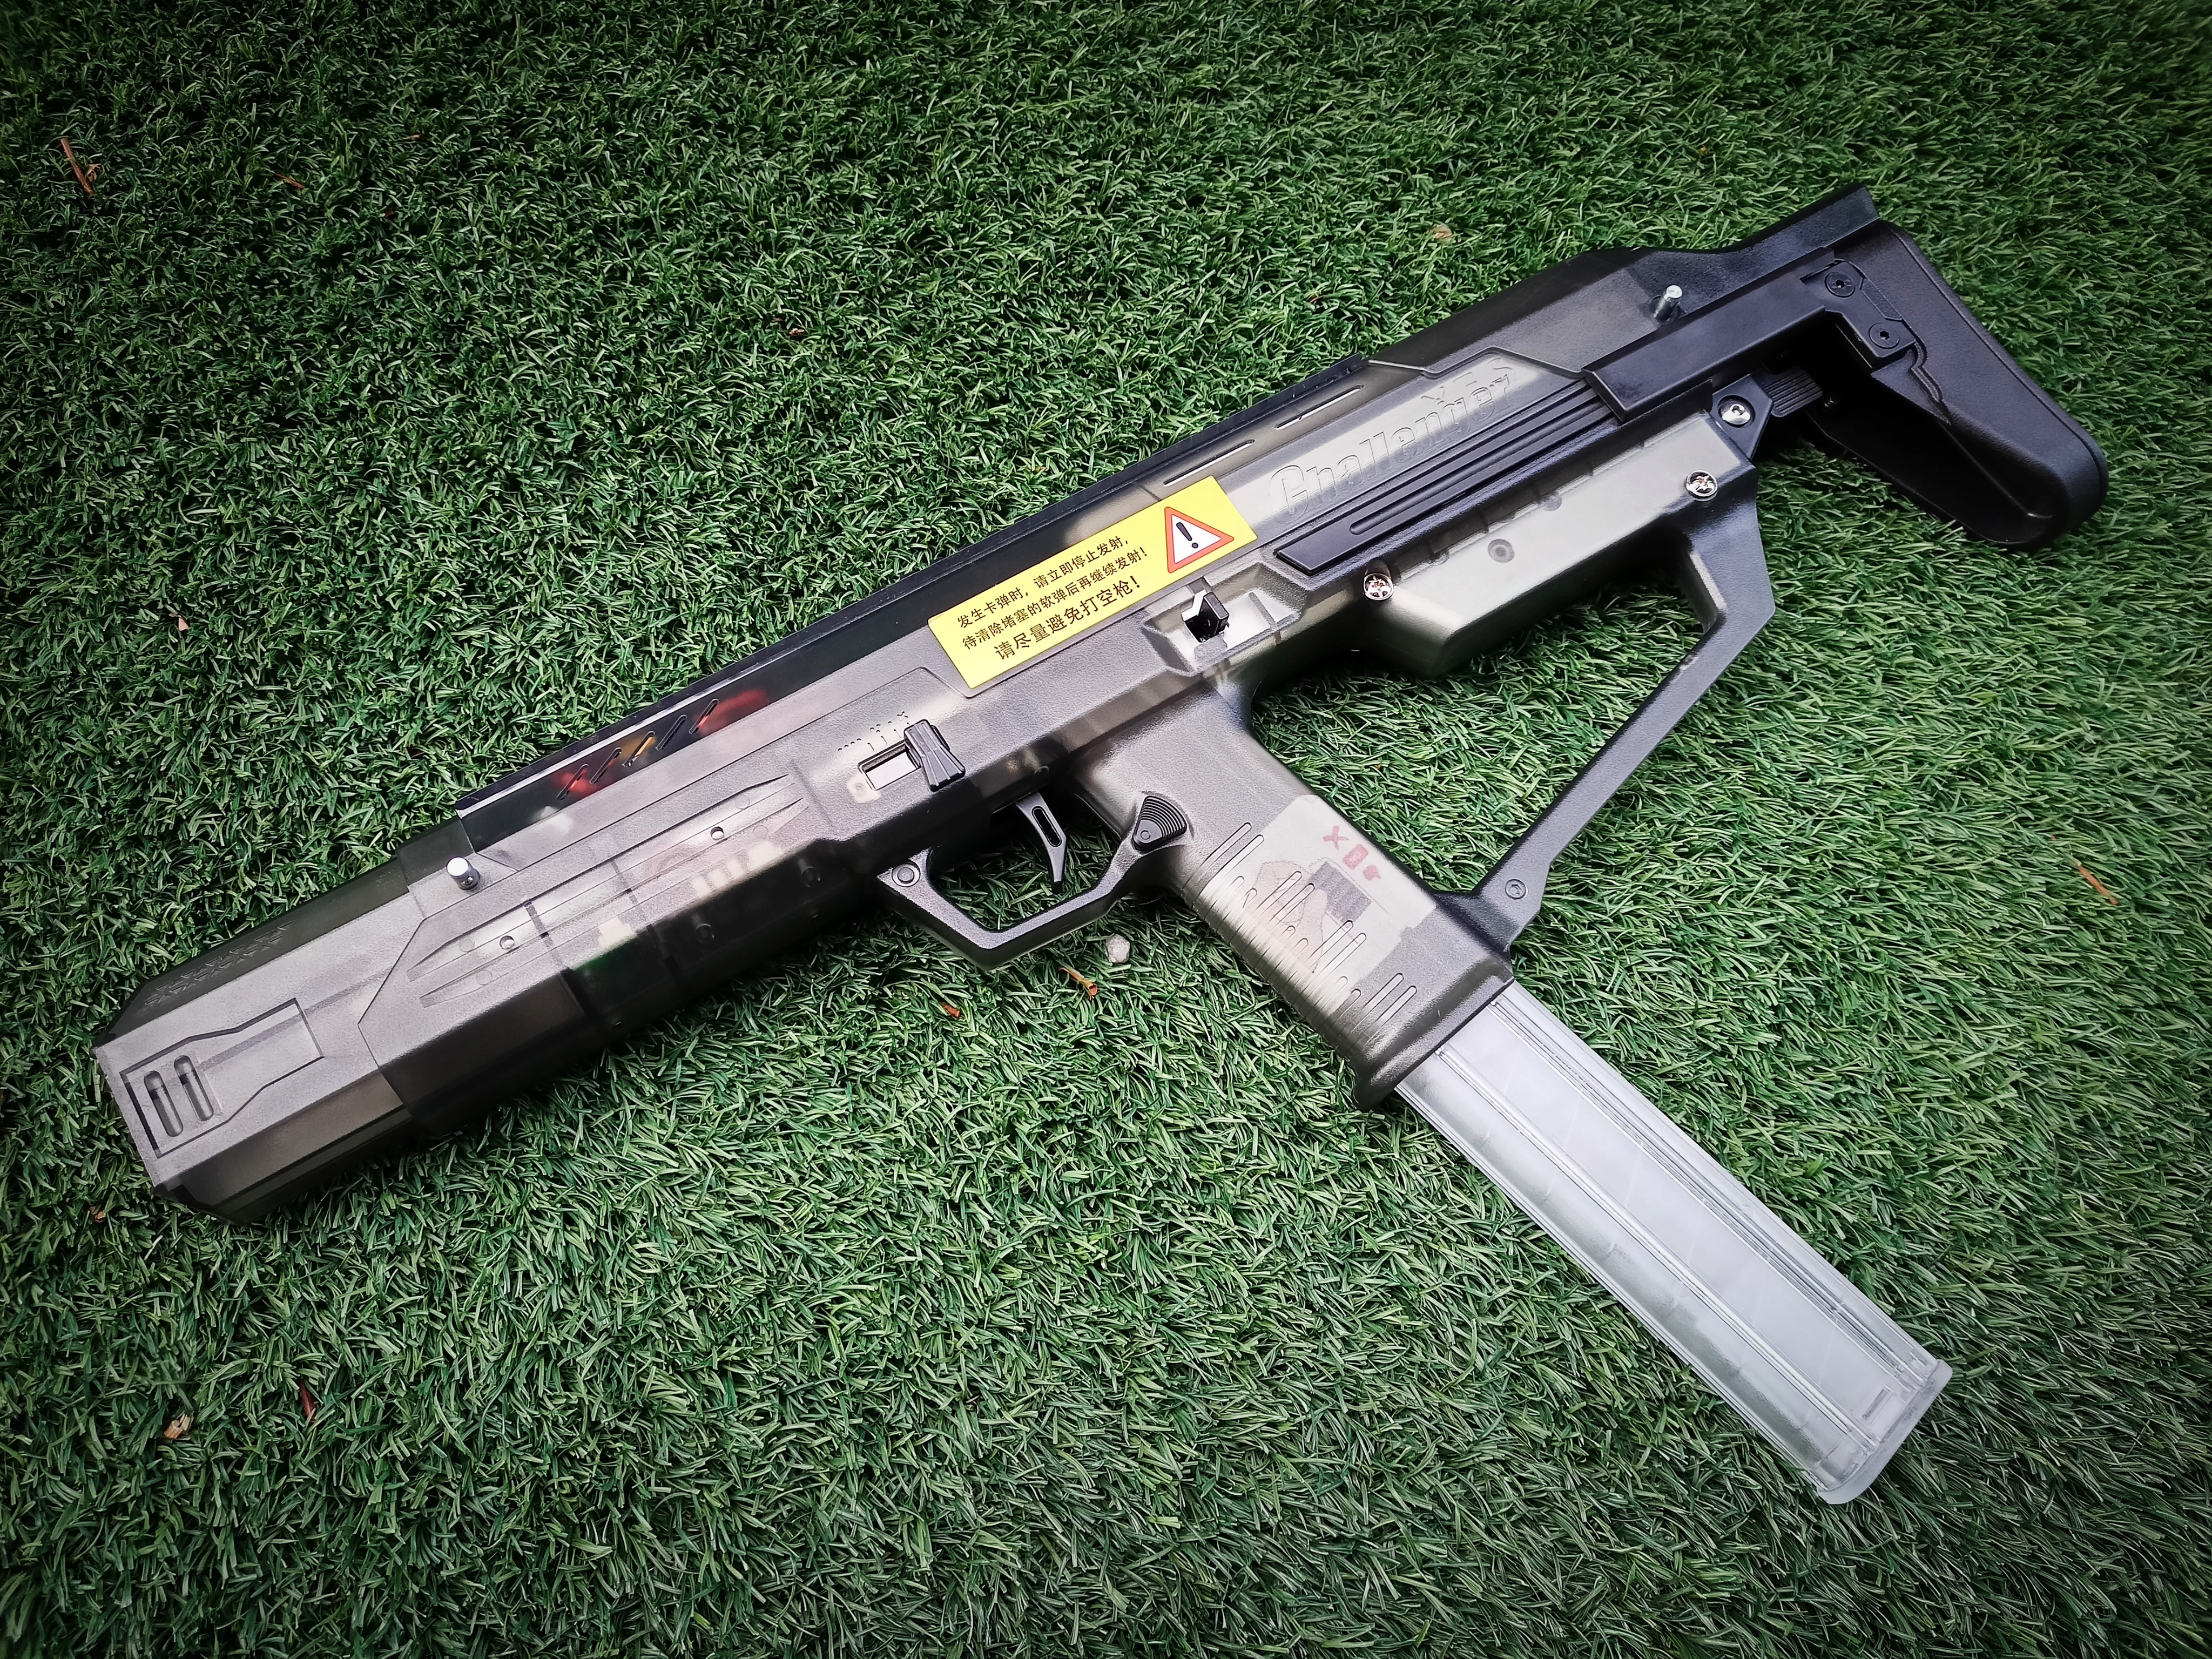
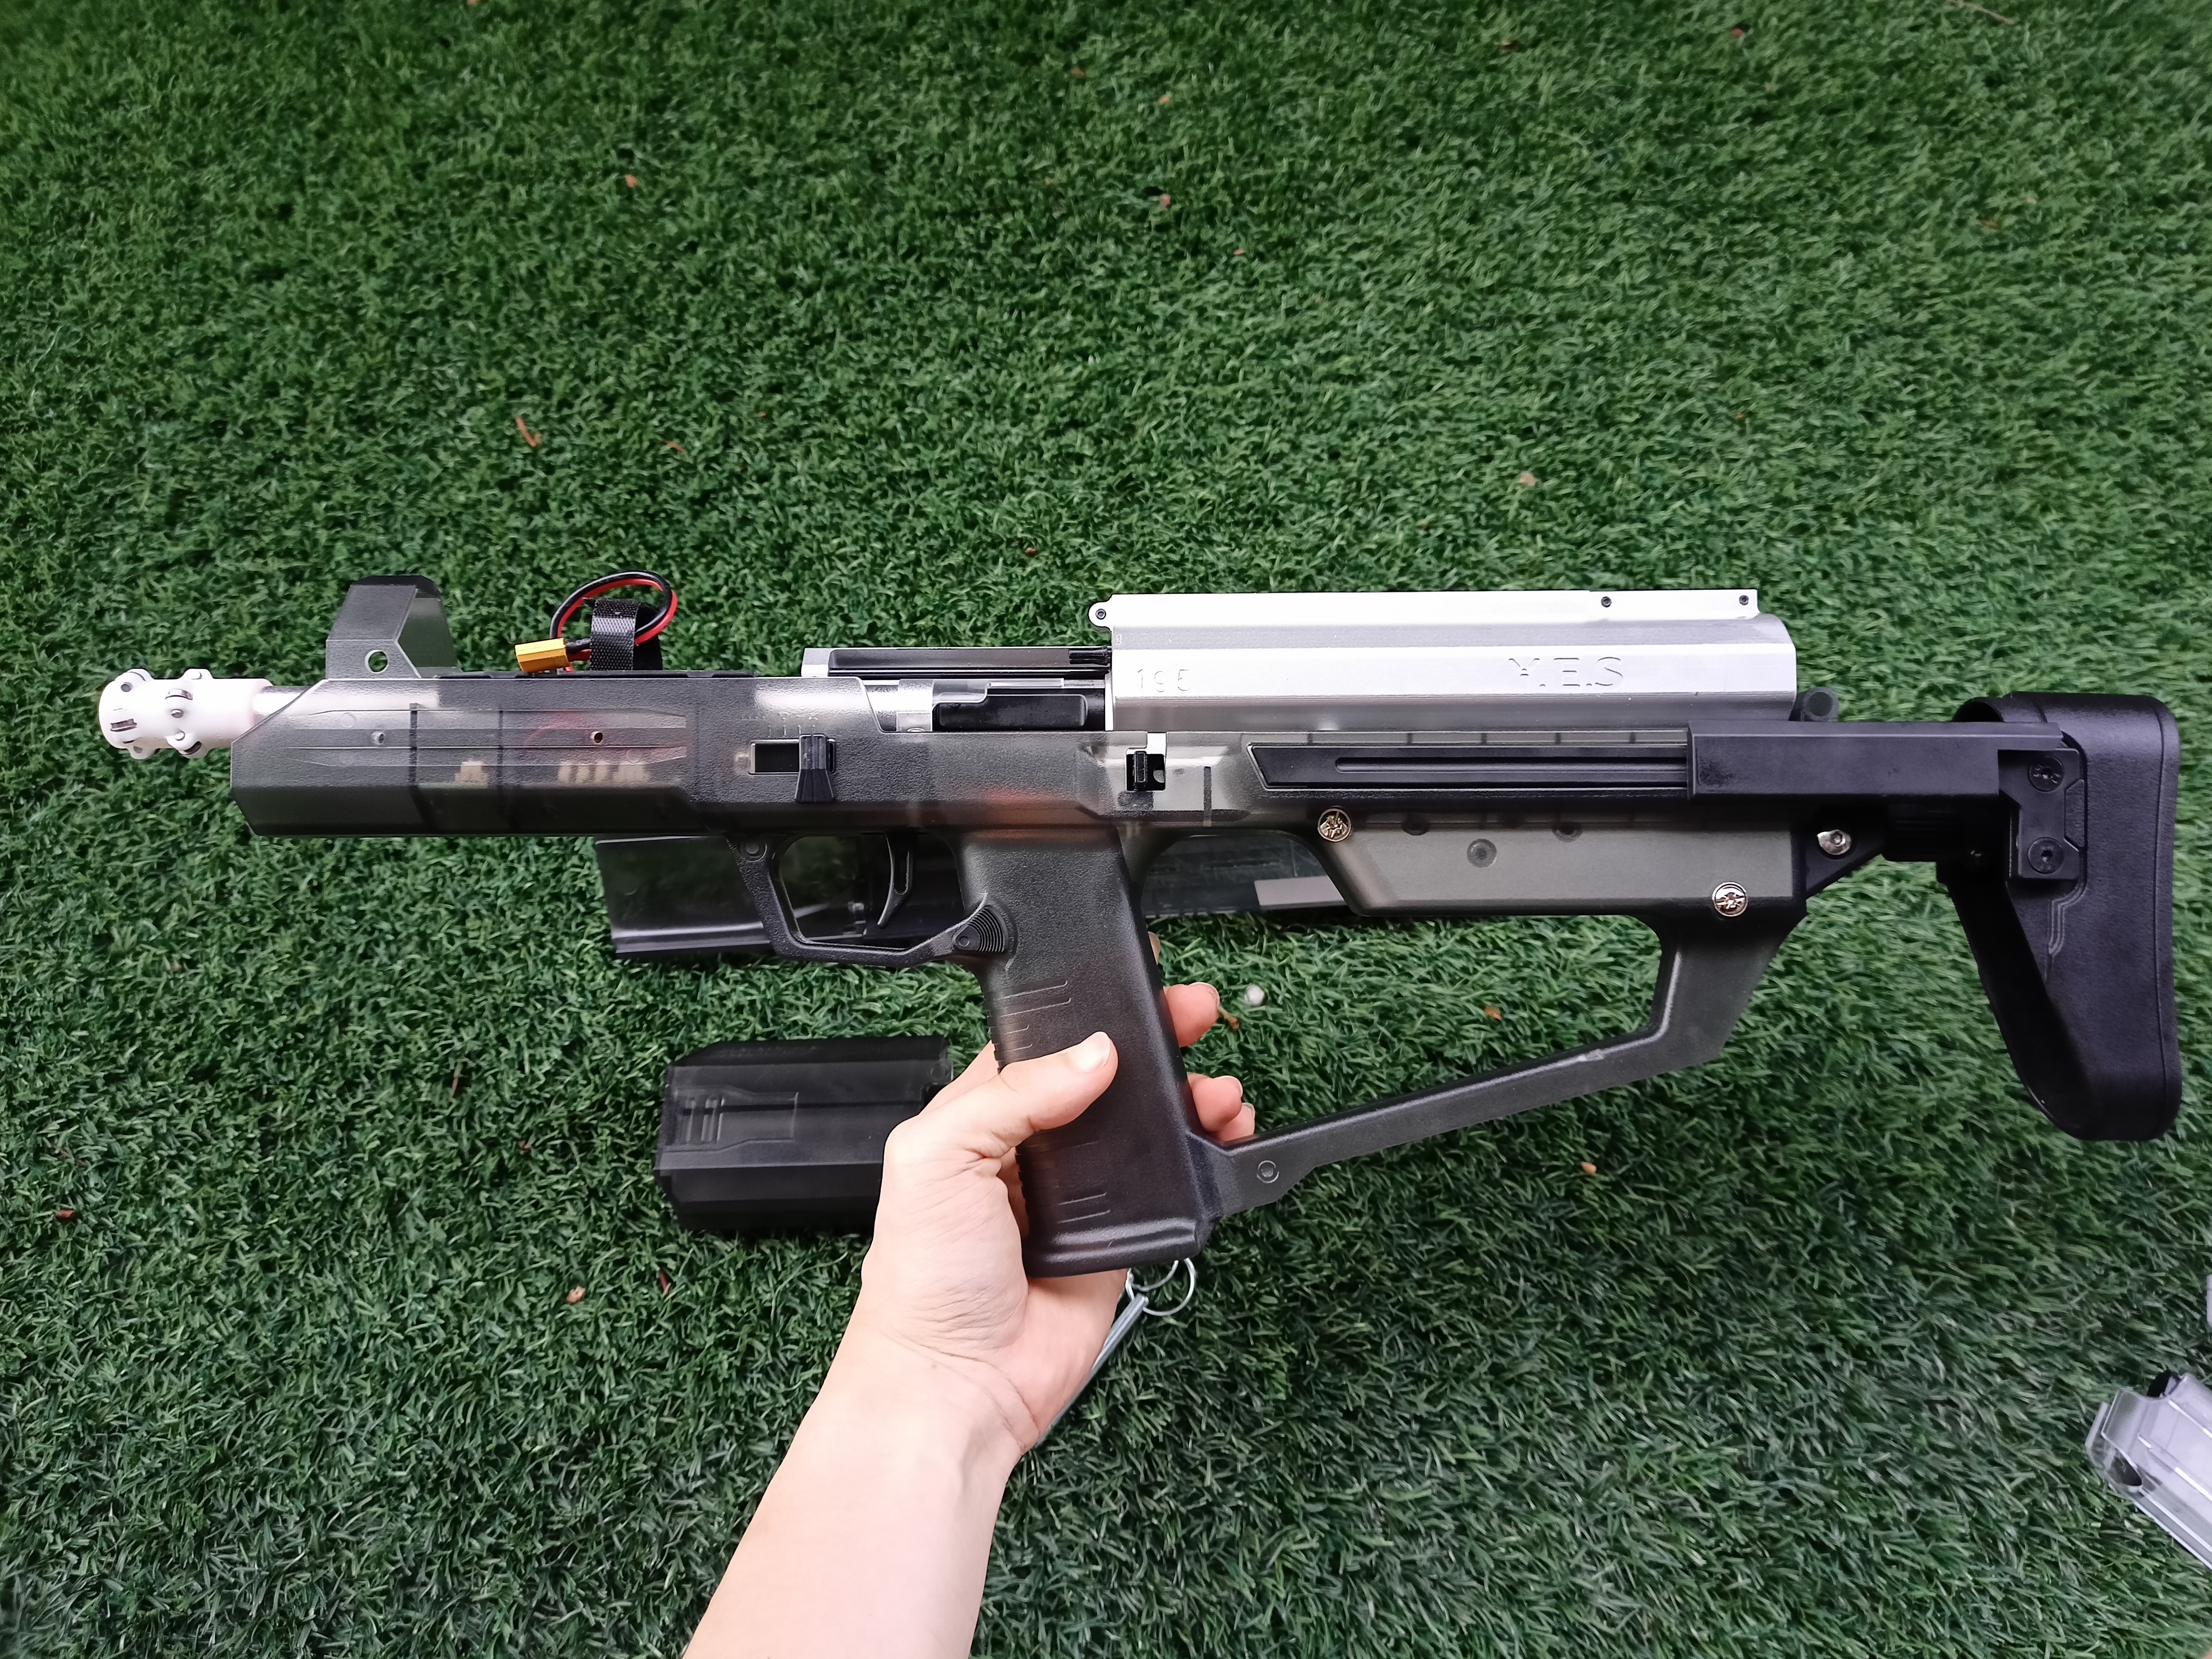
ALRIGHT, now let's start with the External of the blaster!
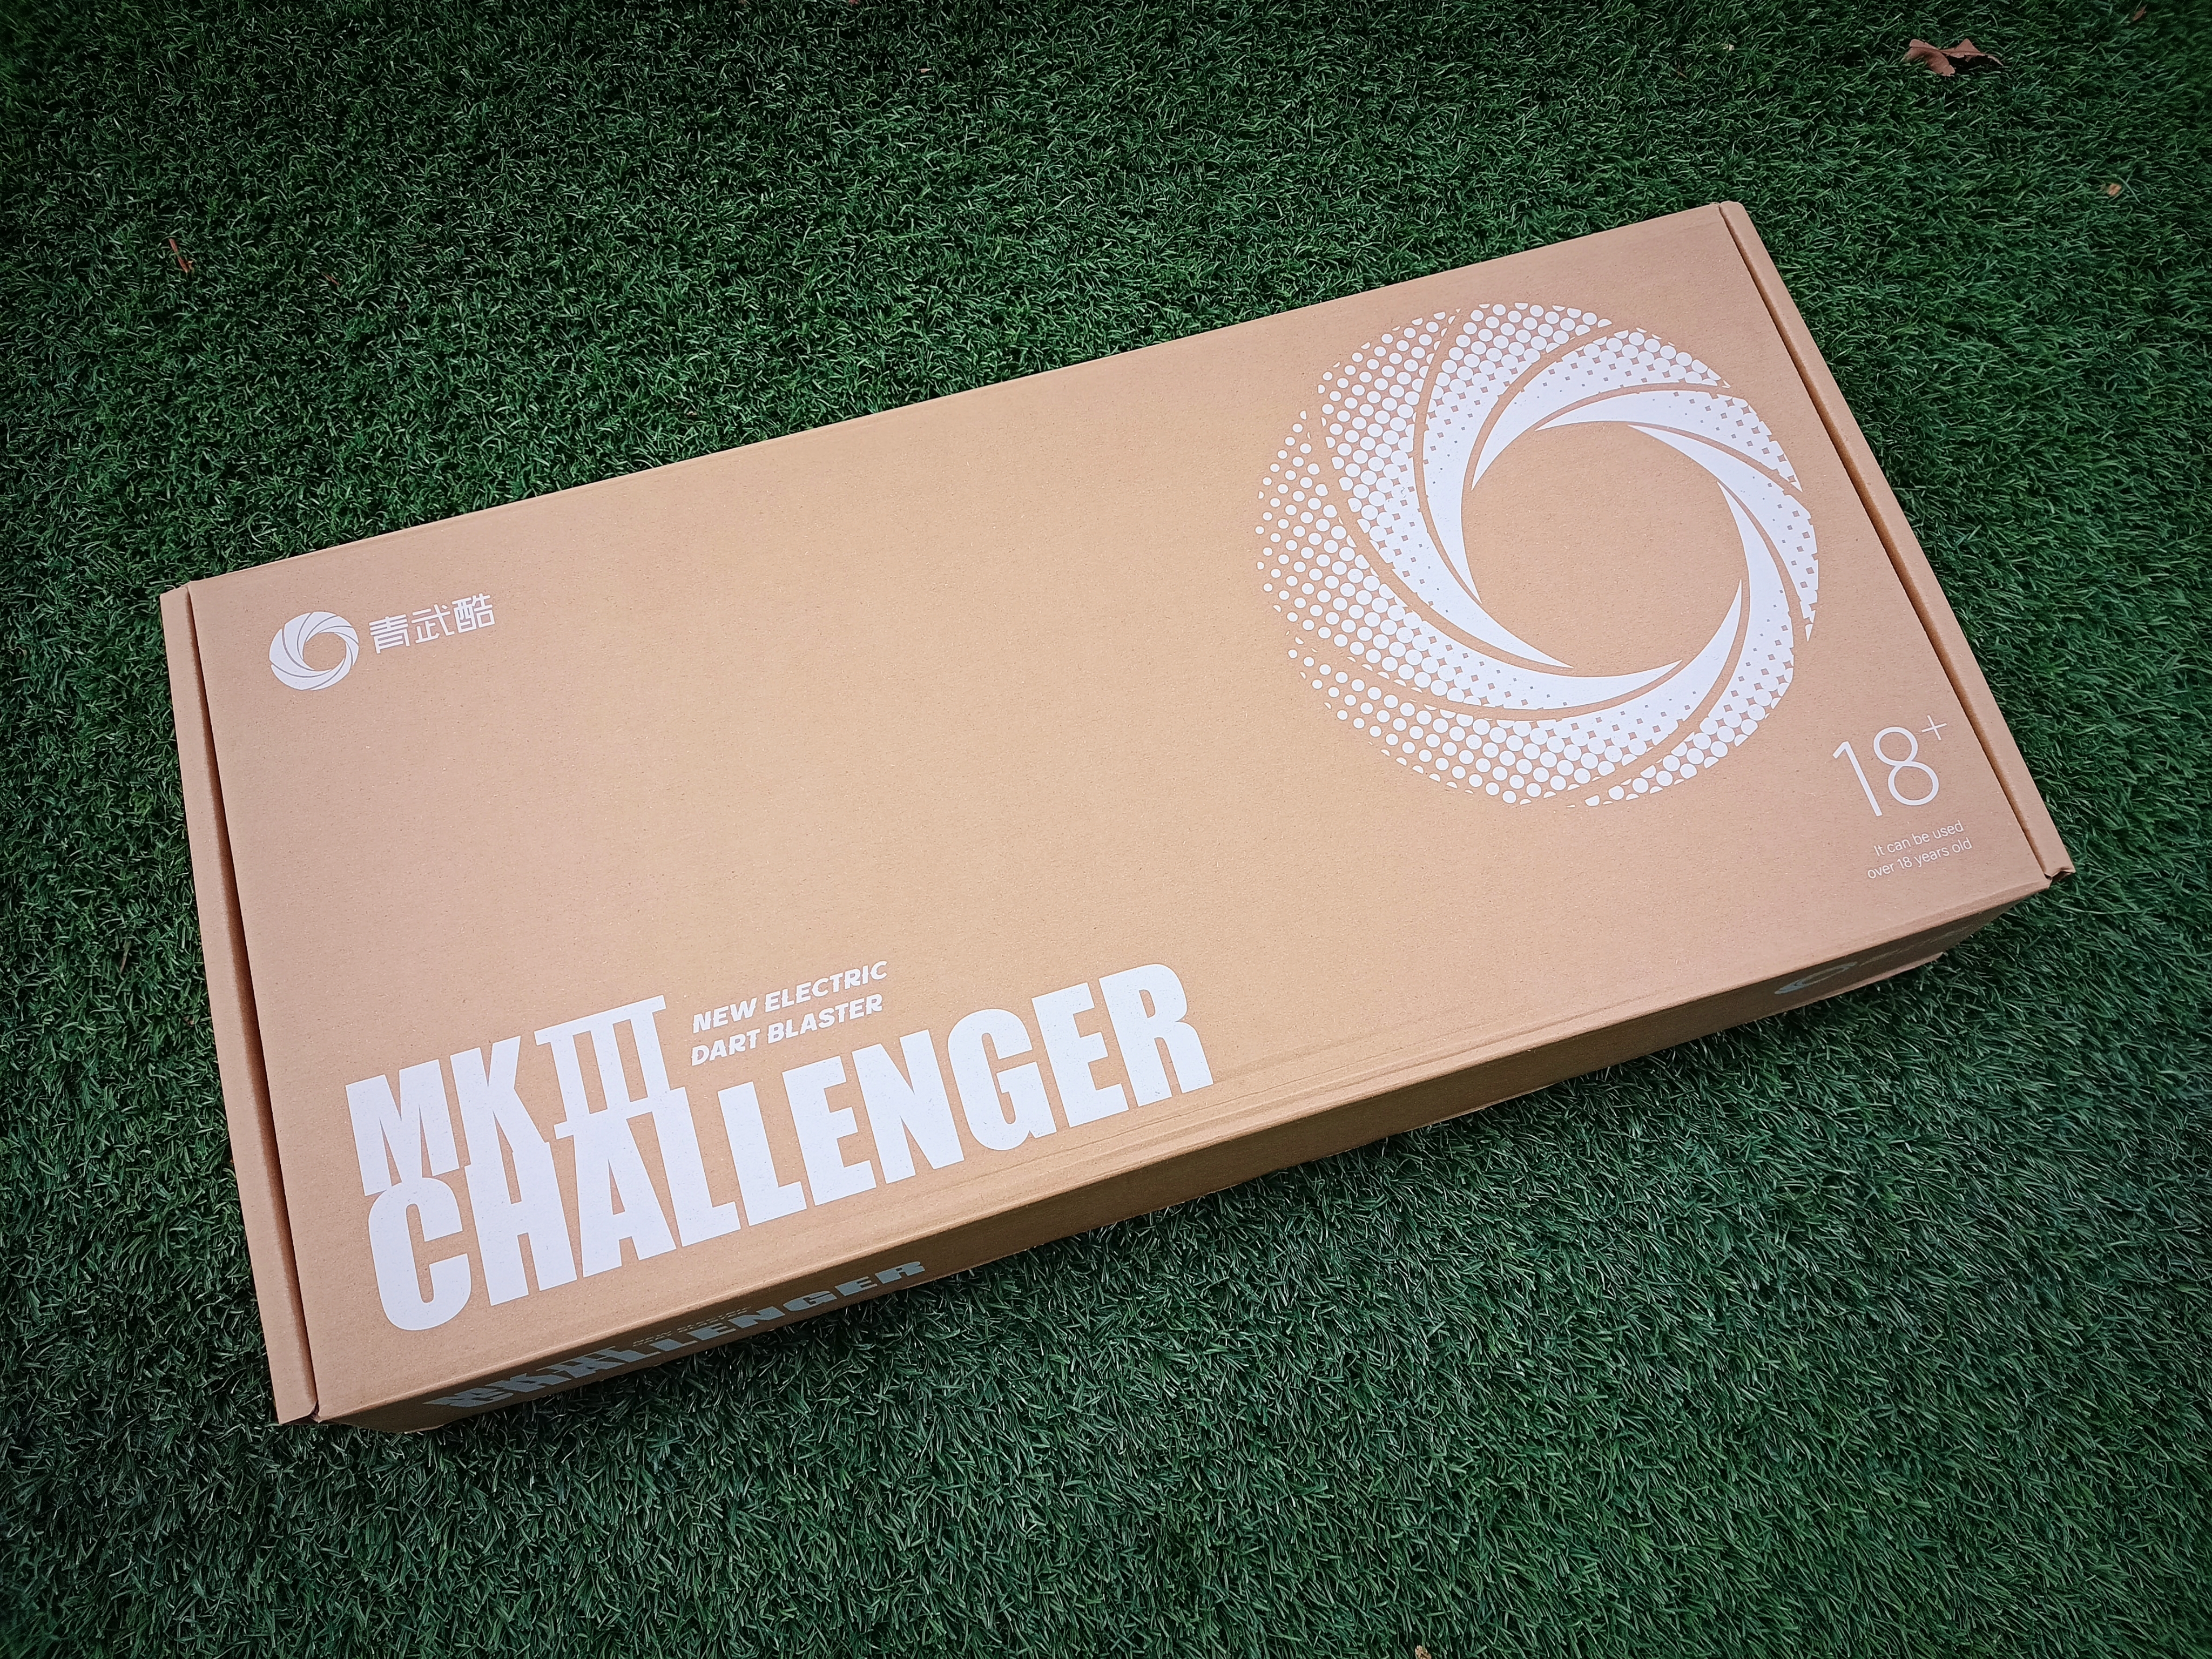
The box is pretty standard cardboard box with QWK and Challenger MK III words, it says its for age 18+.
Open up the box you will be immediately greeted by the blaster itself and some accessories that come with it. The blaster is moderately protected by the simple compartmentalized cardboards, mainly to prevent it from moving around in the box.
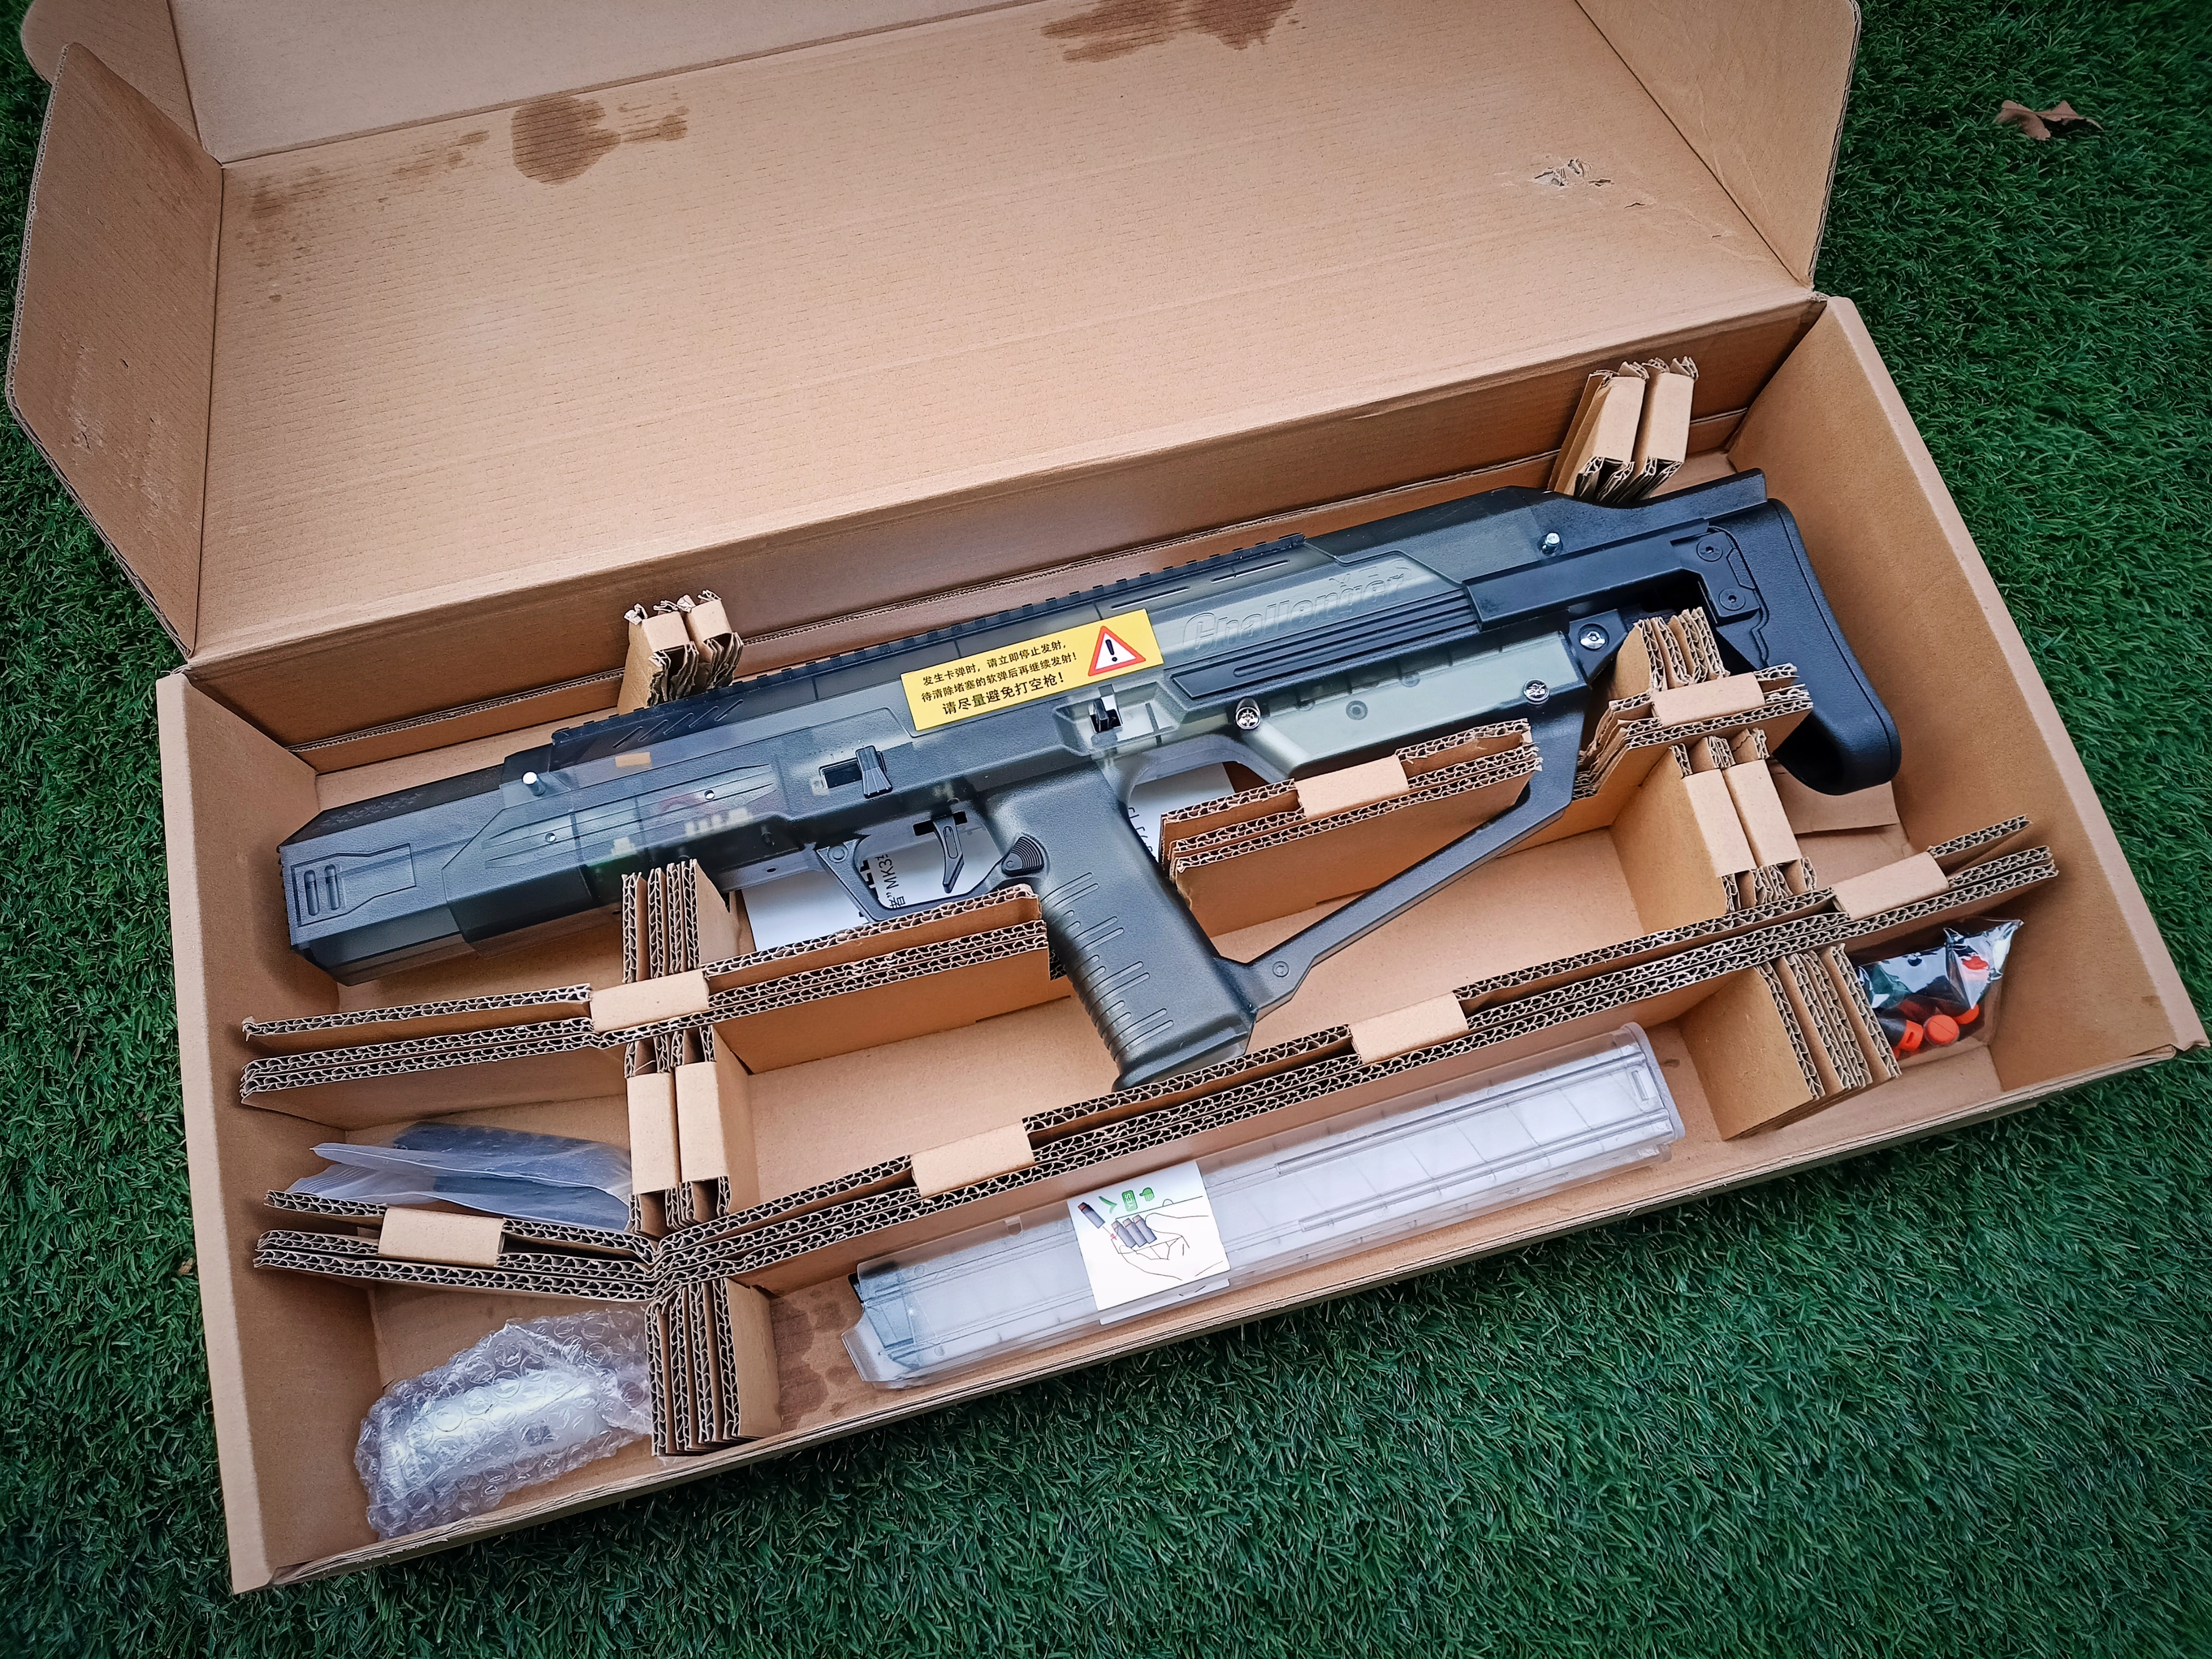
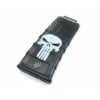
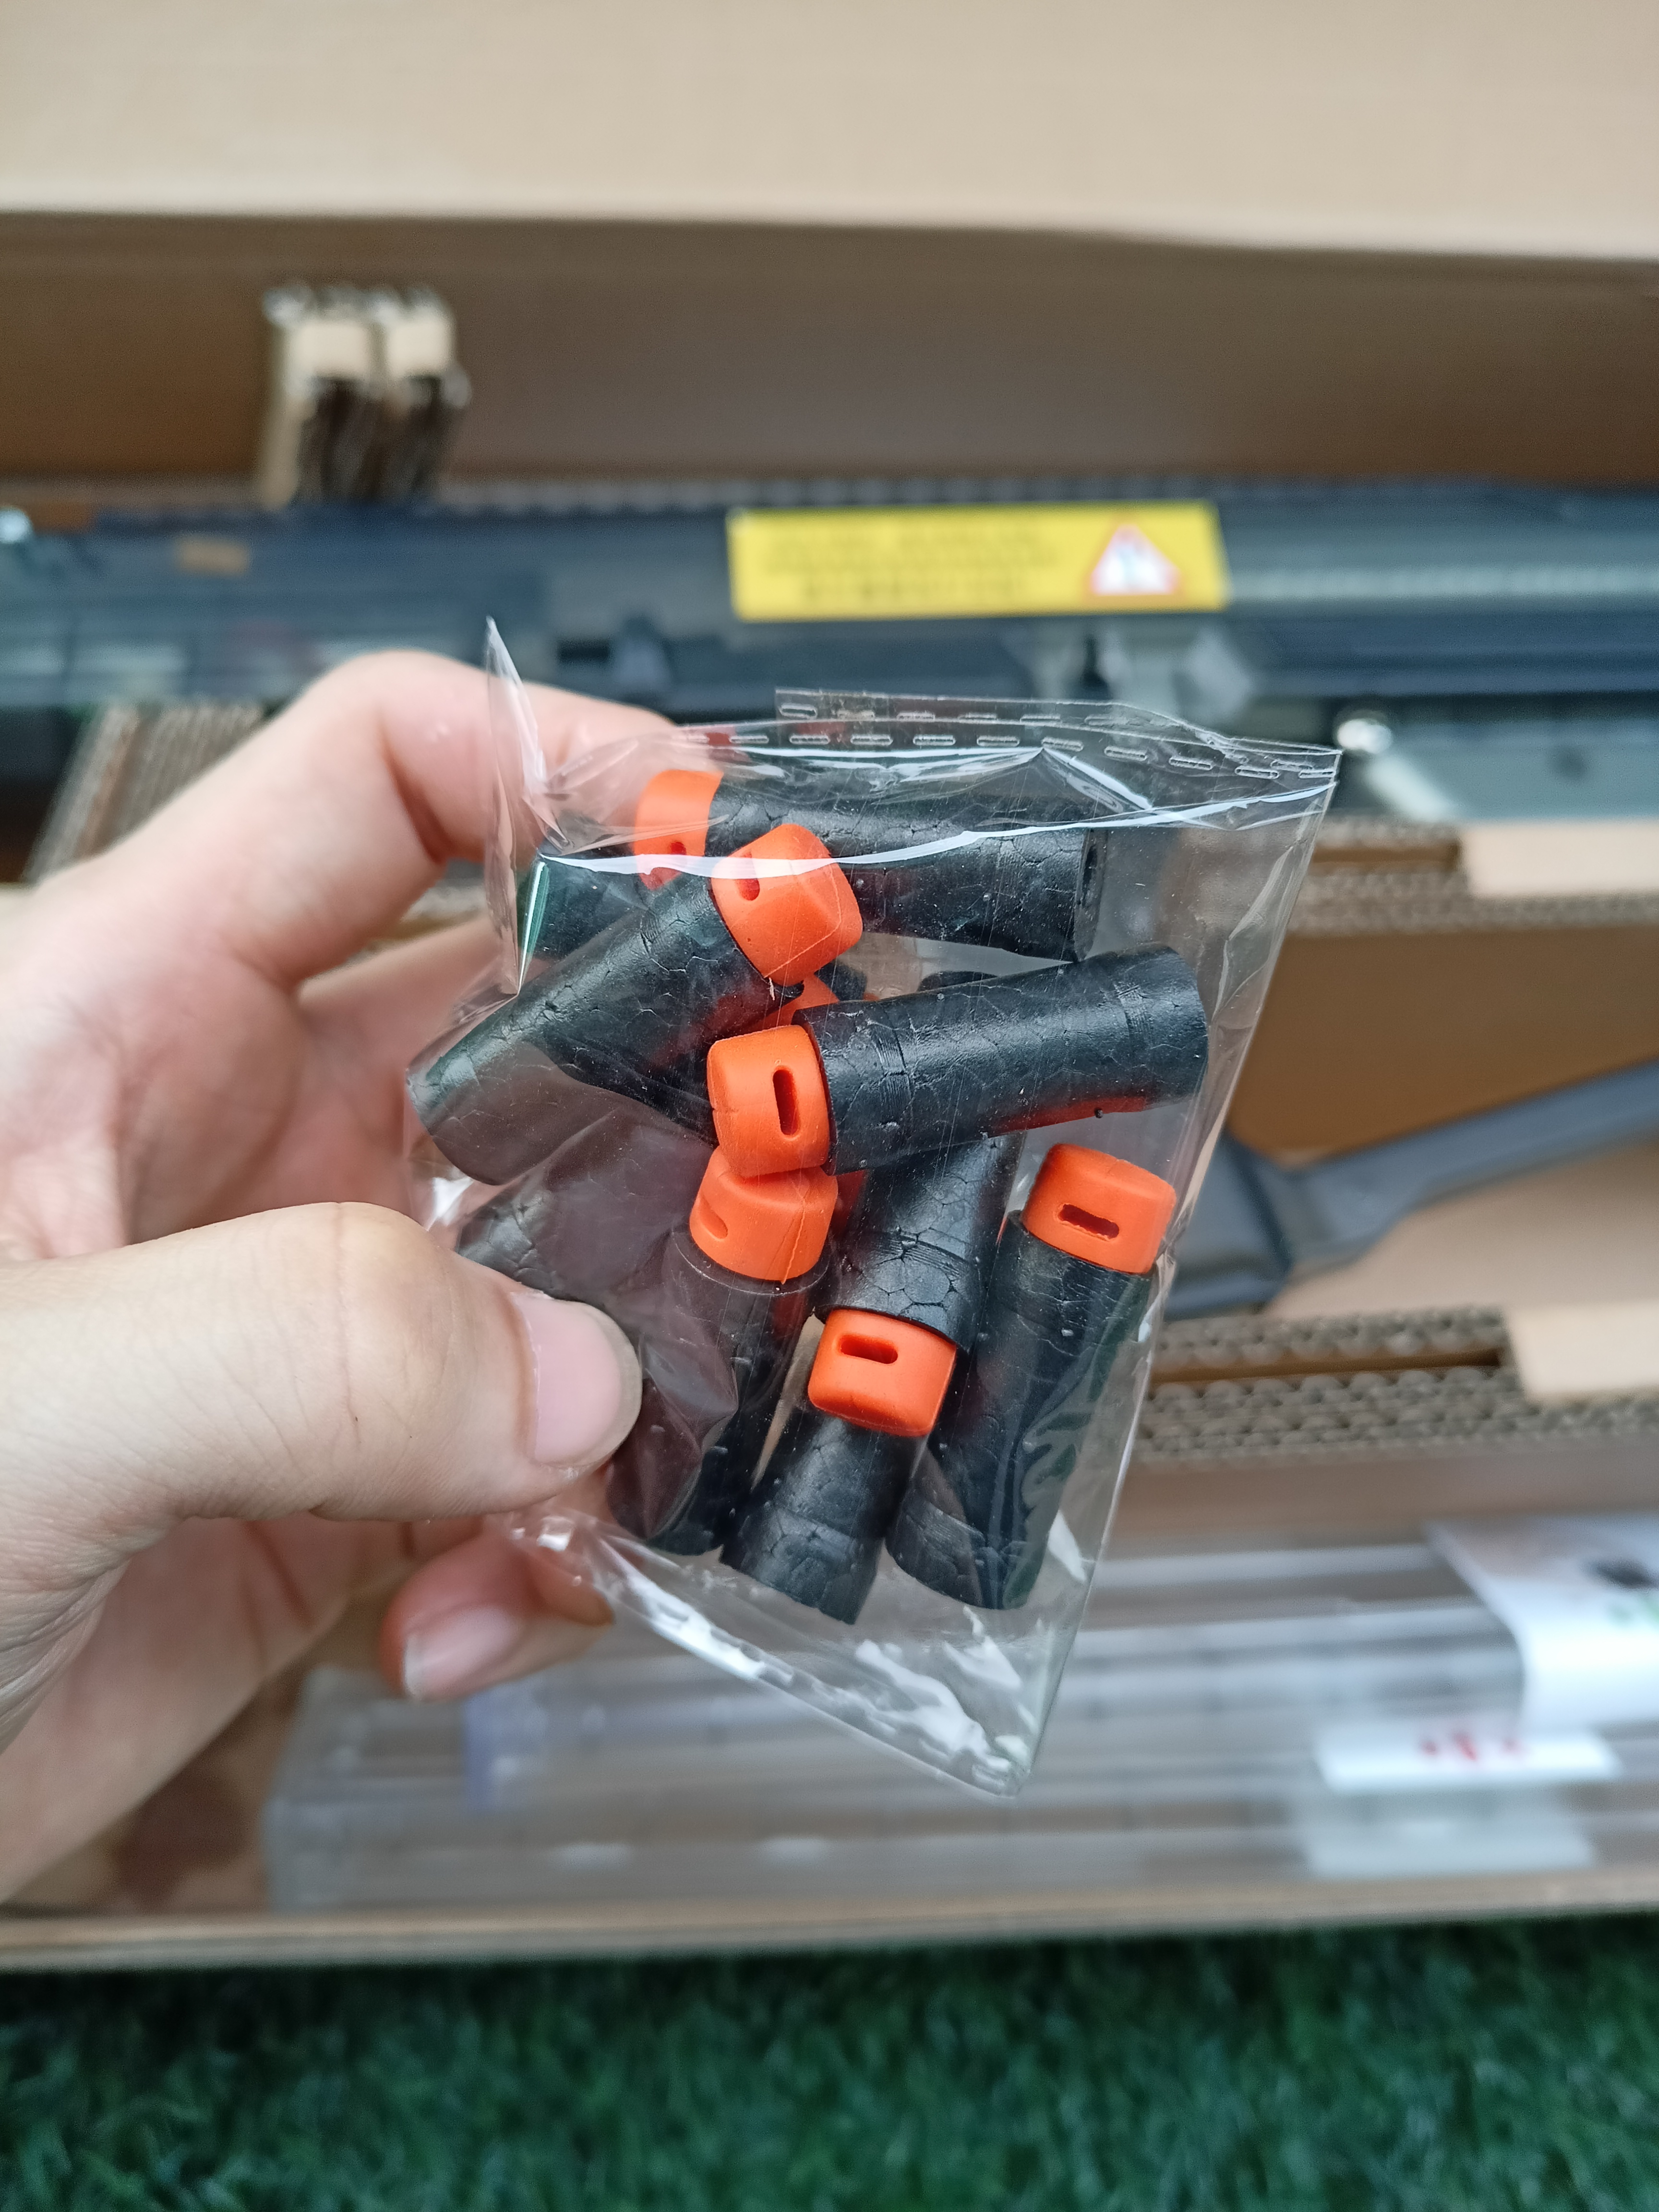
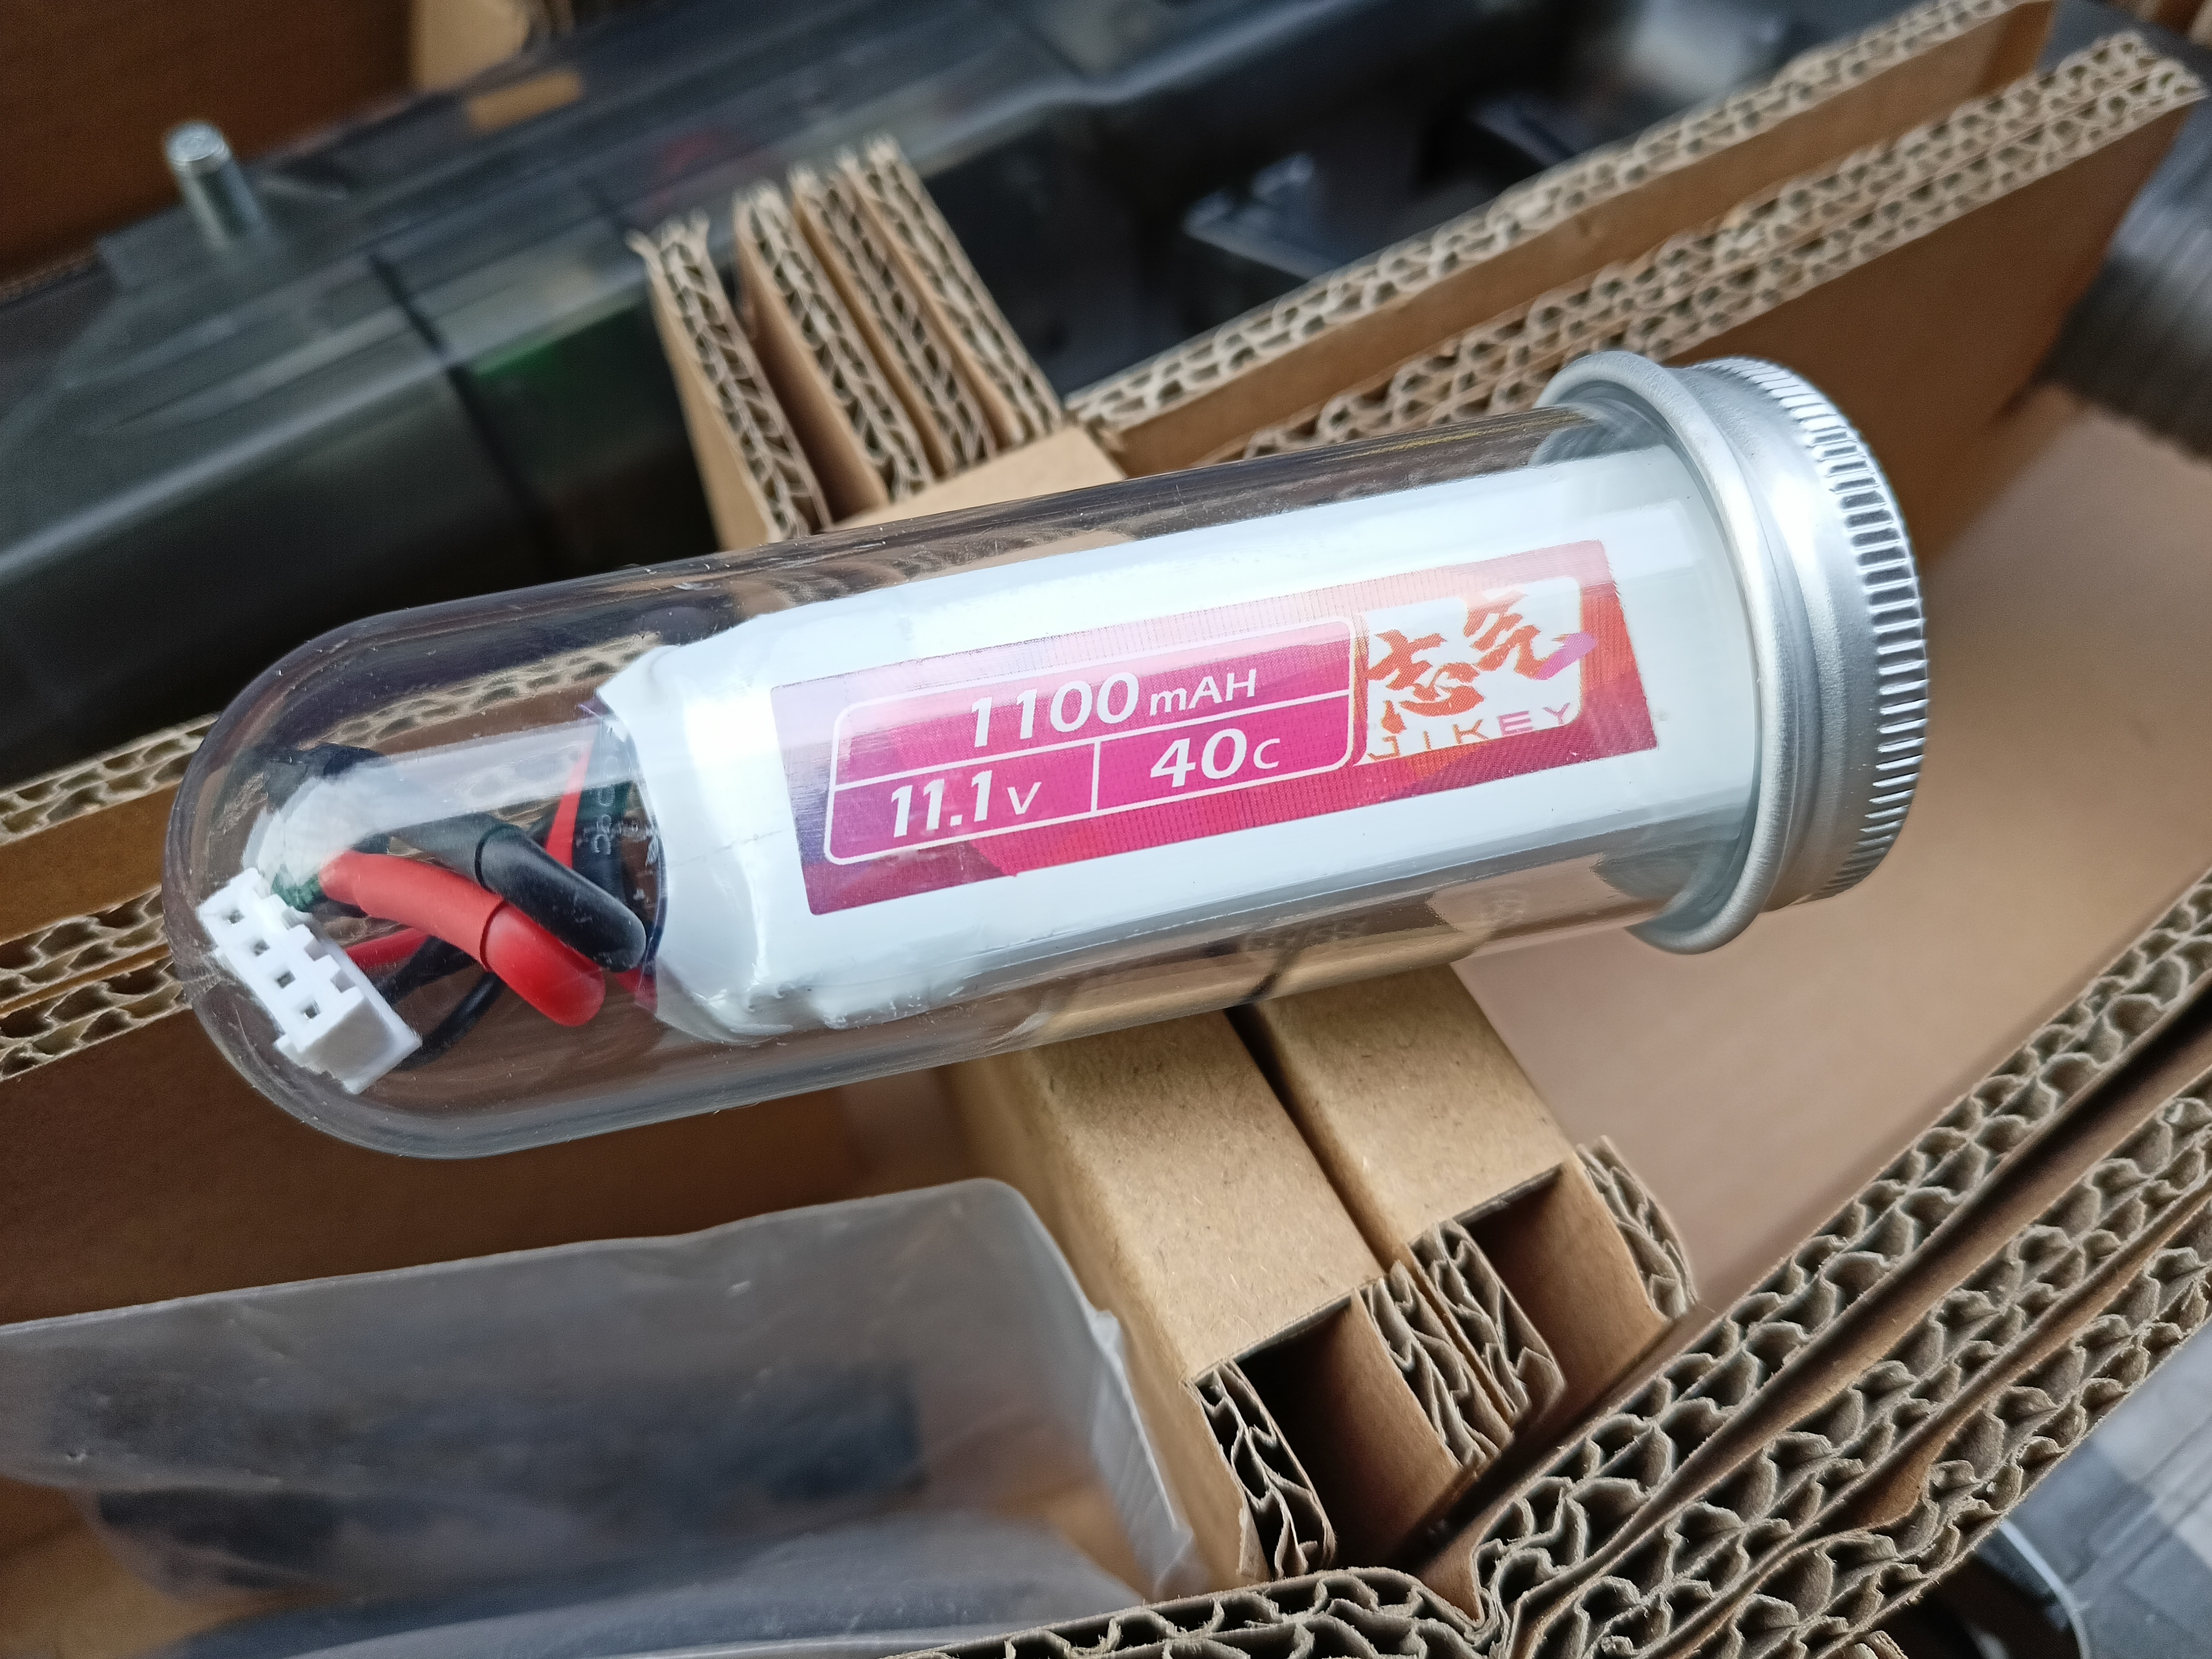
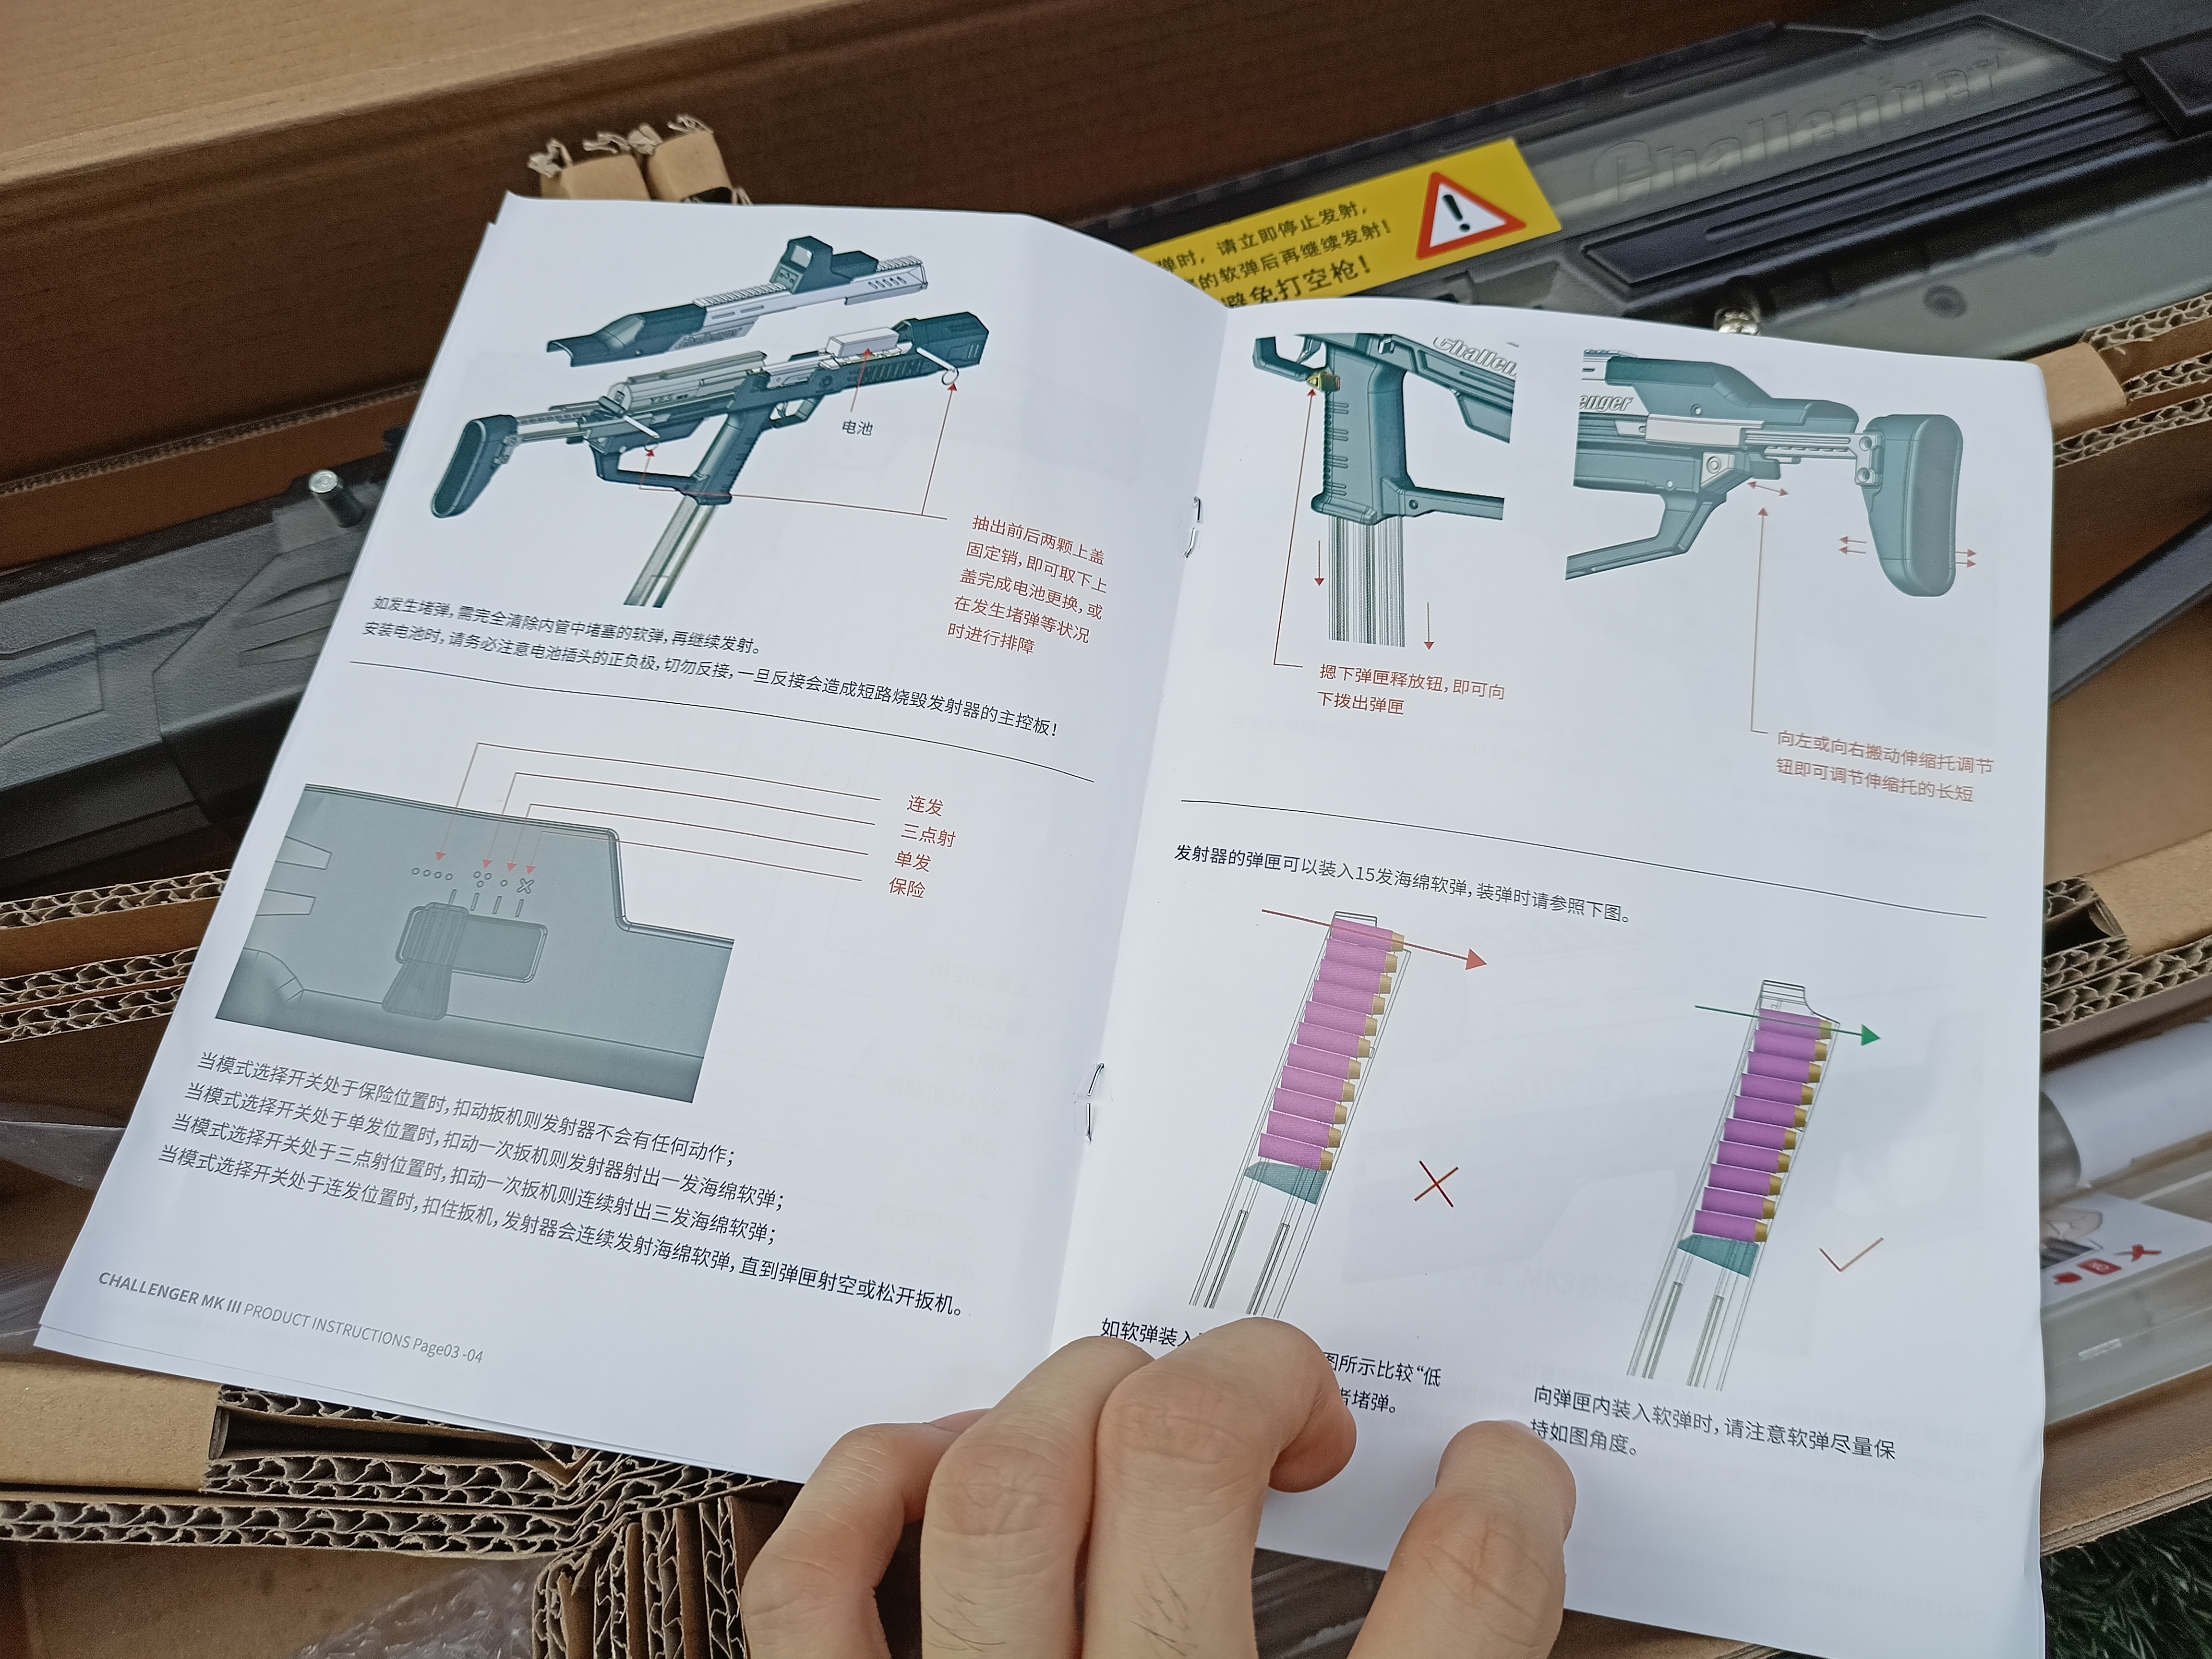
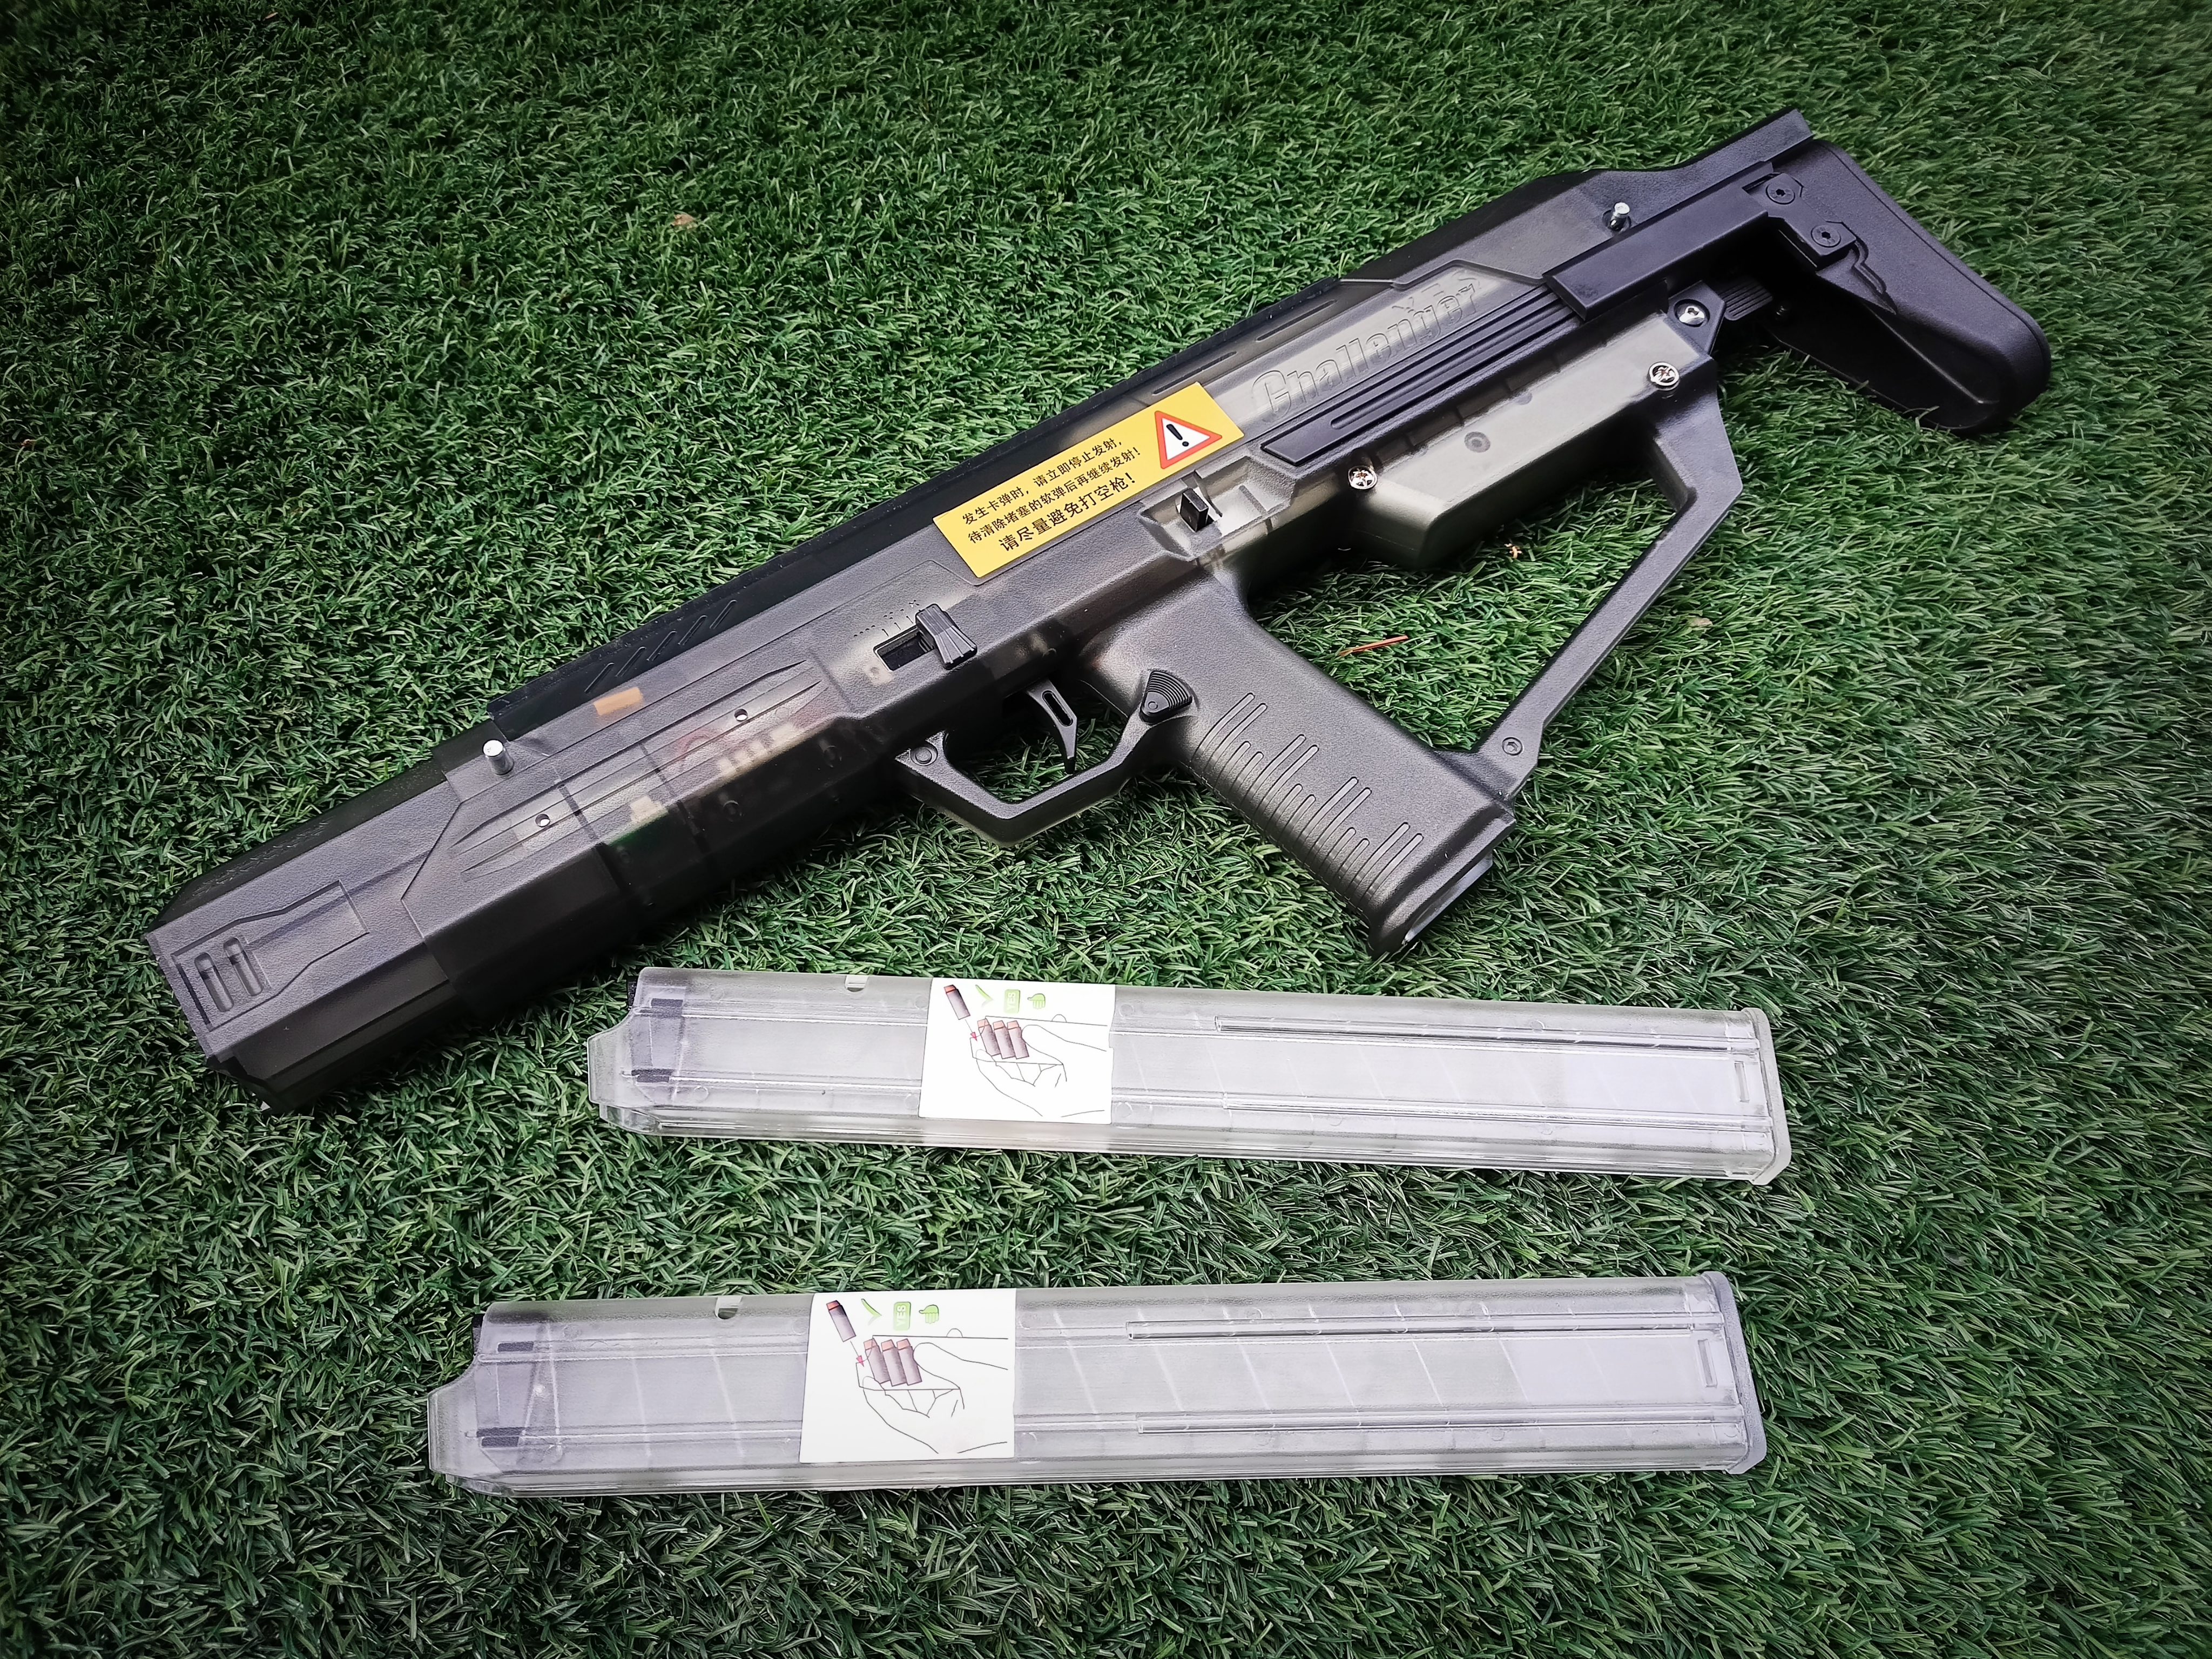
The package includes Challenger MK3 Pro blaster itself; 2 Magazines; a small pack of Black Dragon EPP Darts (Sample really, since it only has 10 rounds); A 1100mAh 40C 3S LiPo battery; 3 metal picatinny rails; User manual that is only in Chinese language, lol.


 \
\
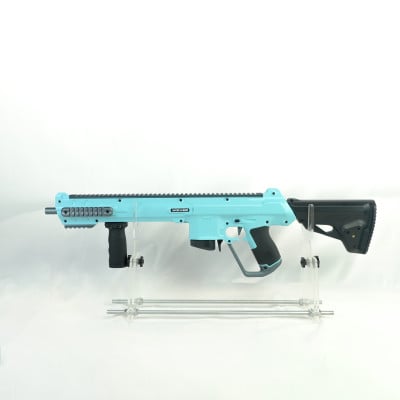
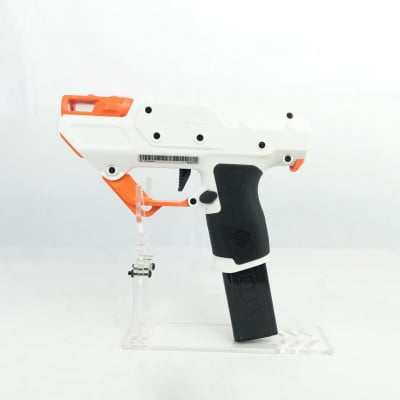
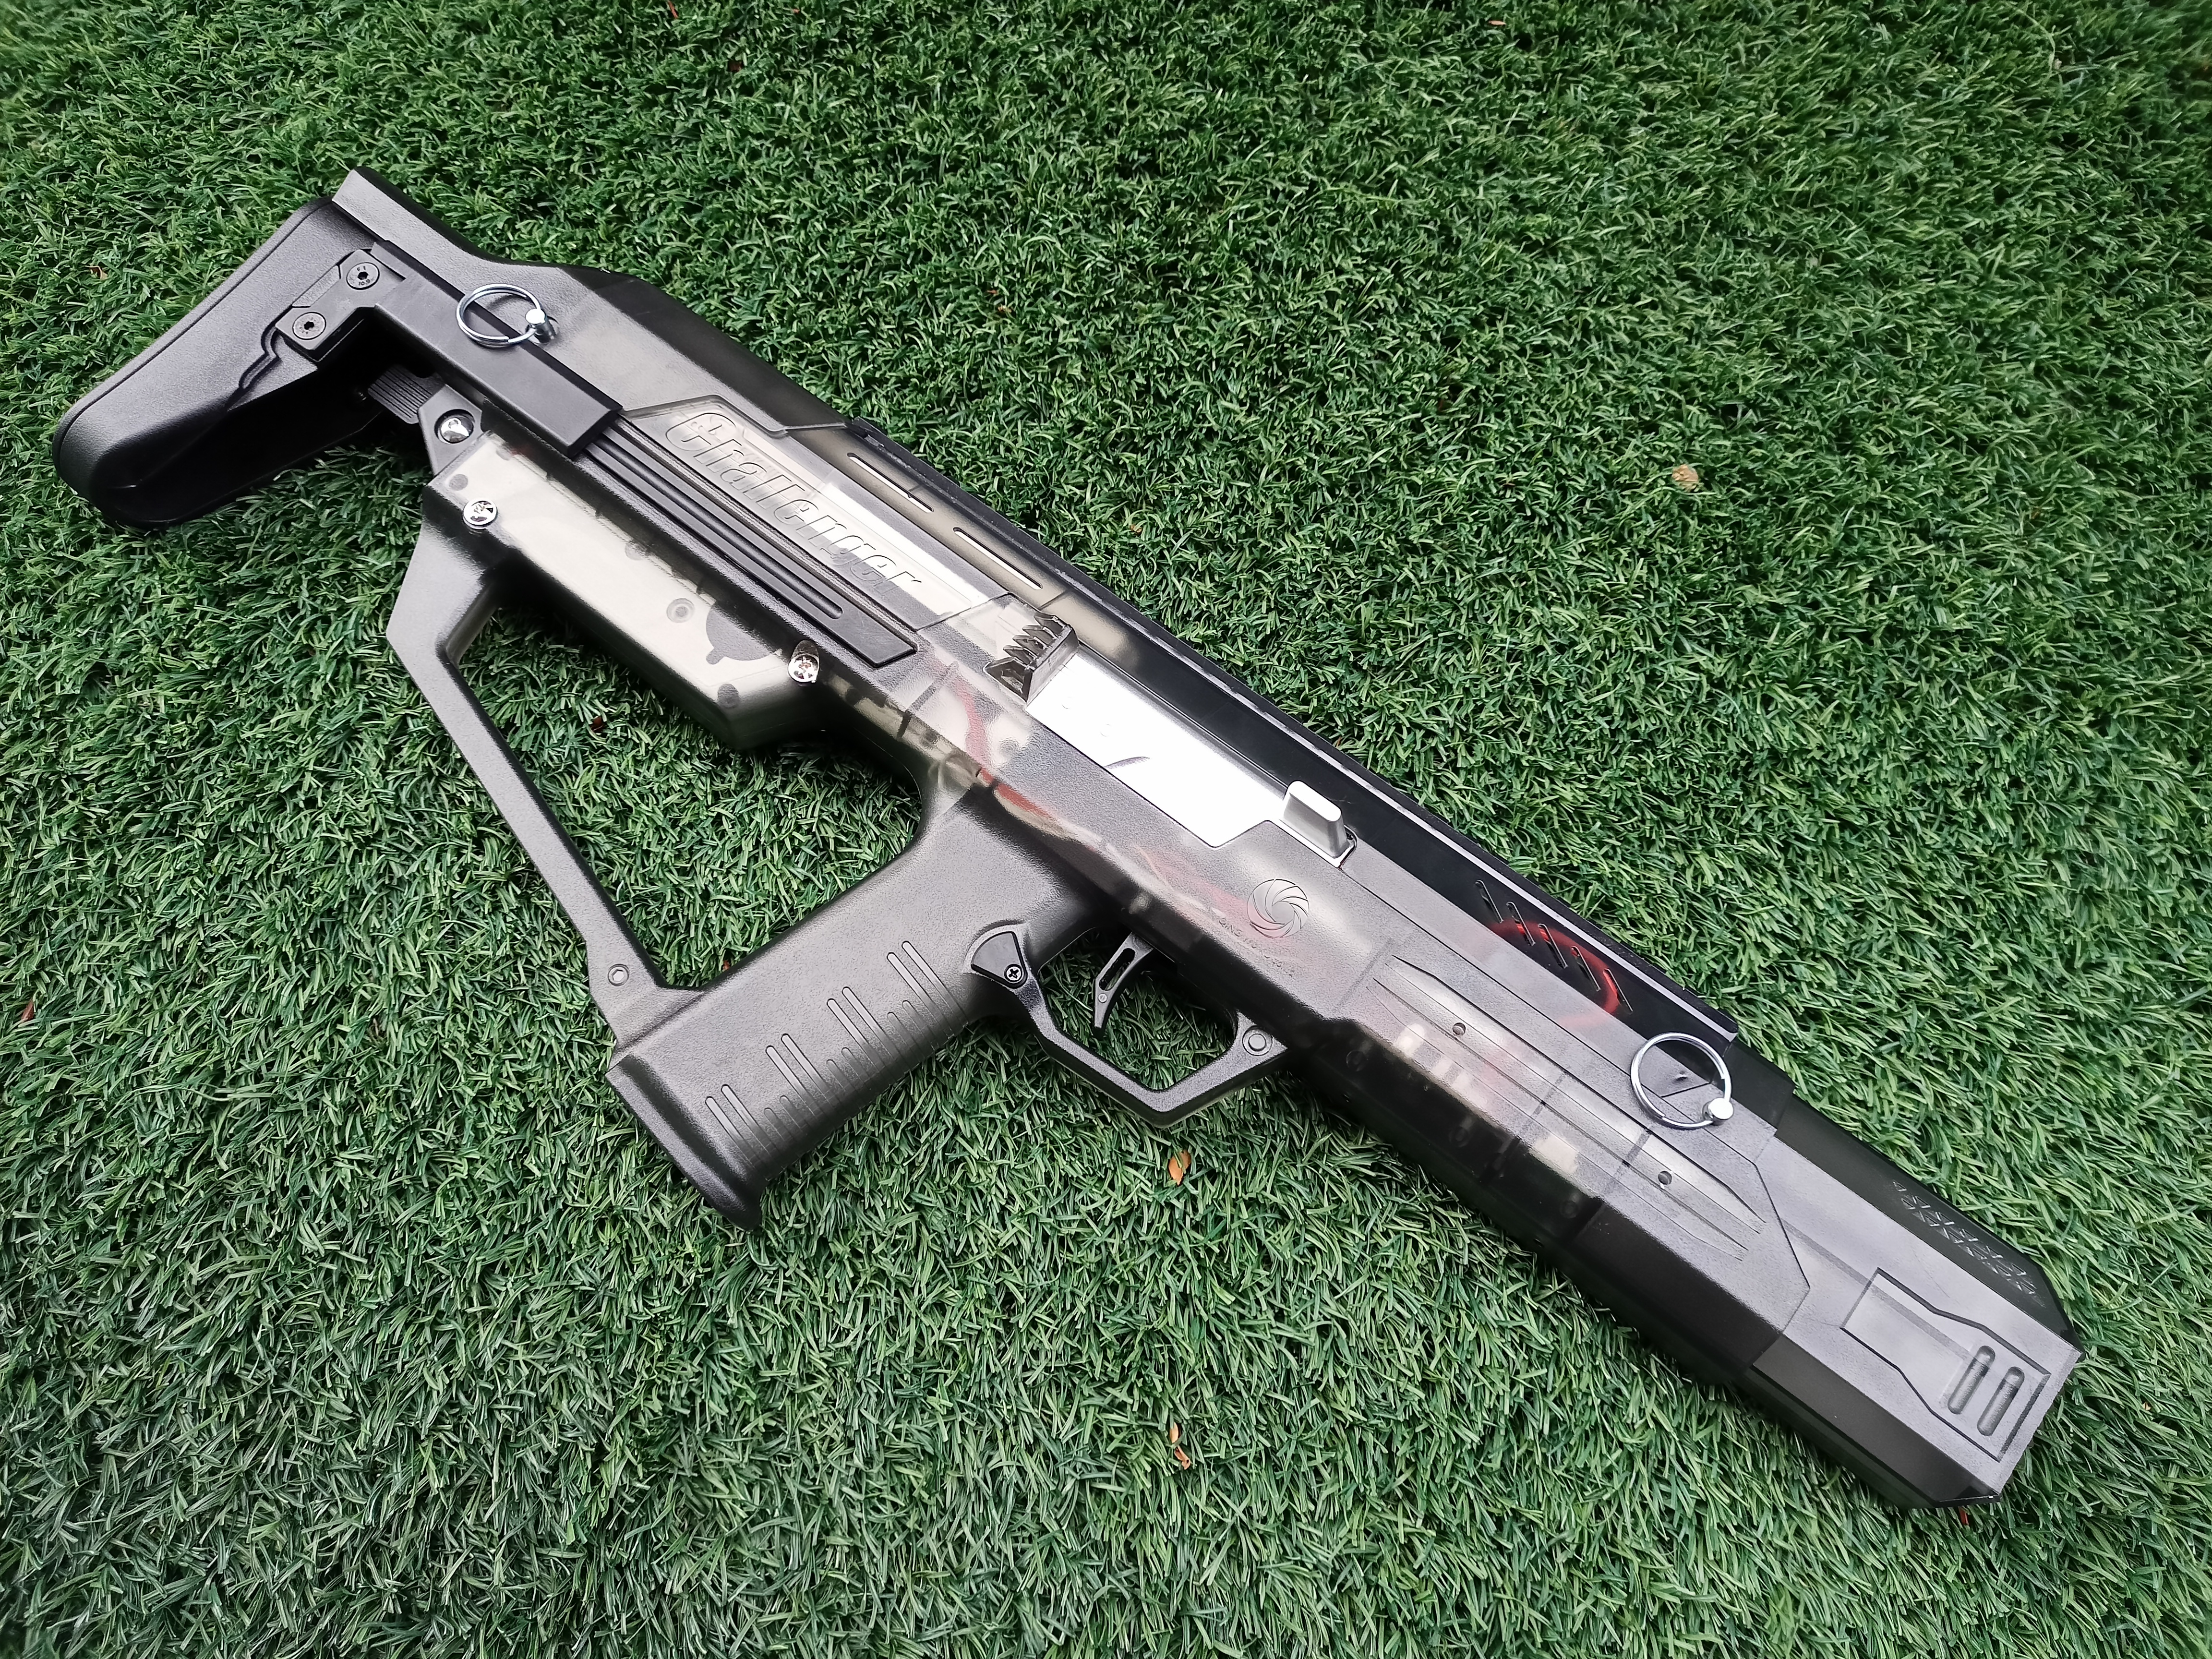
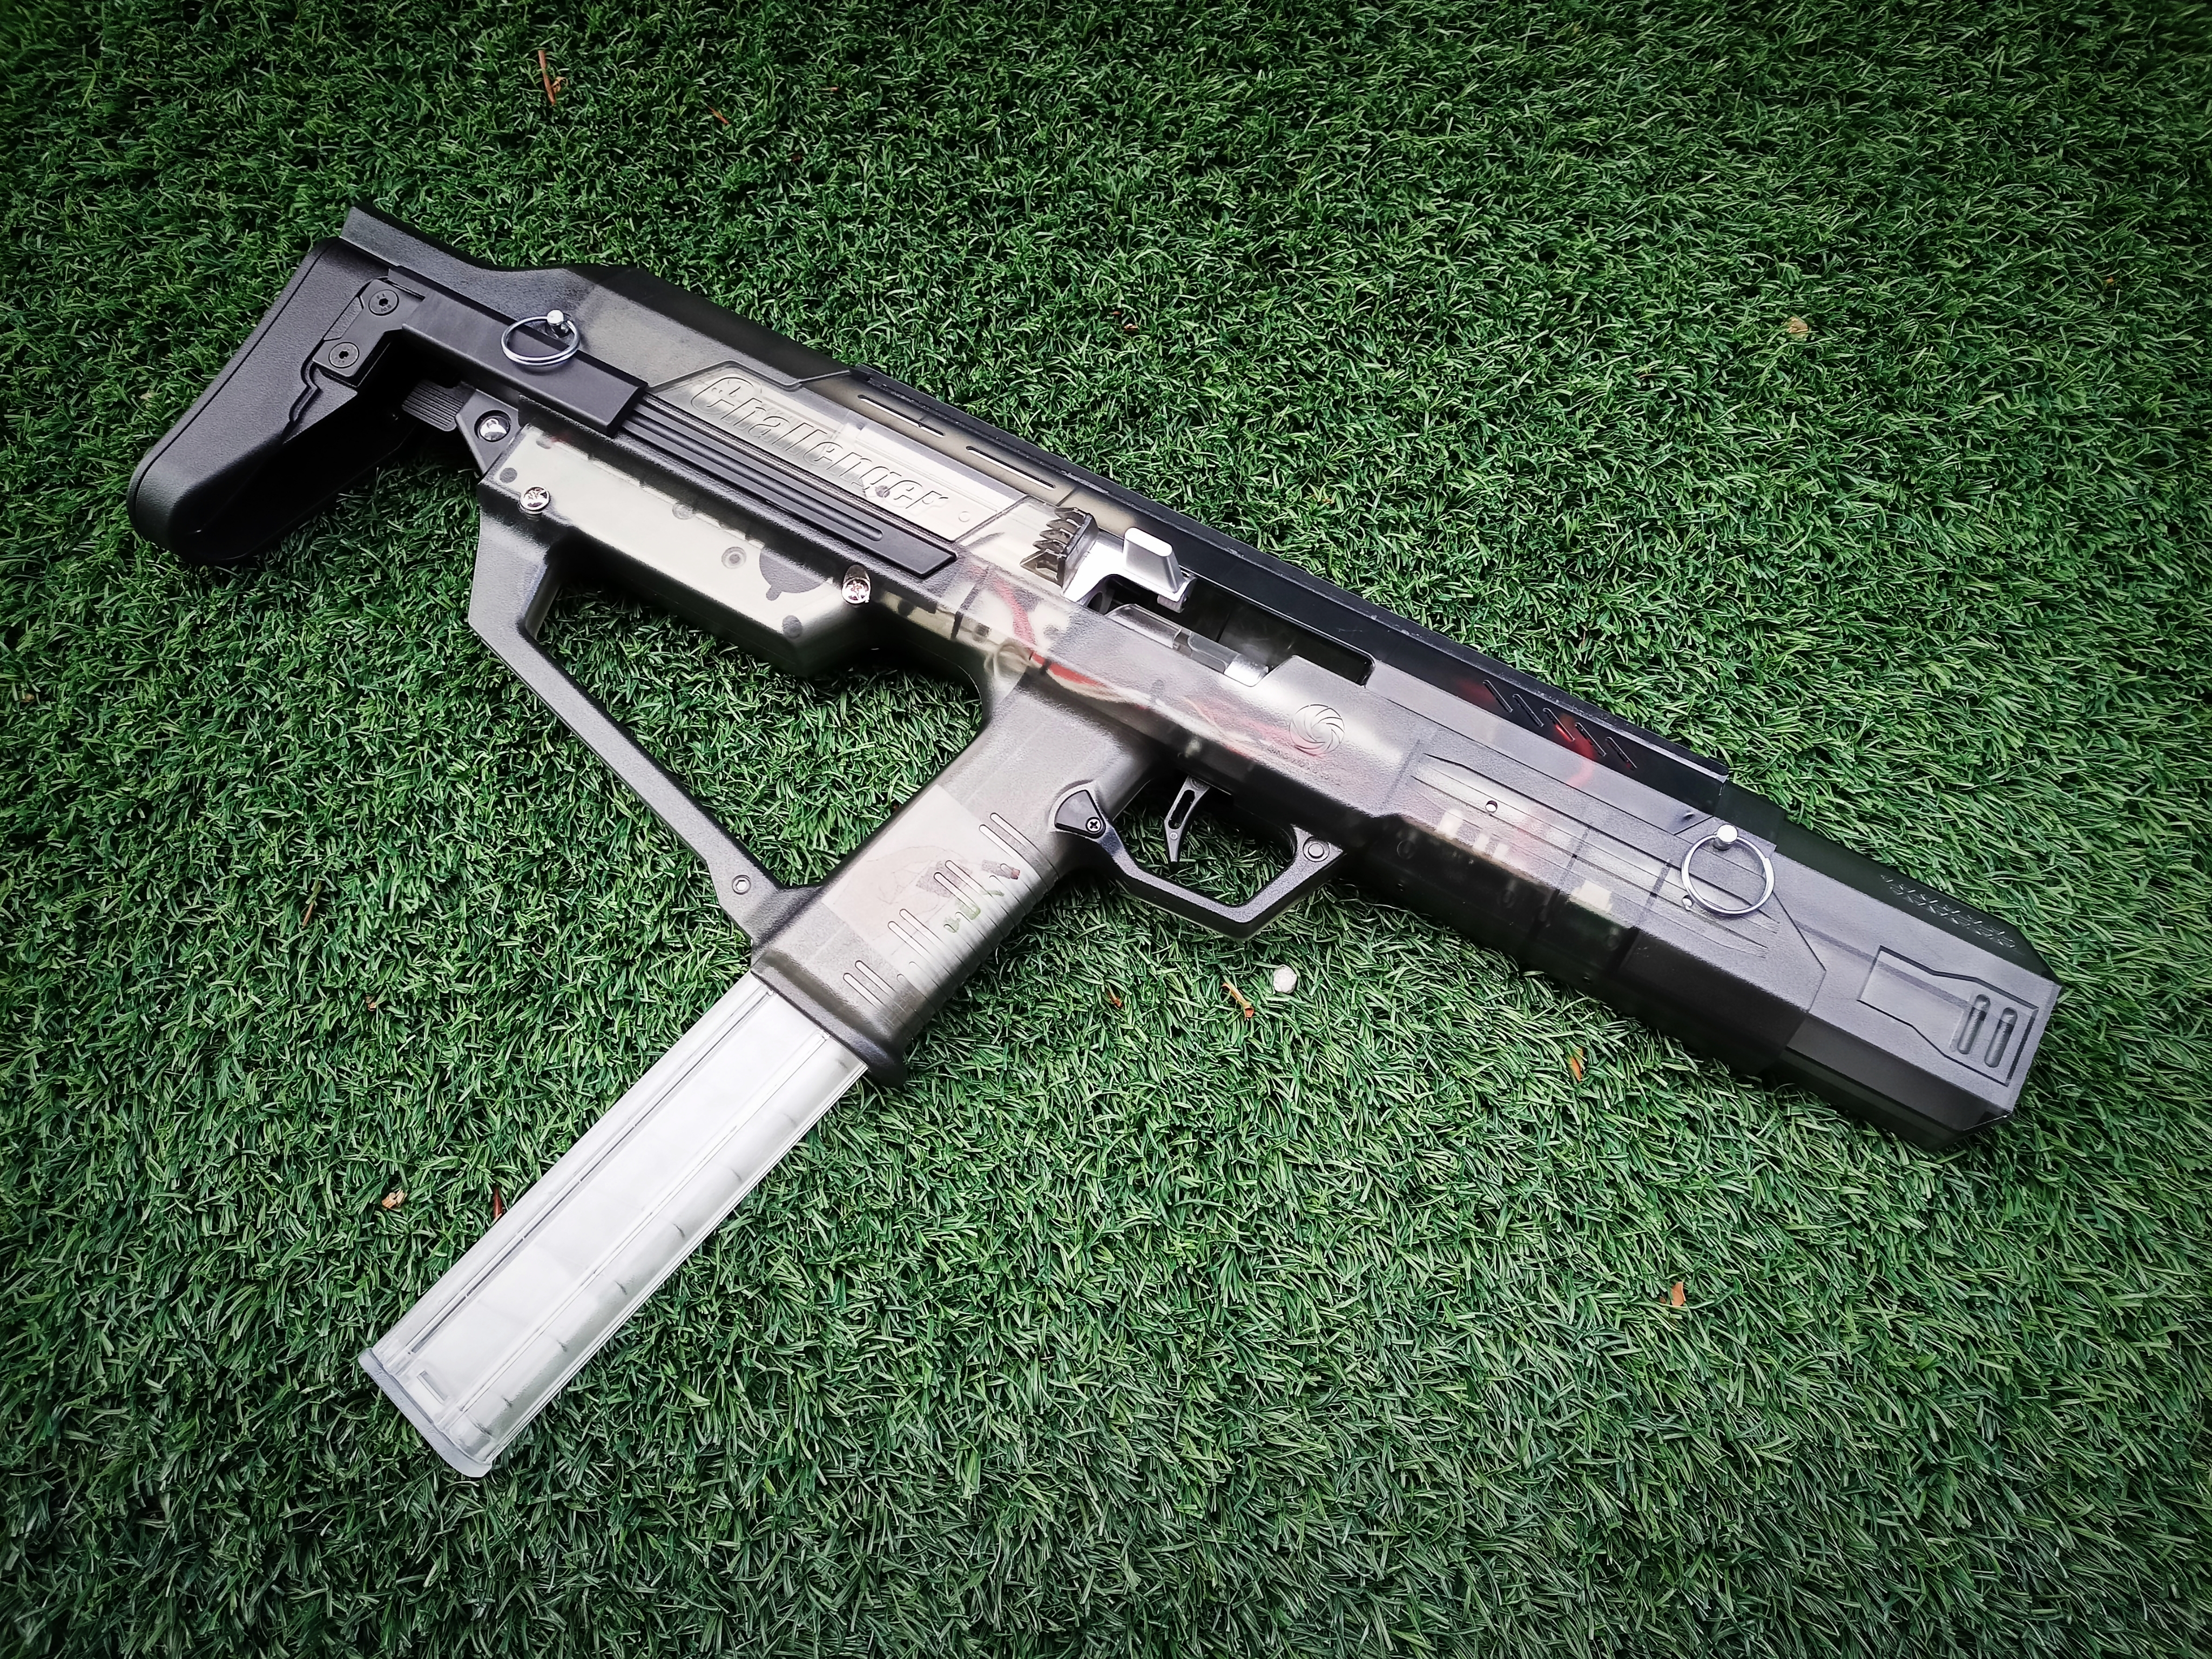
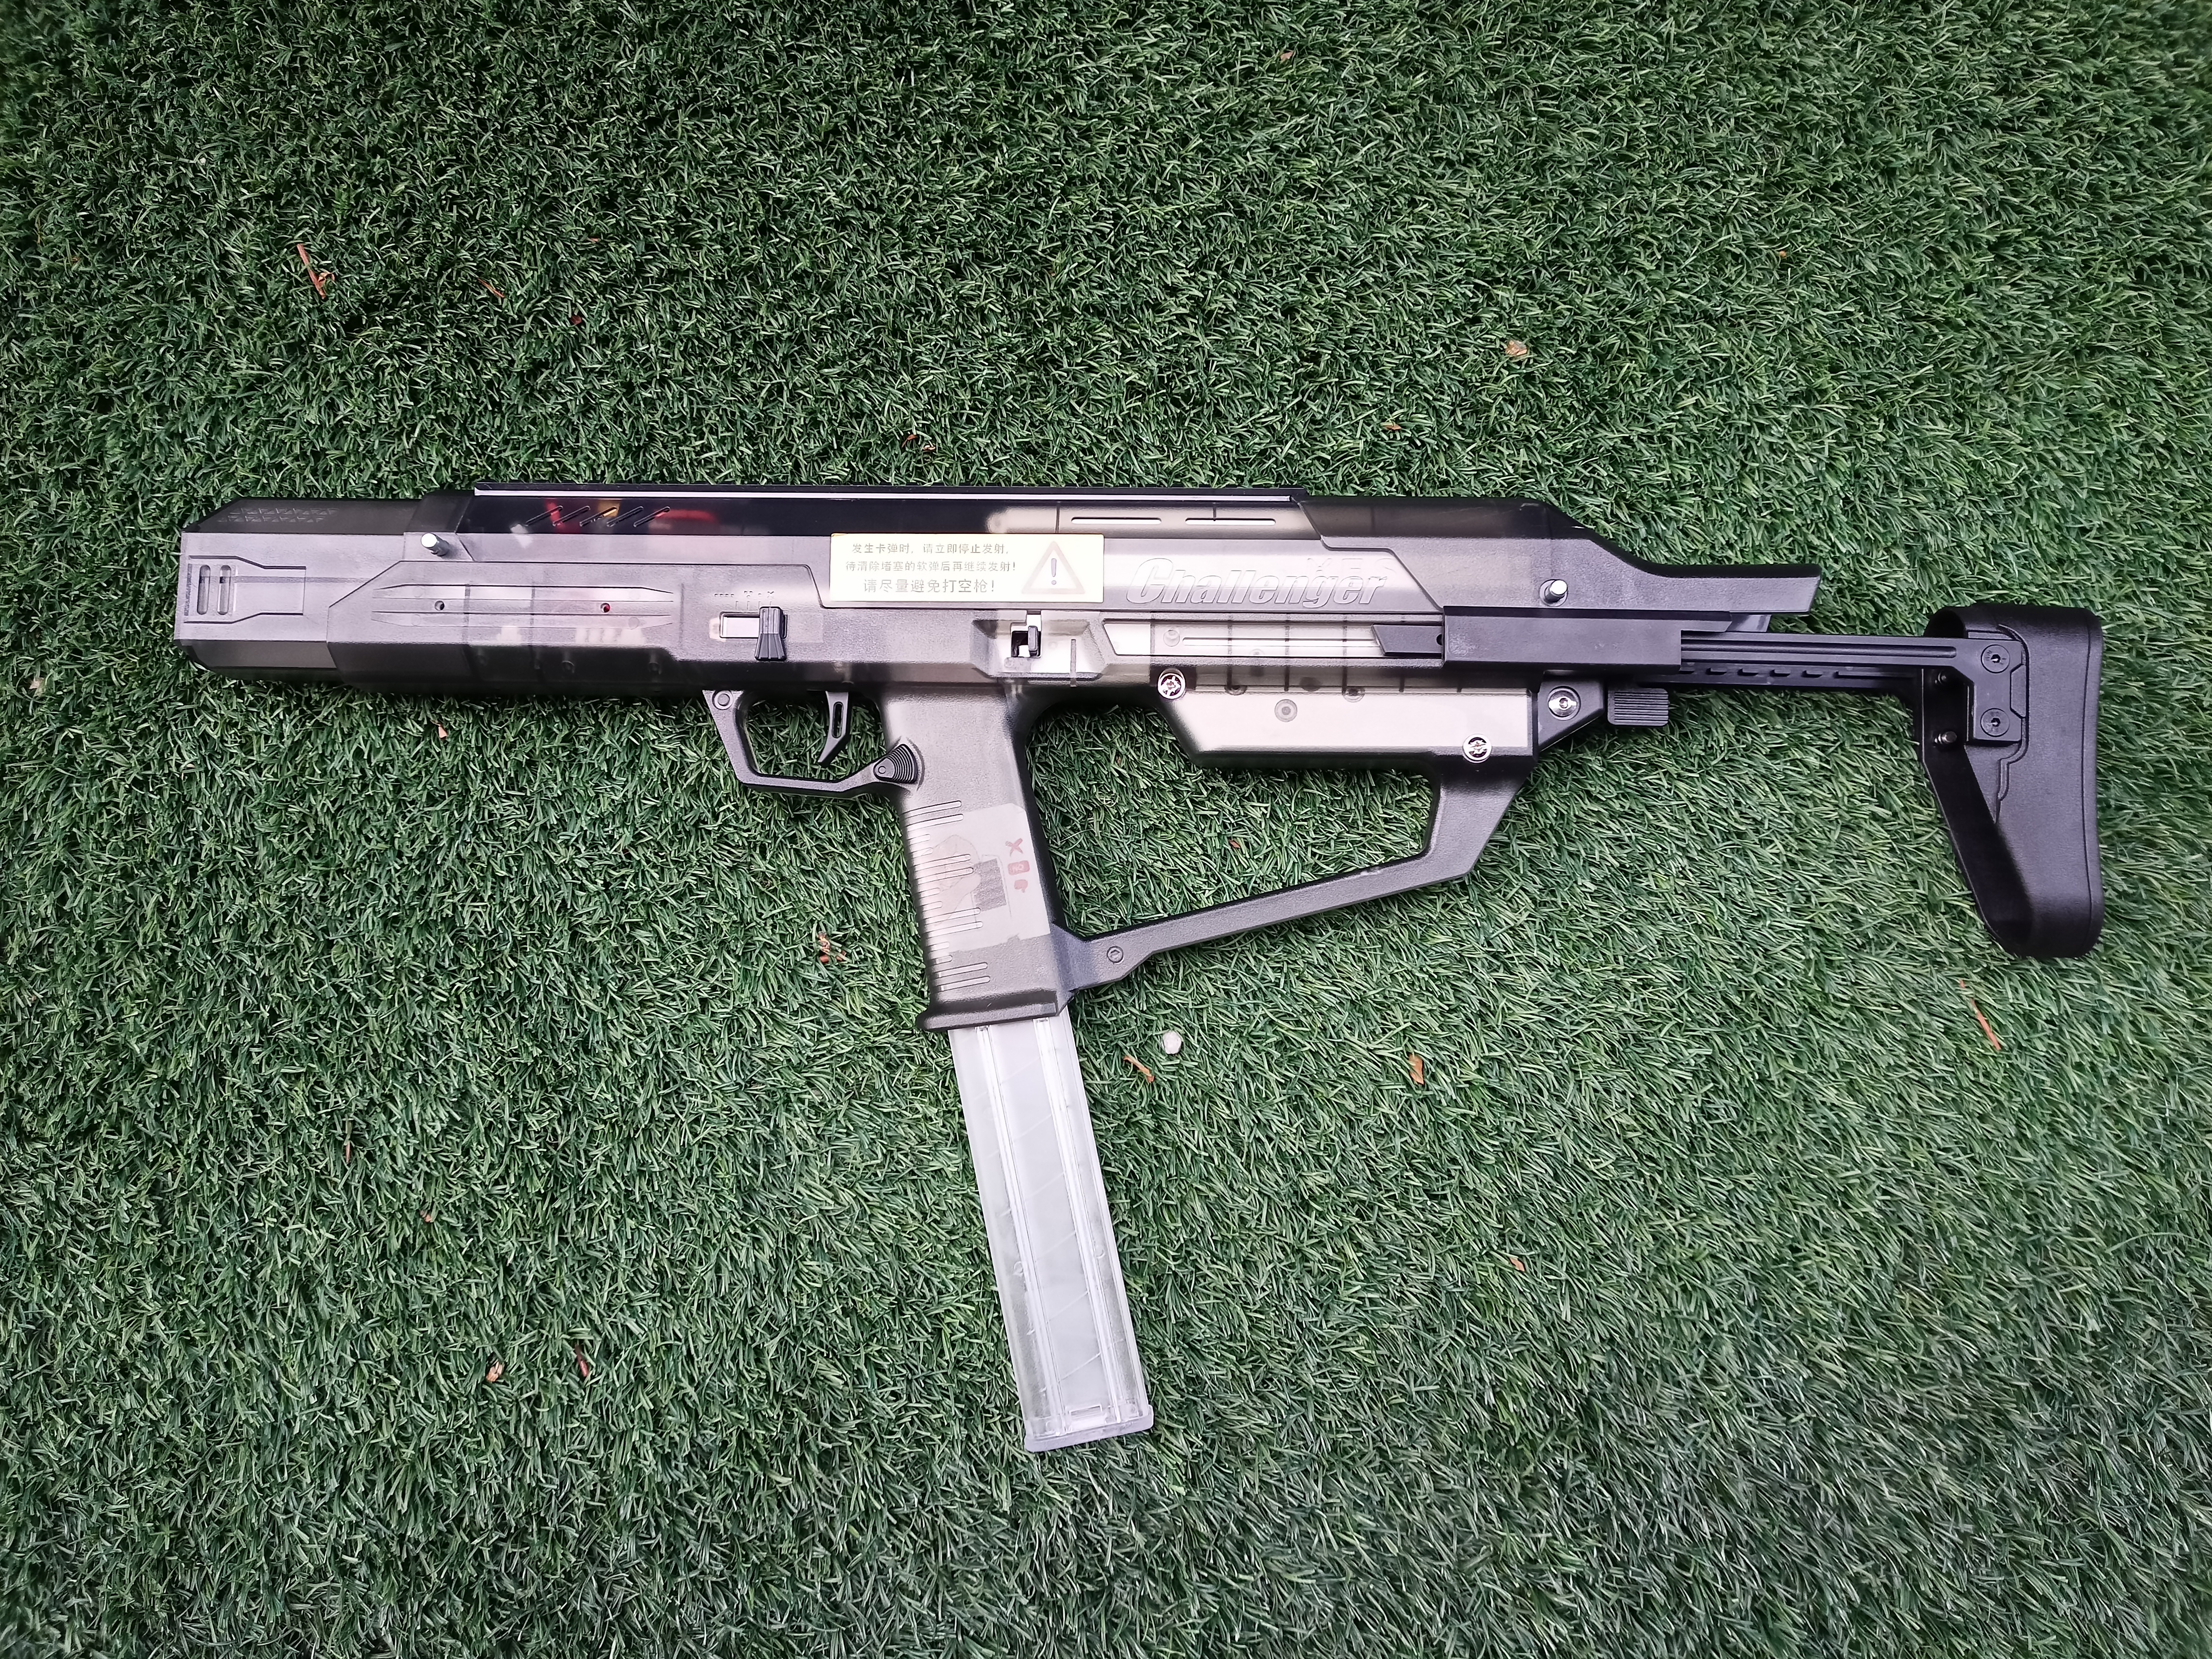
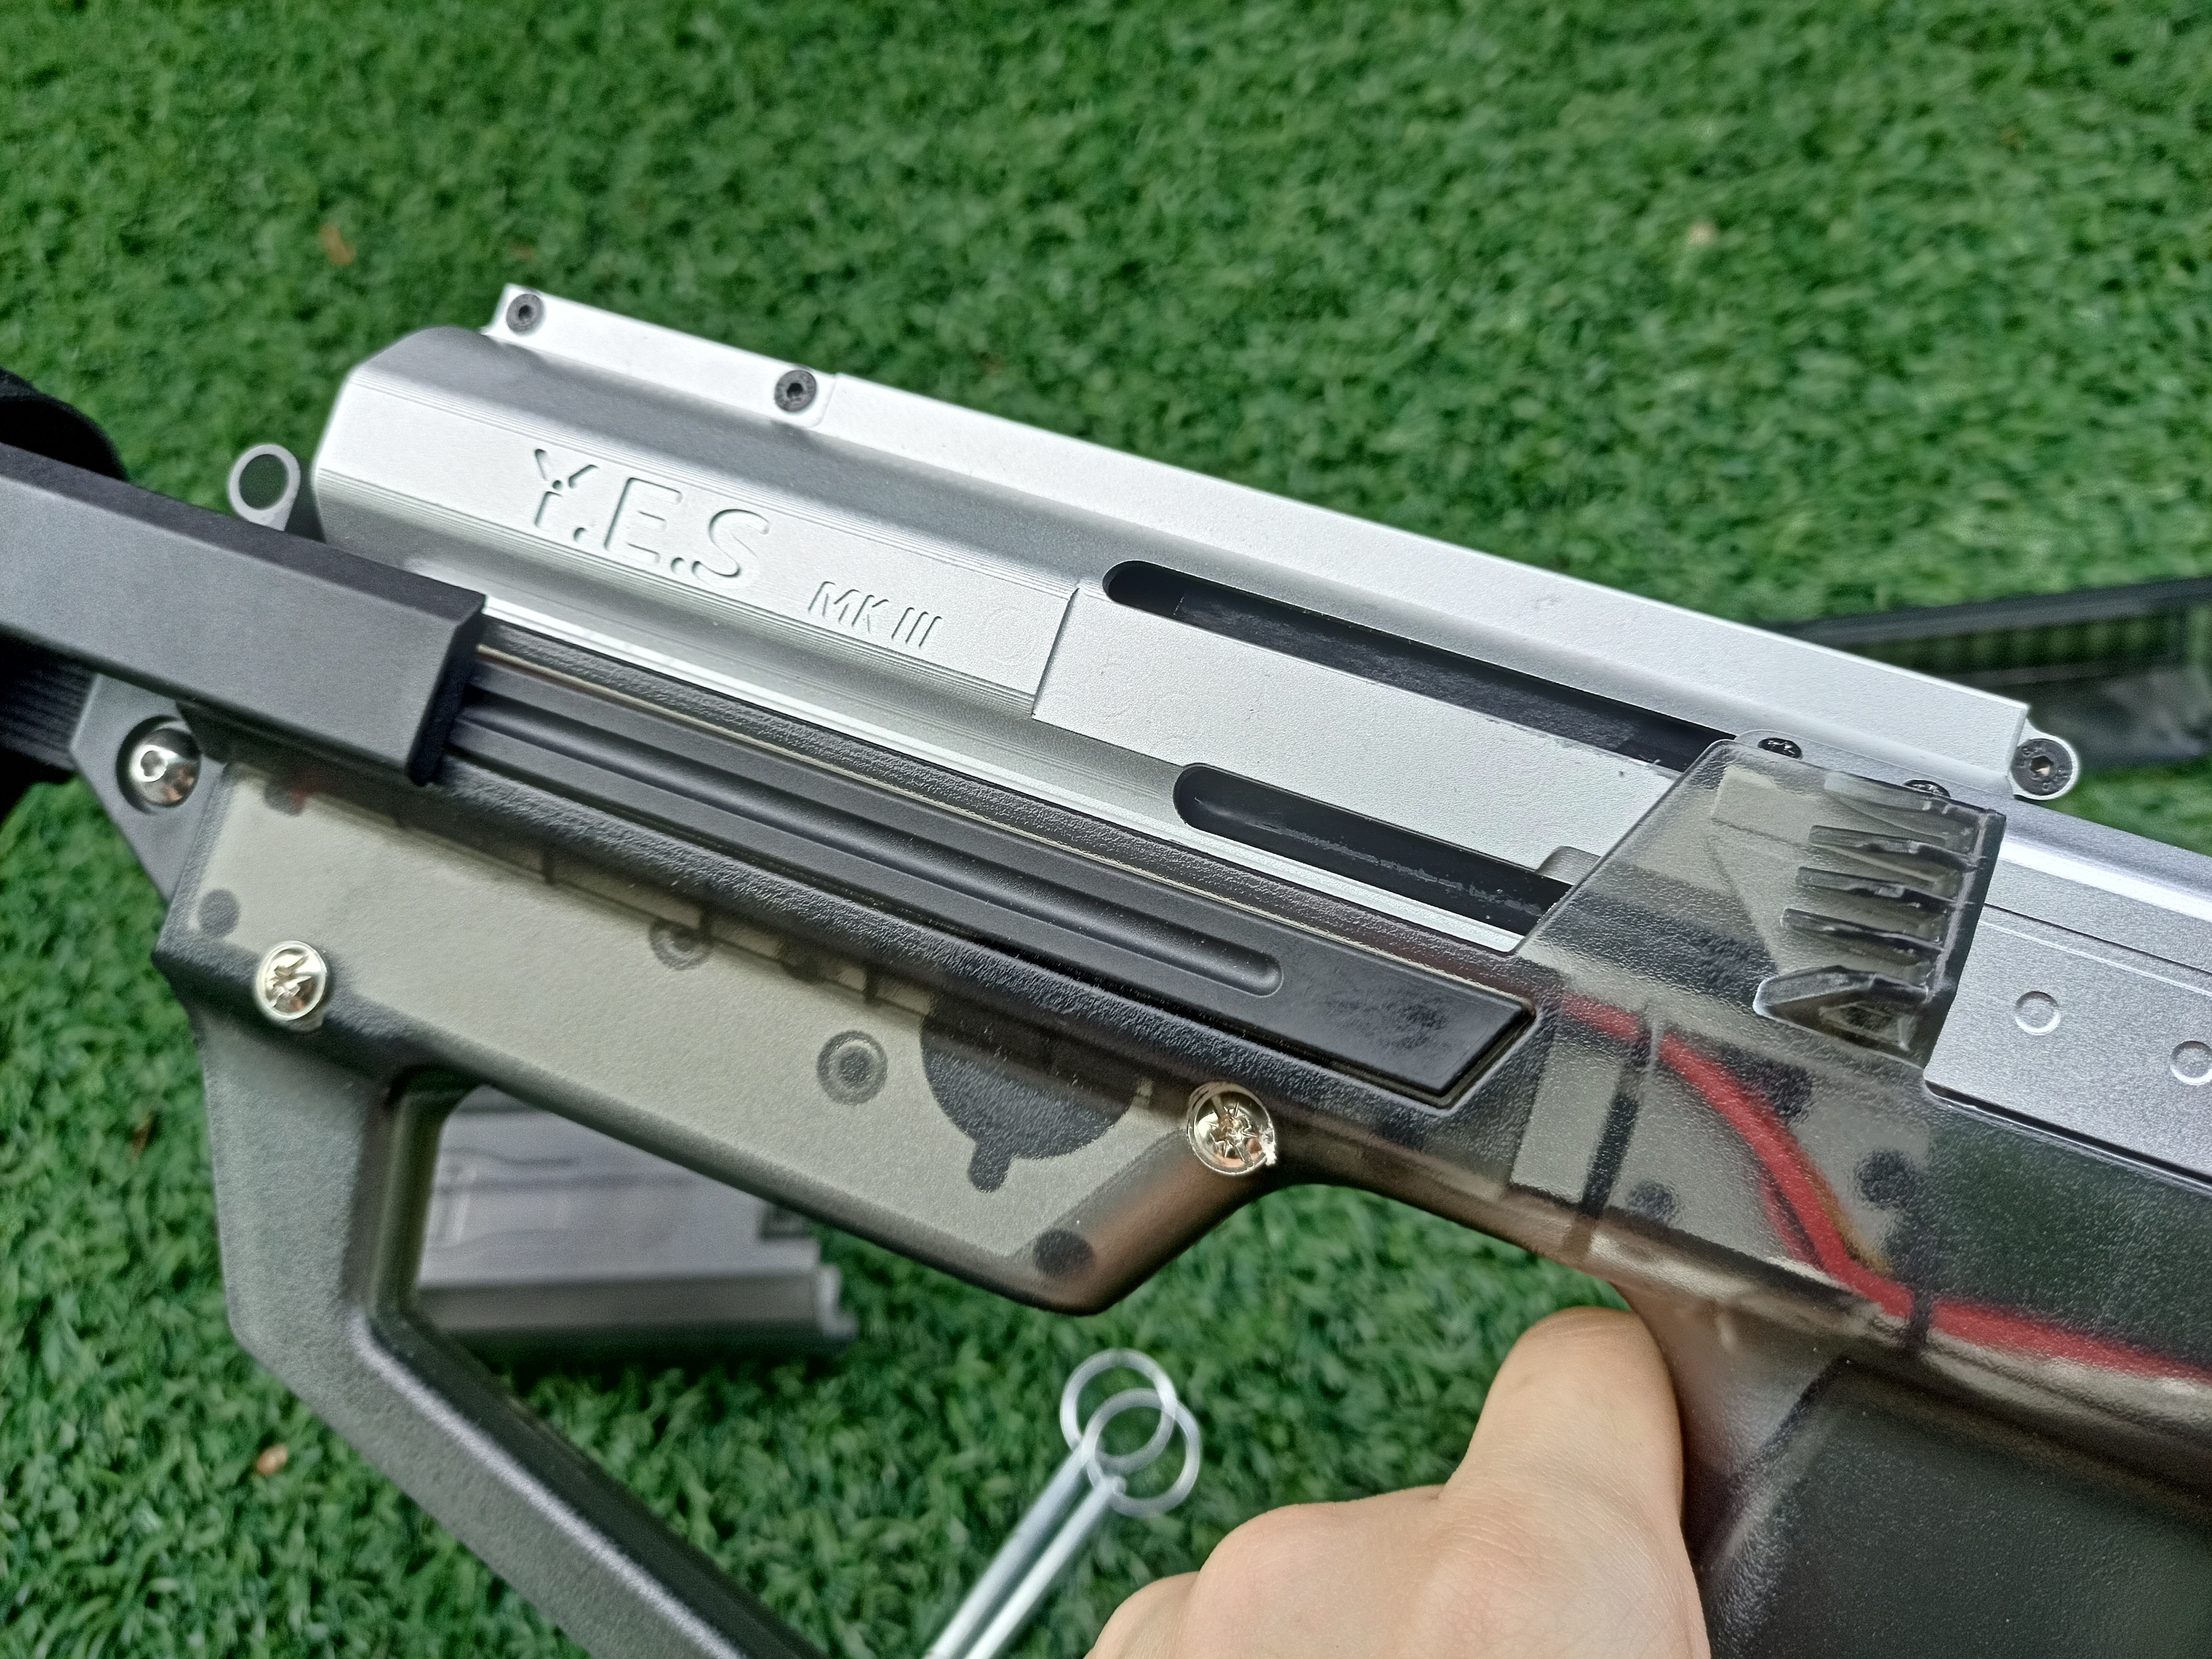
That's the both side of the blaster, noticed something unusual? It has no ugly screw holes! This is a big plus imo, aesthetically. The Challenger Mk3 has a one piece lower and upper receiver design that will allow you to access into the blaster very easily with just 2 take down pins with the very annoying key chain ring...(Jet Ceda, lol)
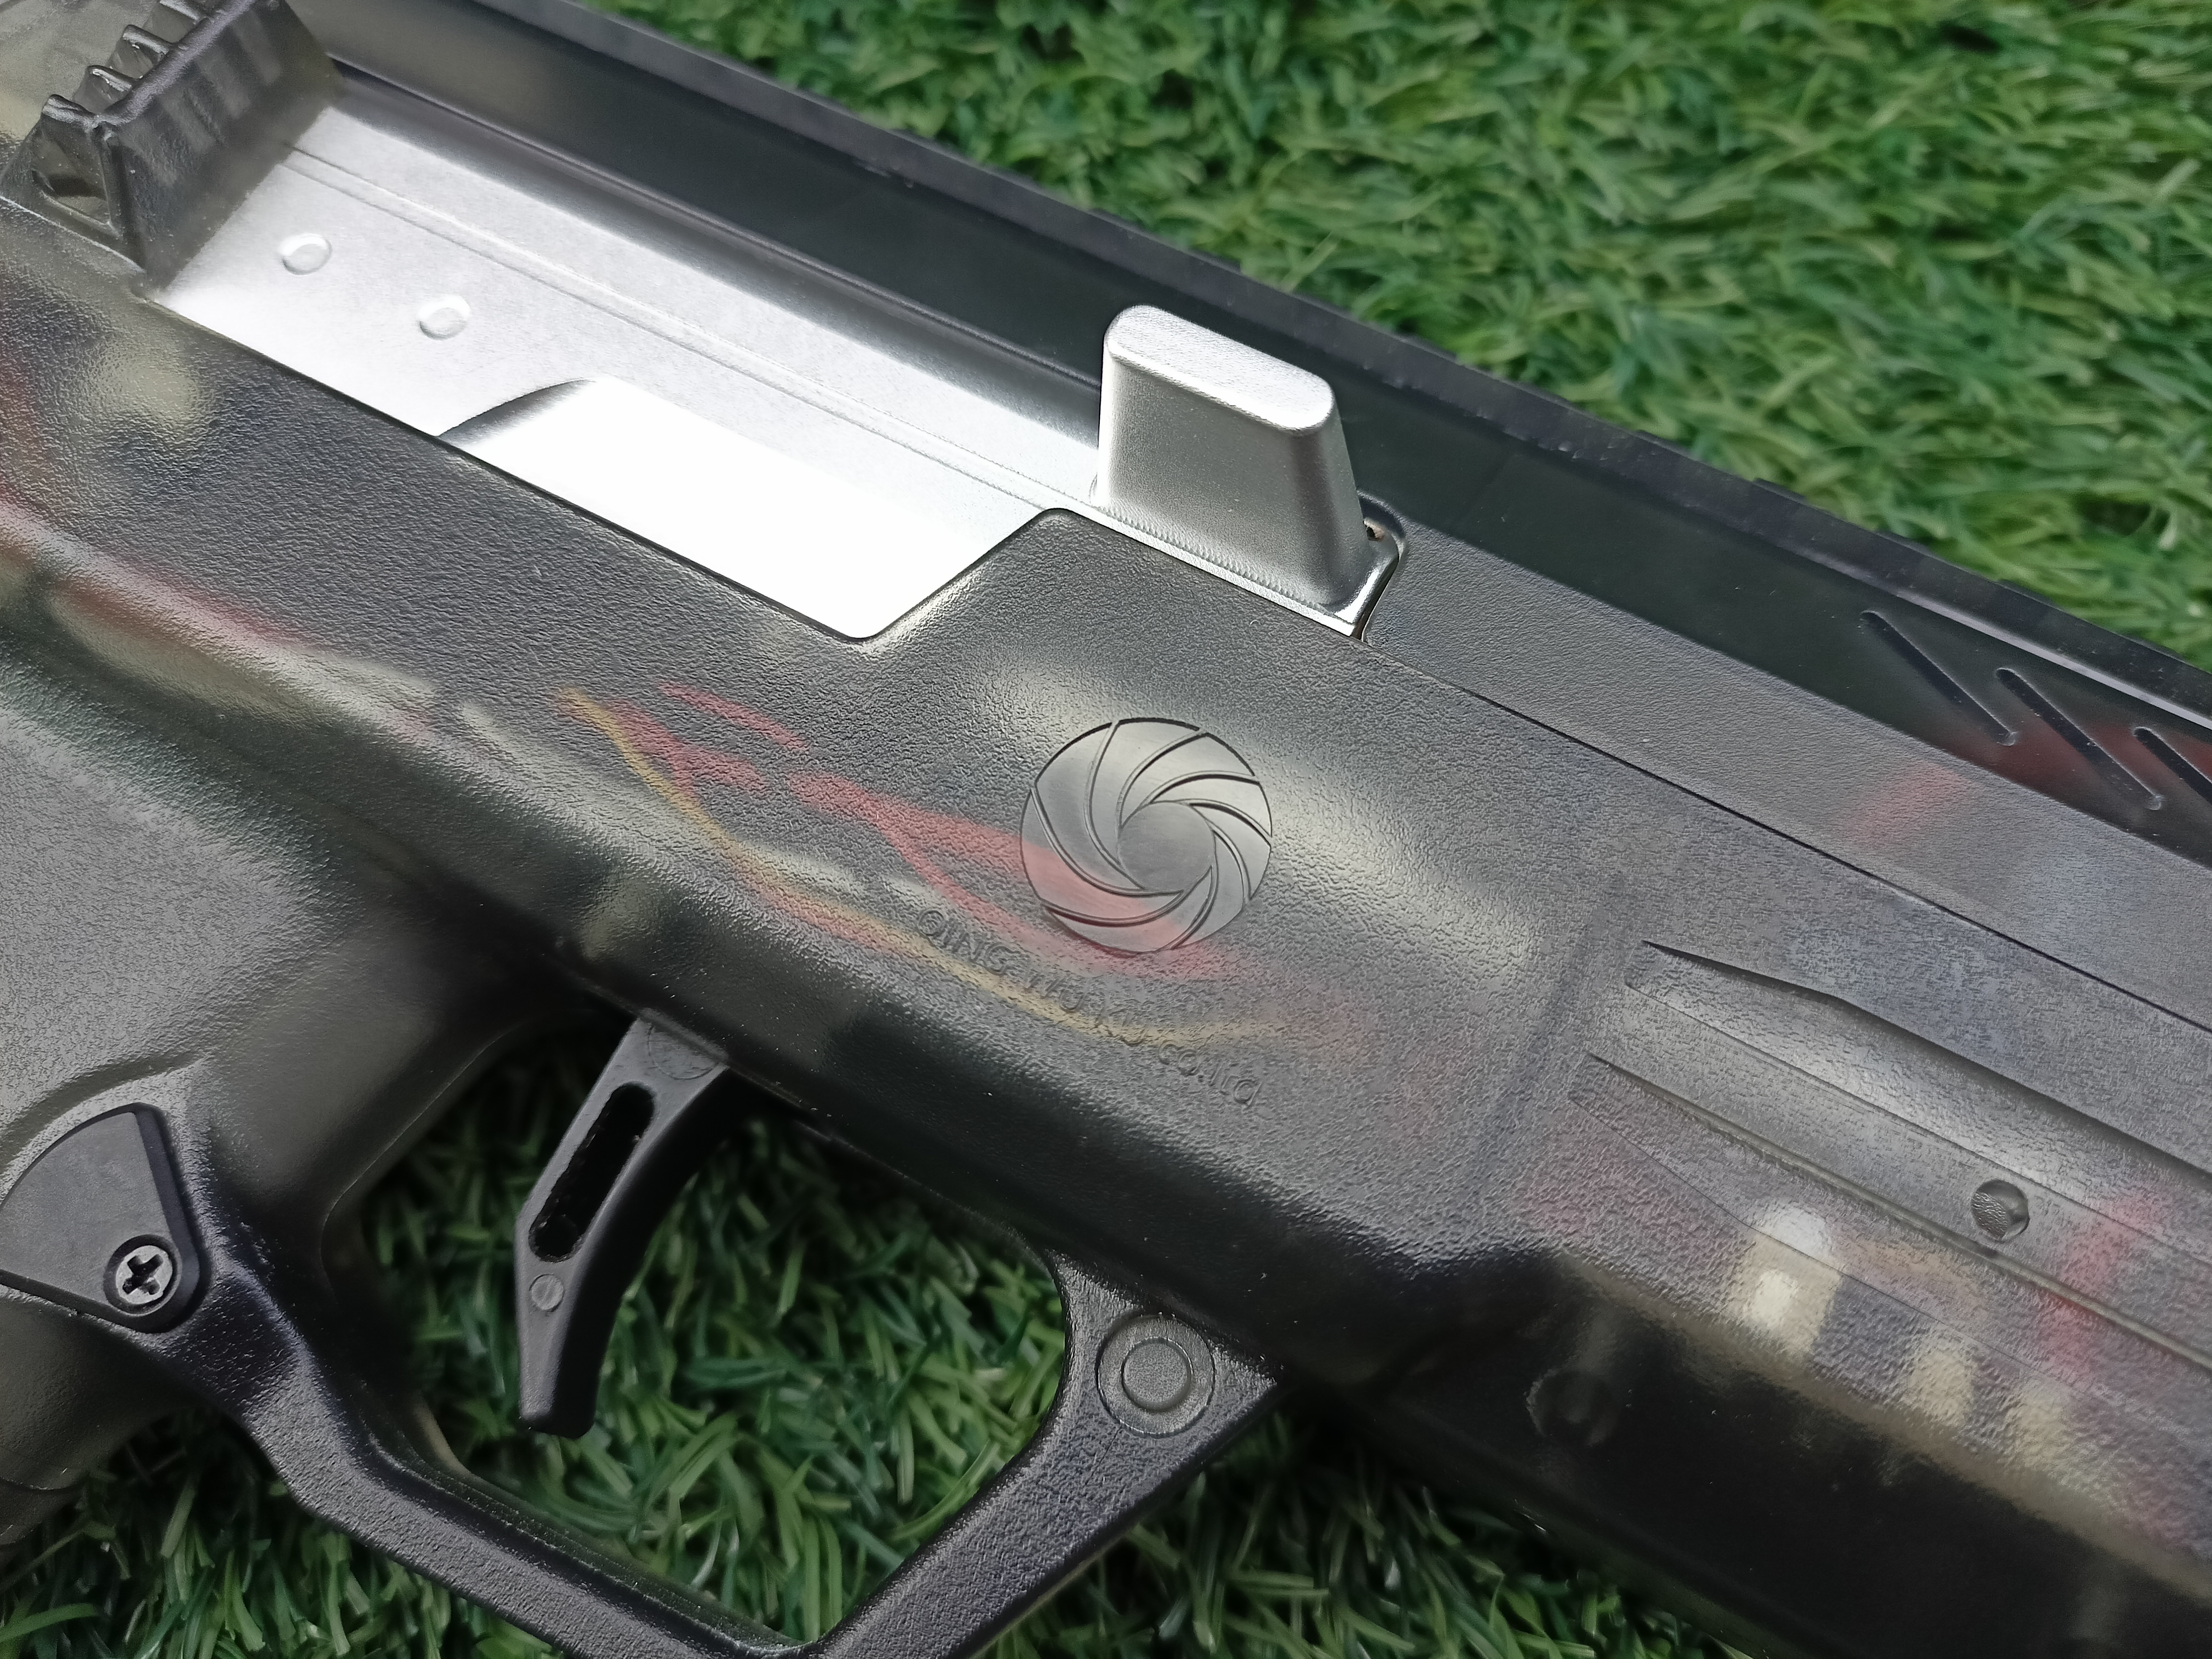
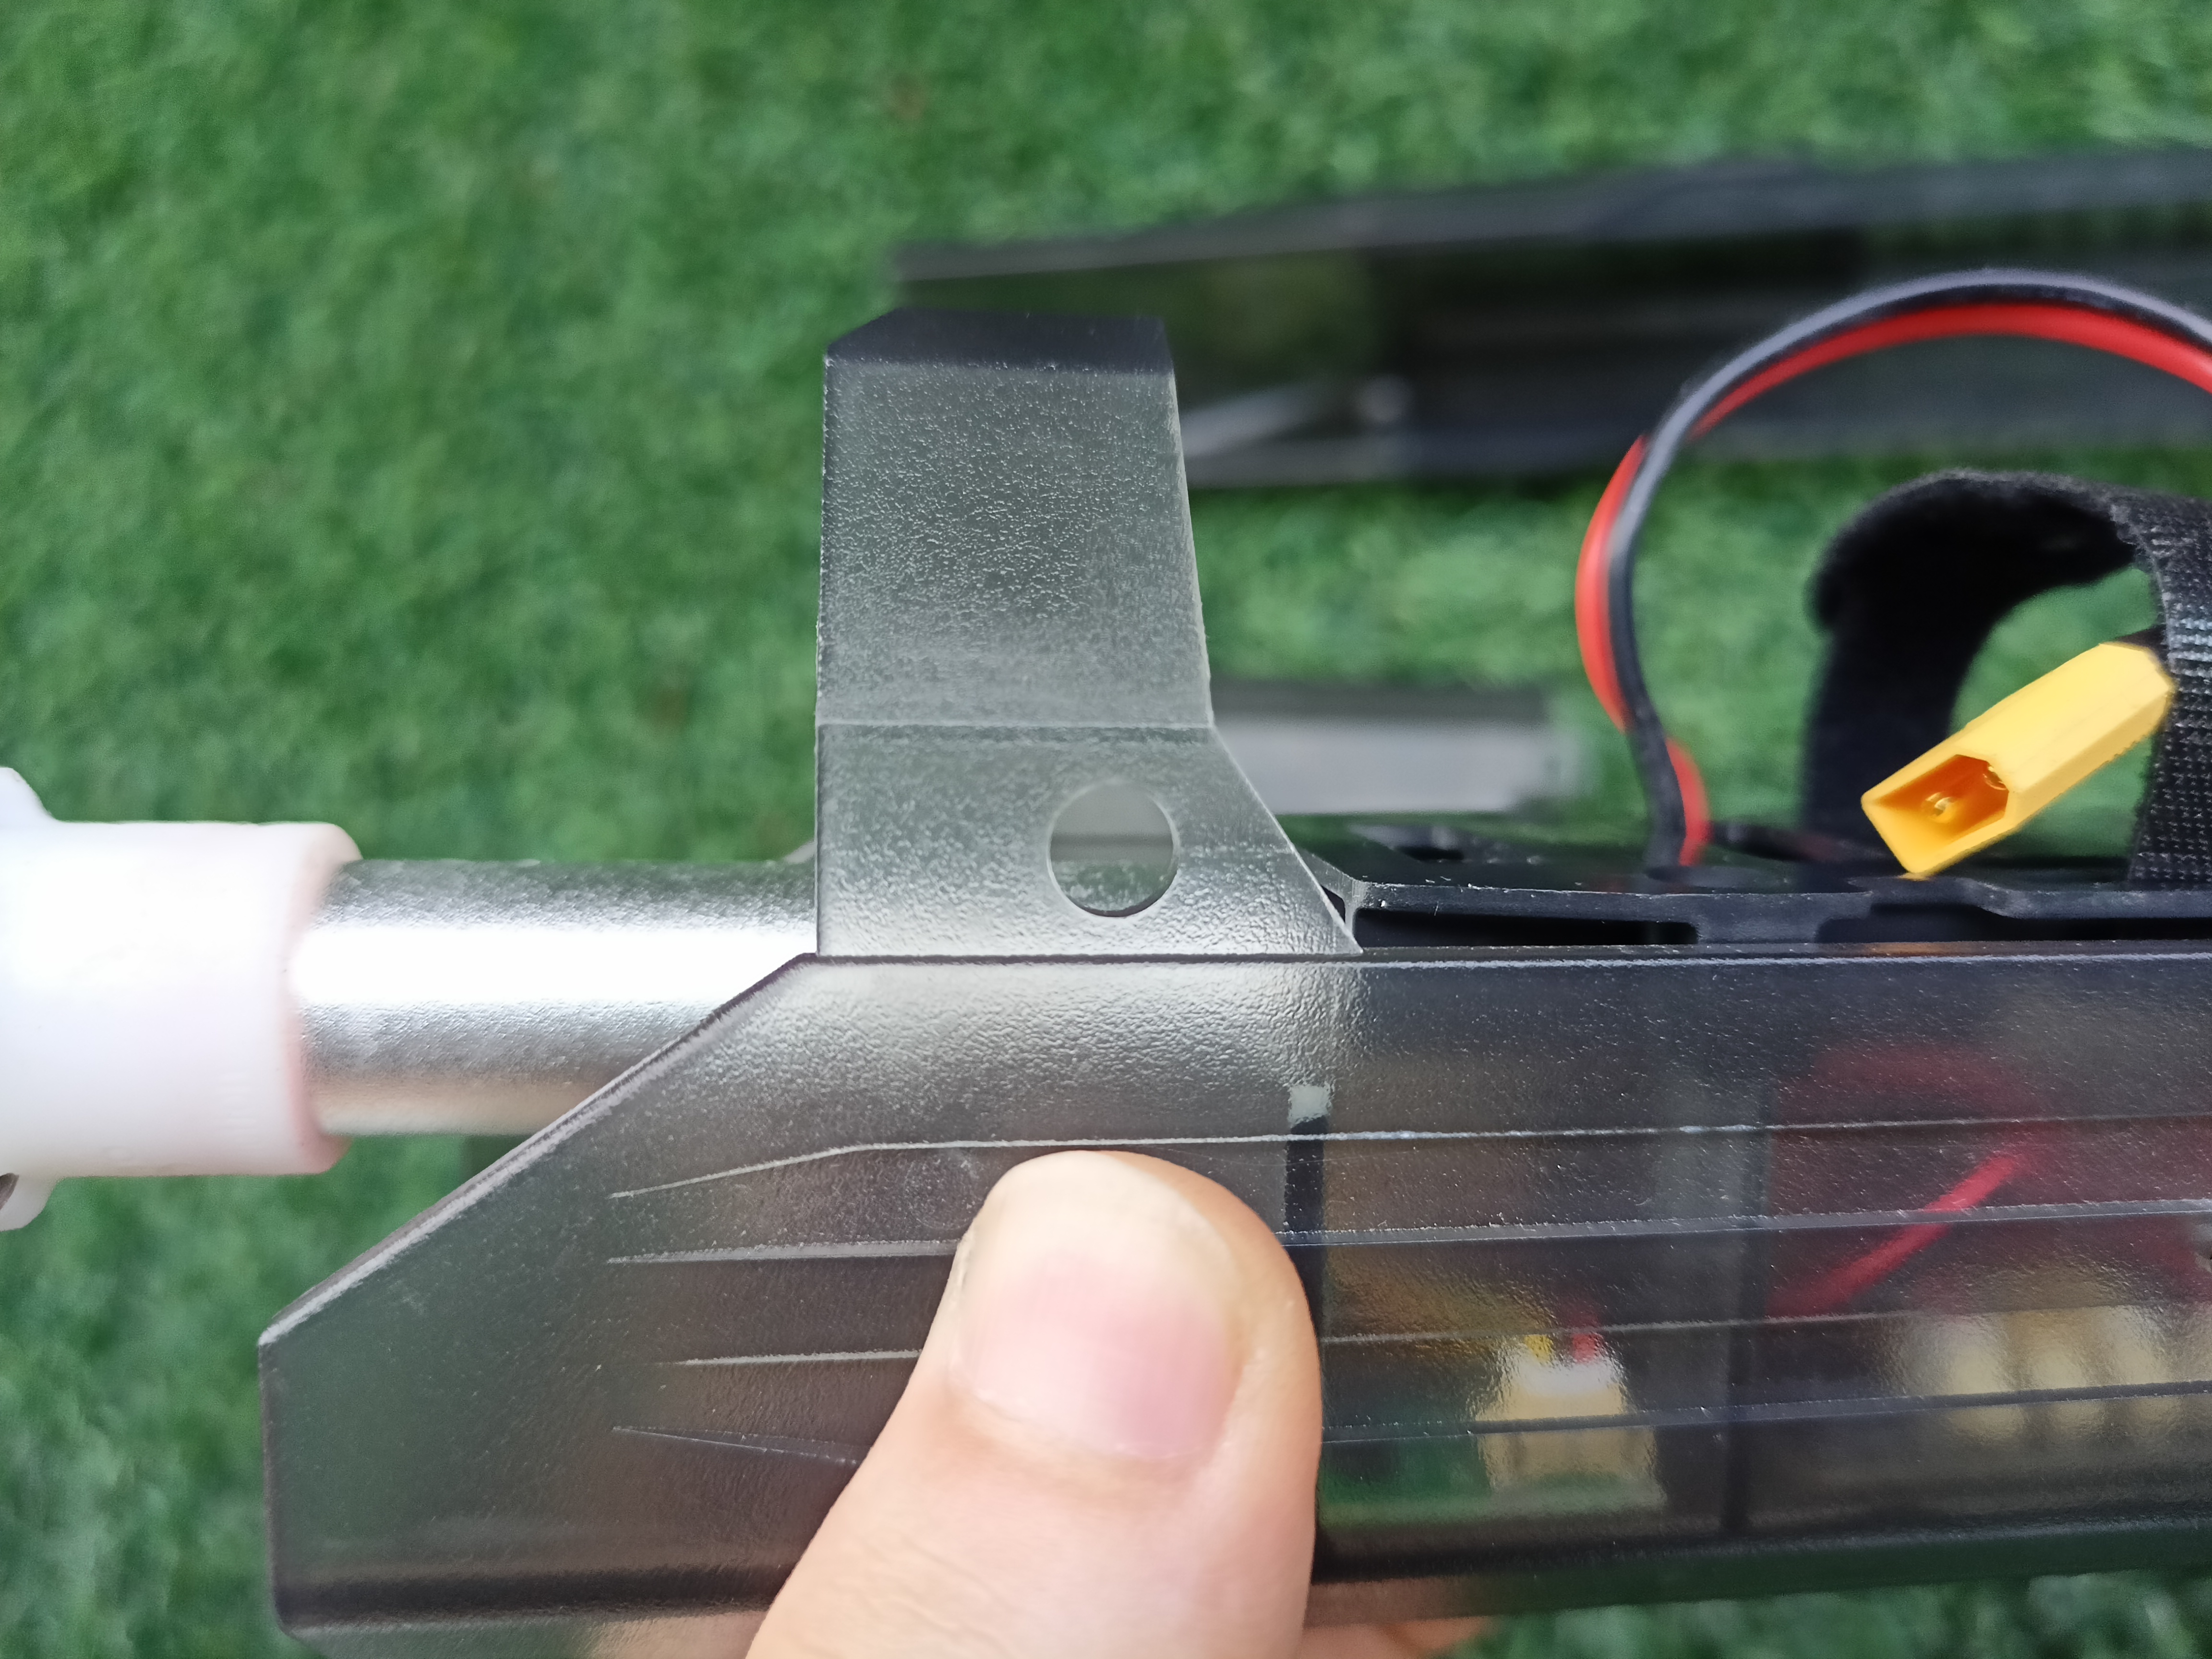
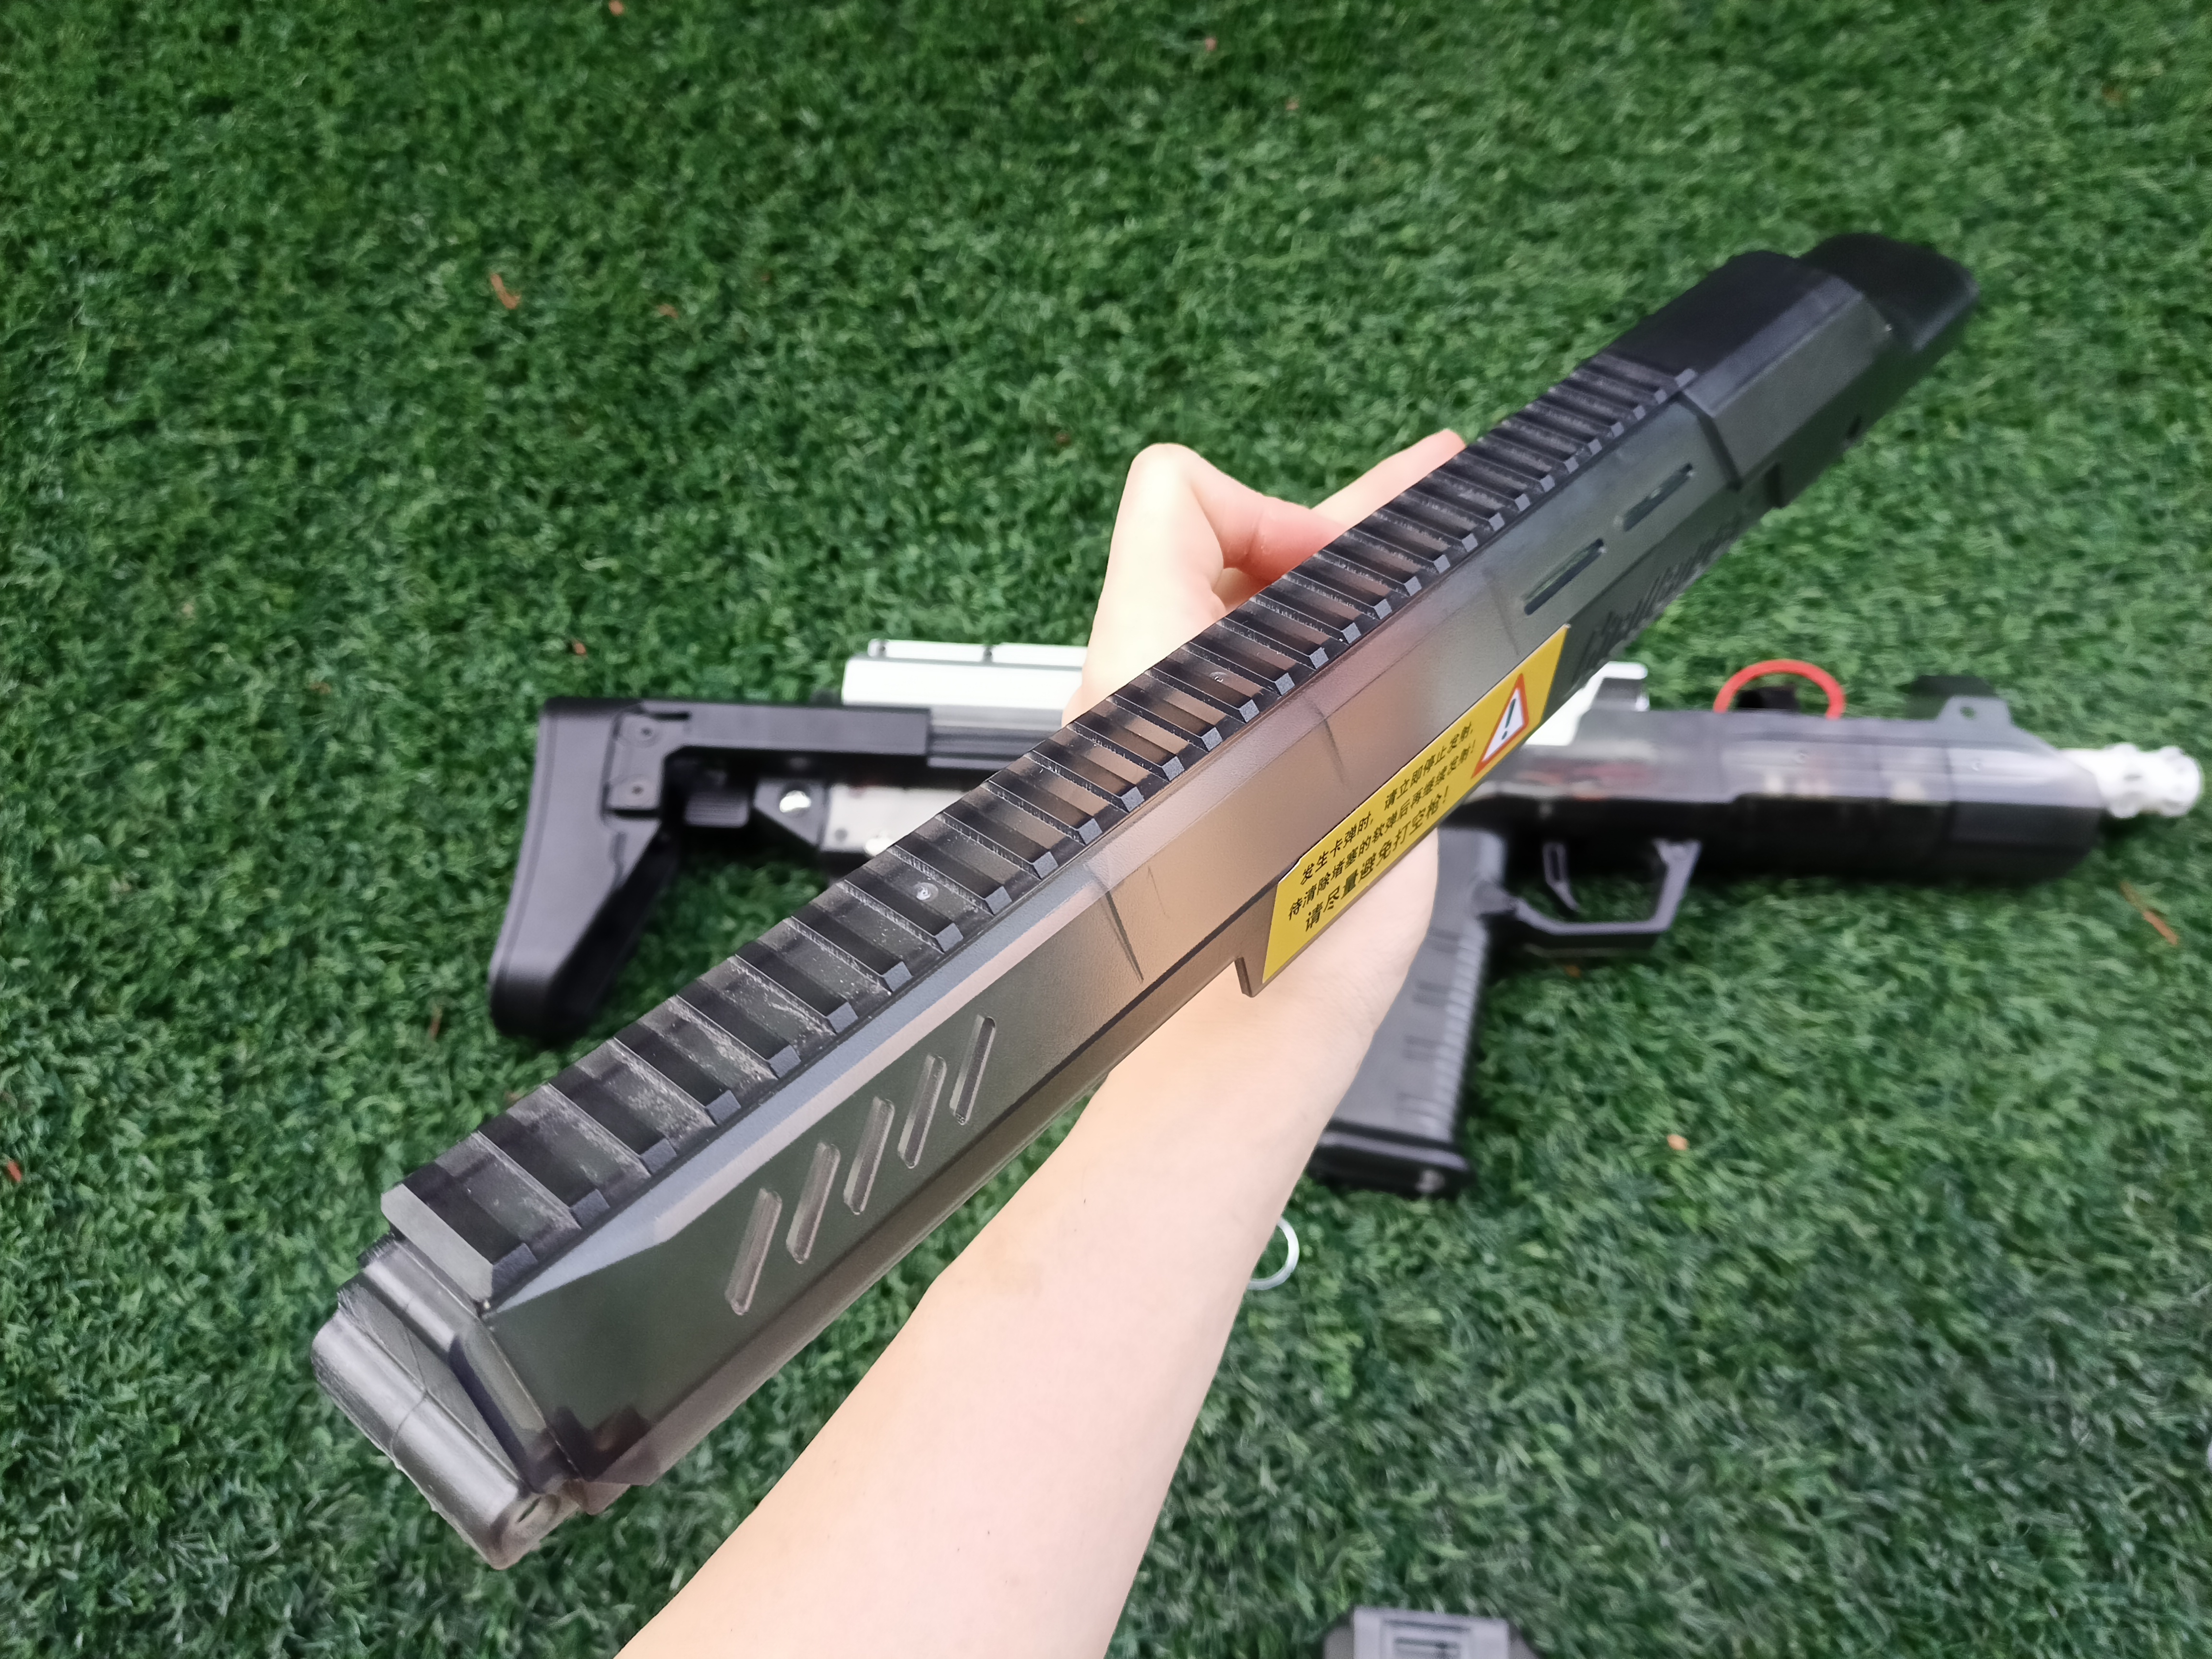
The Challenger Mk3 Upper receiver sports a standard 20mm Picatinny top flat rail that you can mount iron sights, optics and any other attachments that uses picatinny rail system.
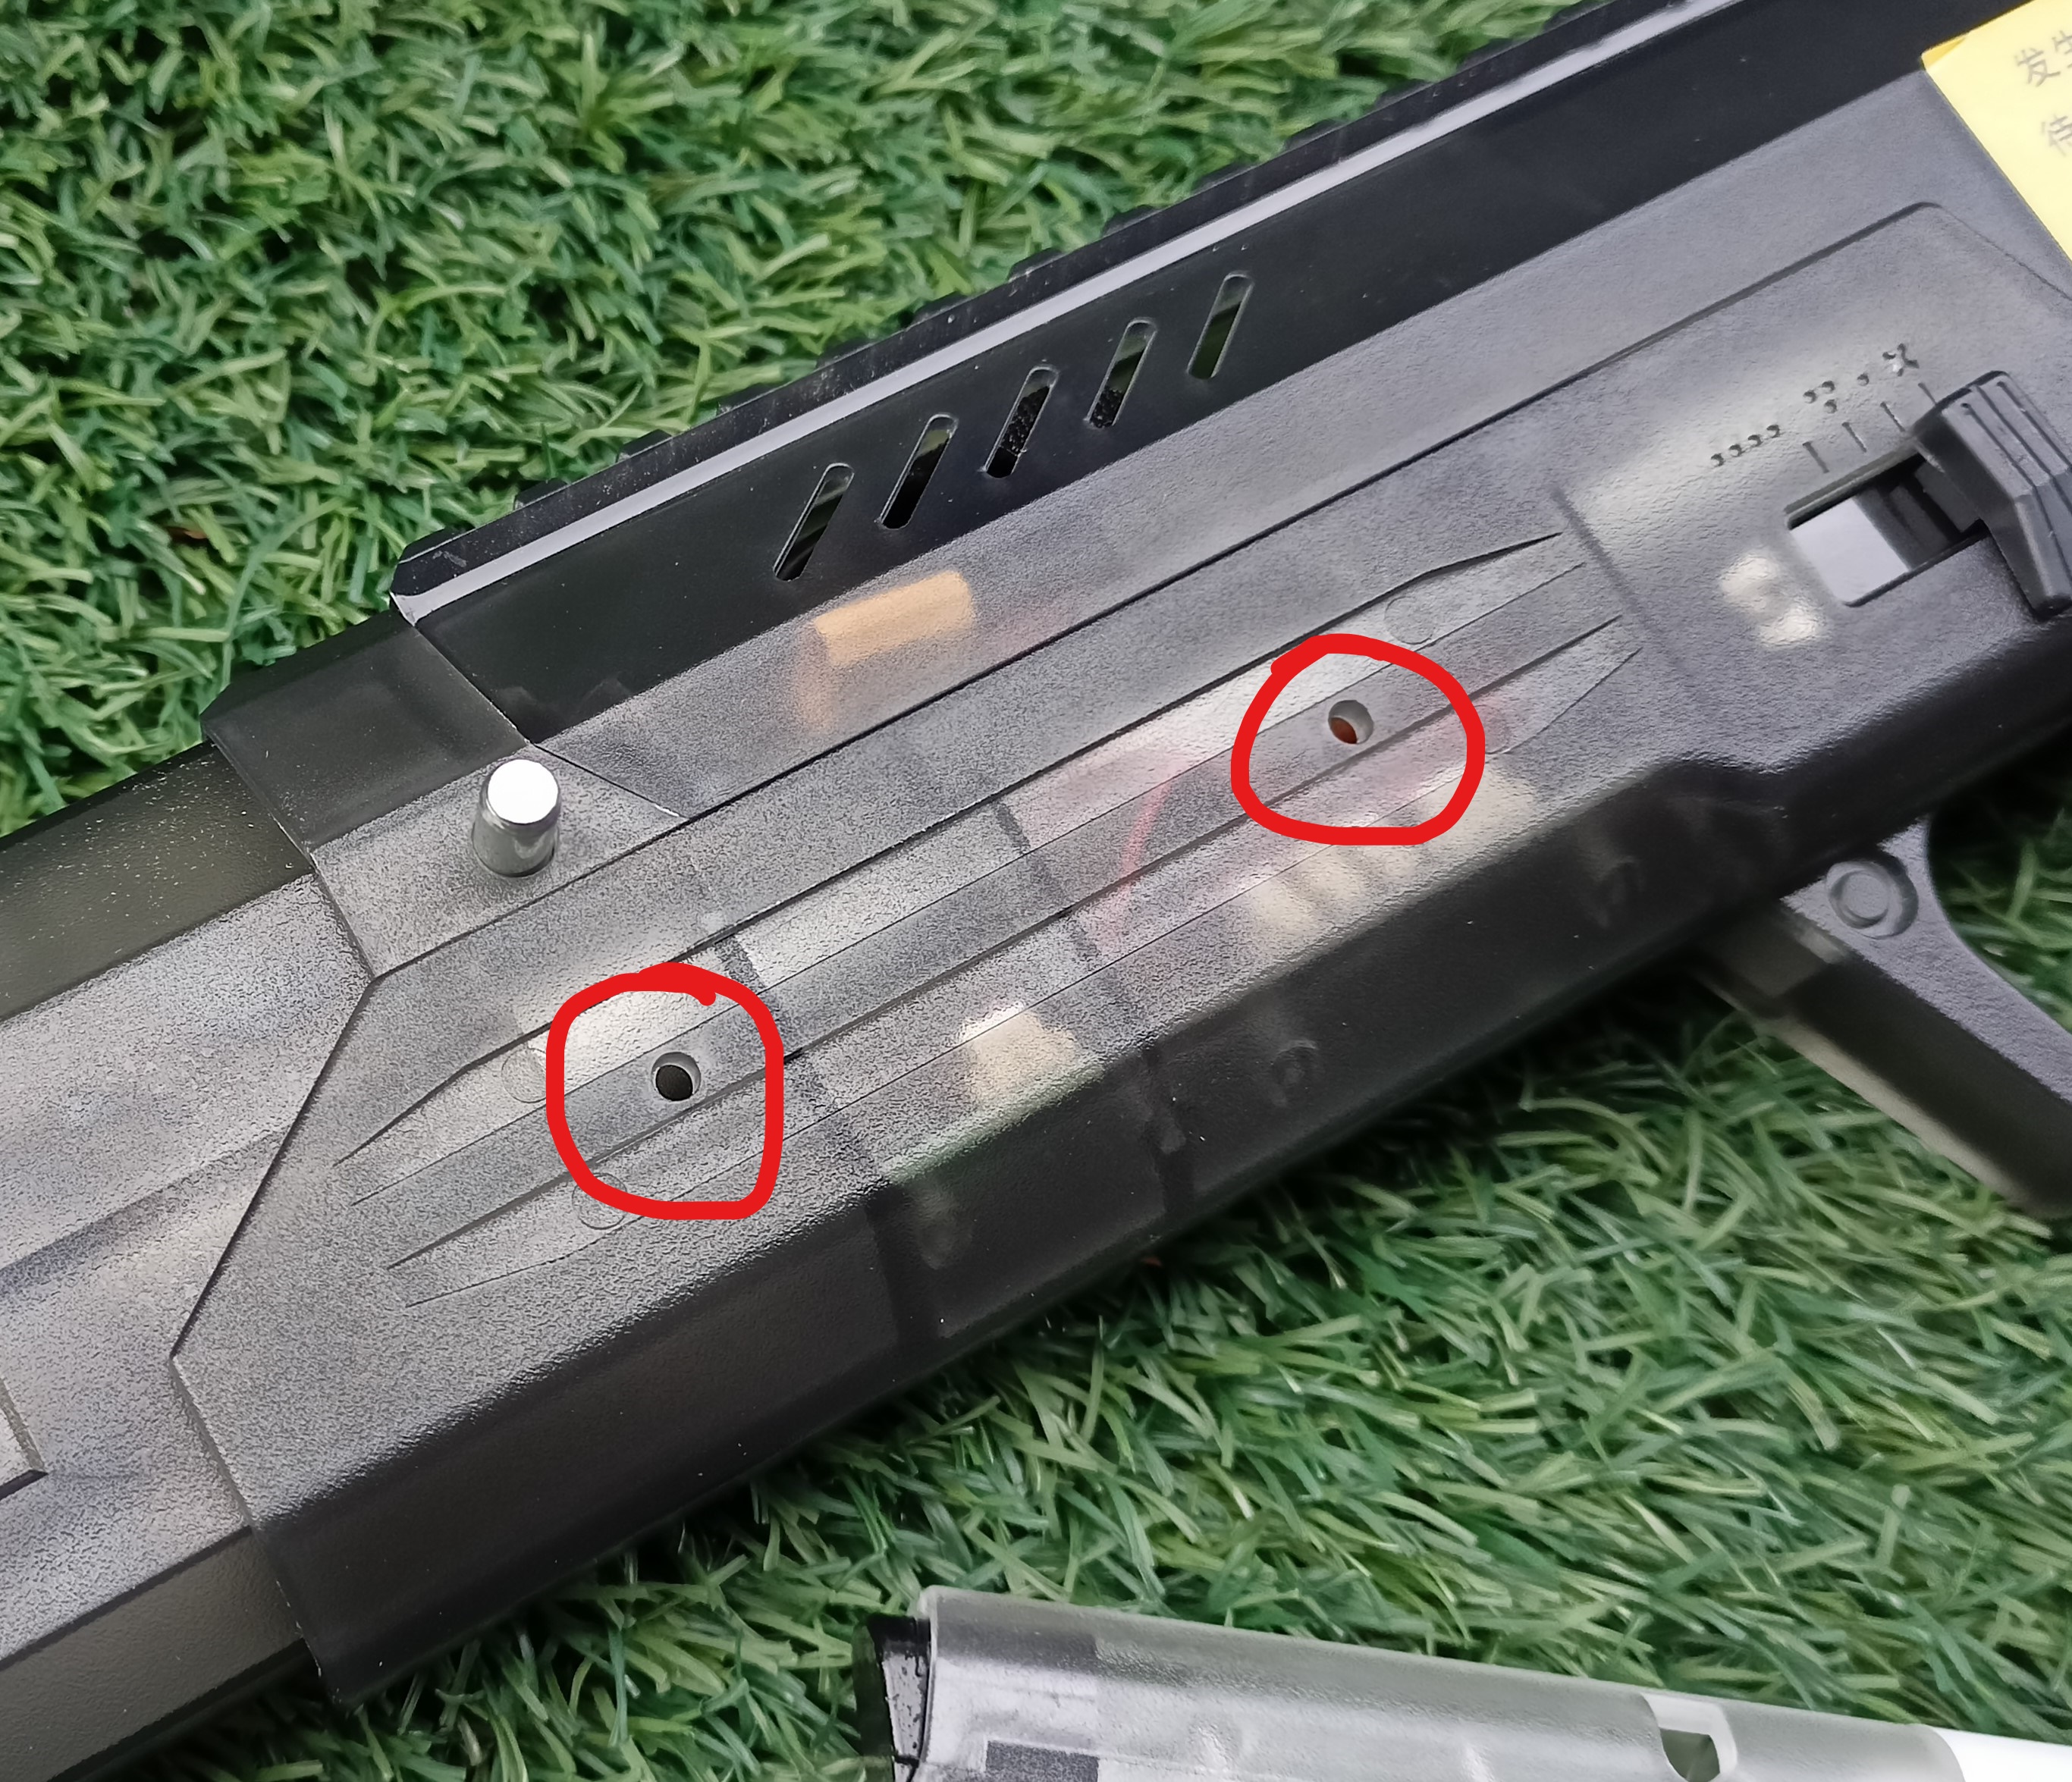
The 3 included metal picatinny rails are secured by screws to left/right/bottom of the front lower receiver. But come on man QWK, for this price you couldn't make a brass nut inserts so it will not strip easily? That said, once the rail is installed to the receiver properly, it is very solid. It will only be a problem if you are going to put it on and off very frequently, that will definitely strip the screw holes for sure.
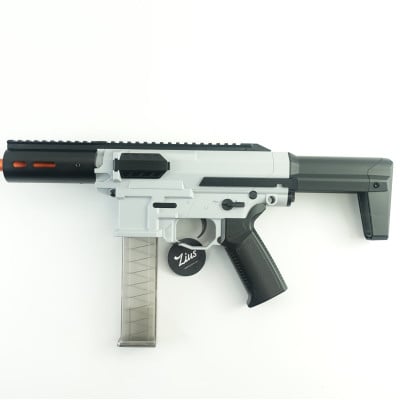
With the magazine inserted and bolt locked.
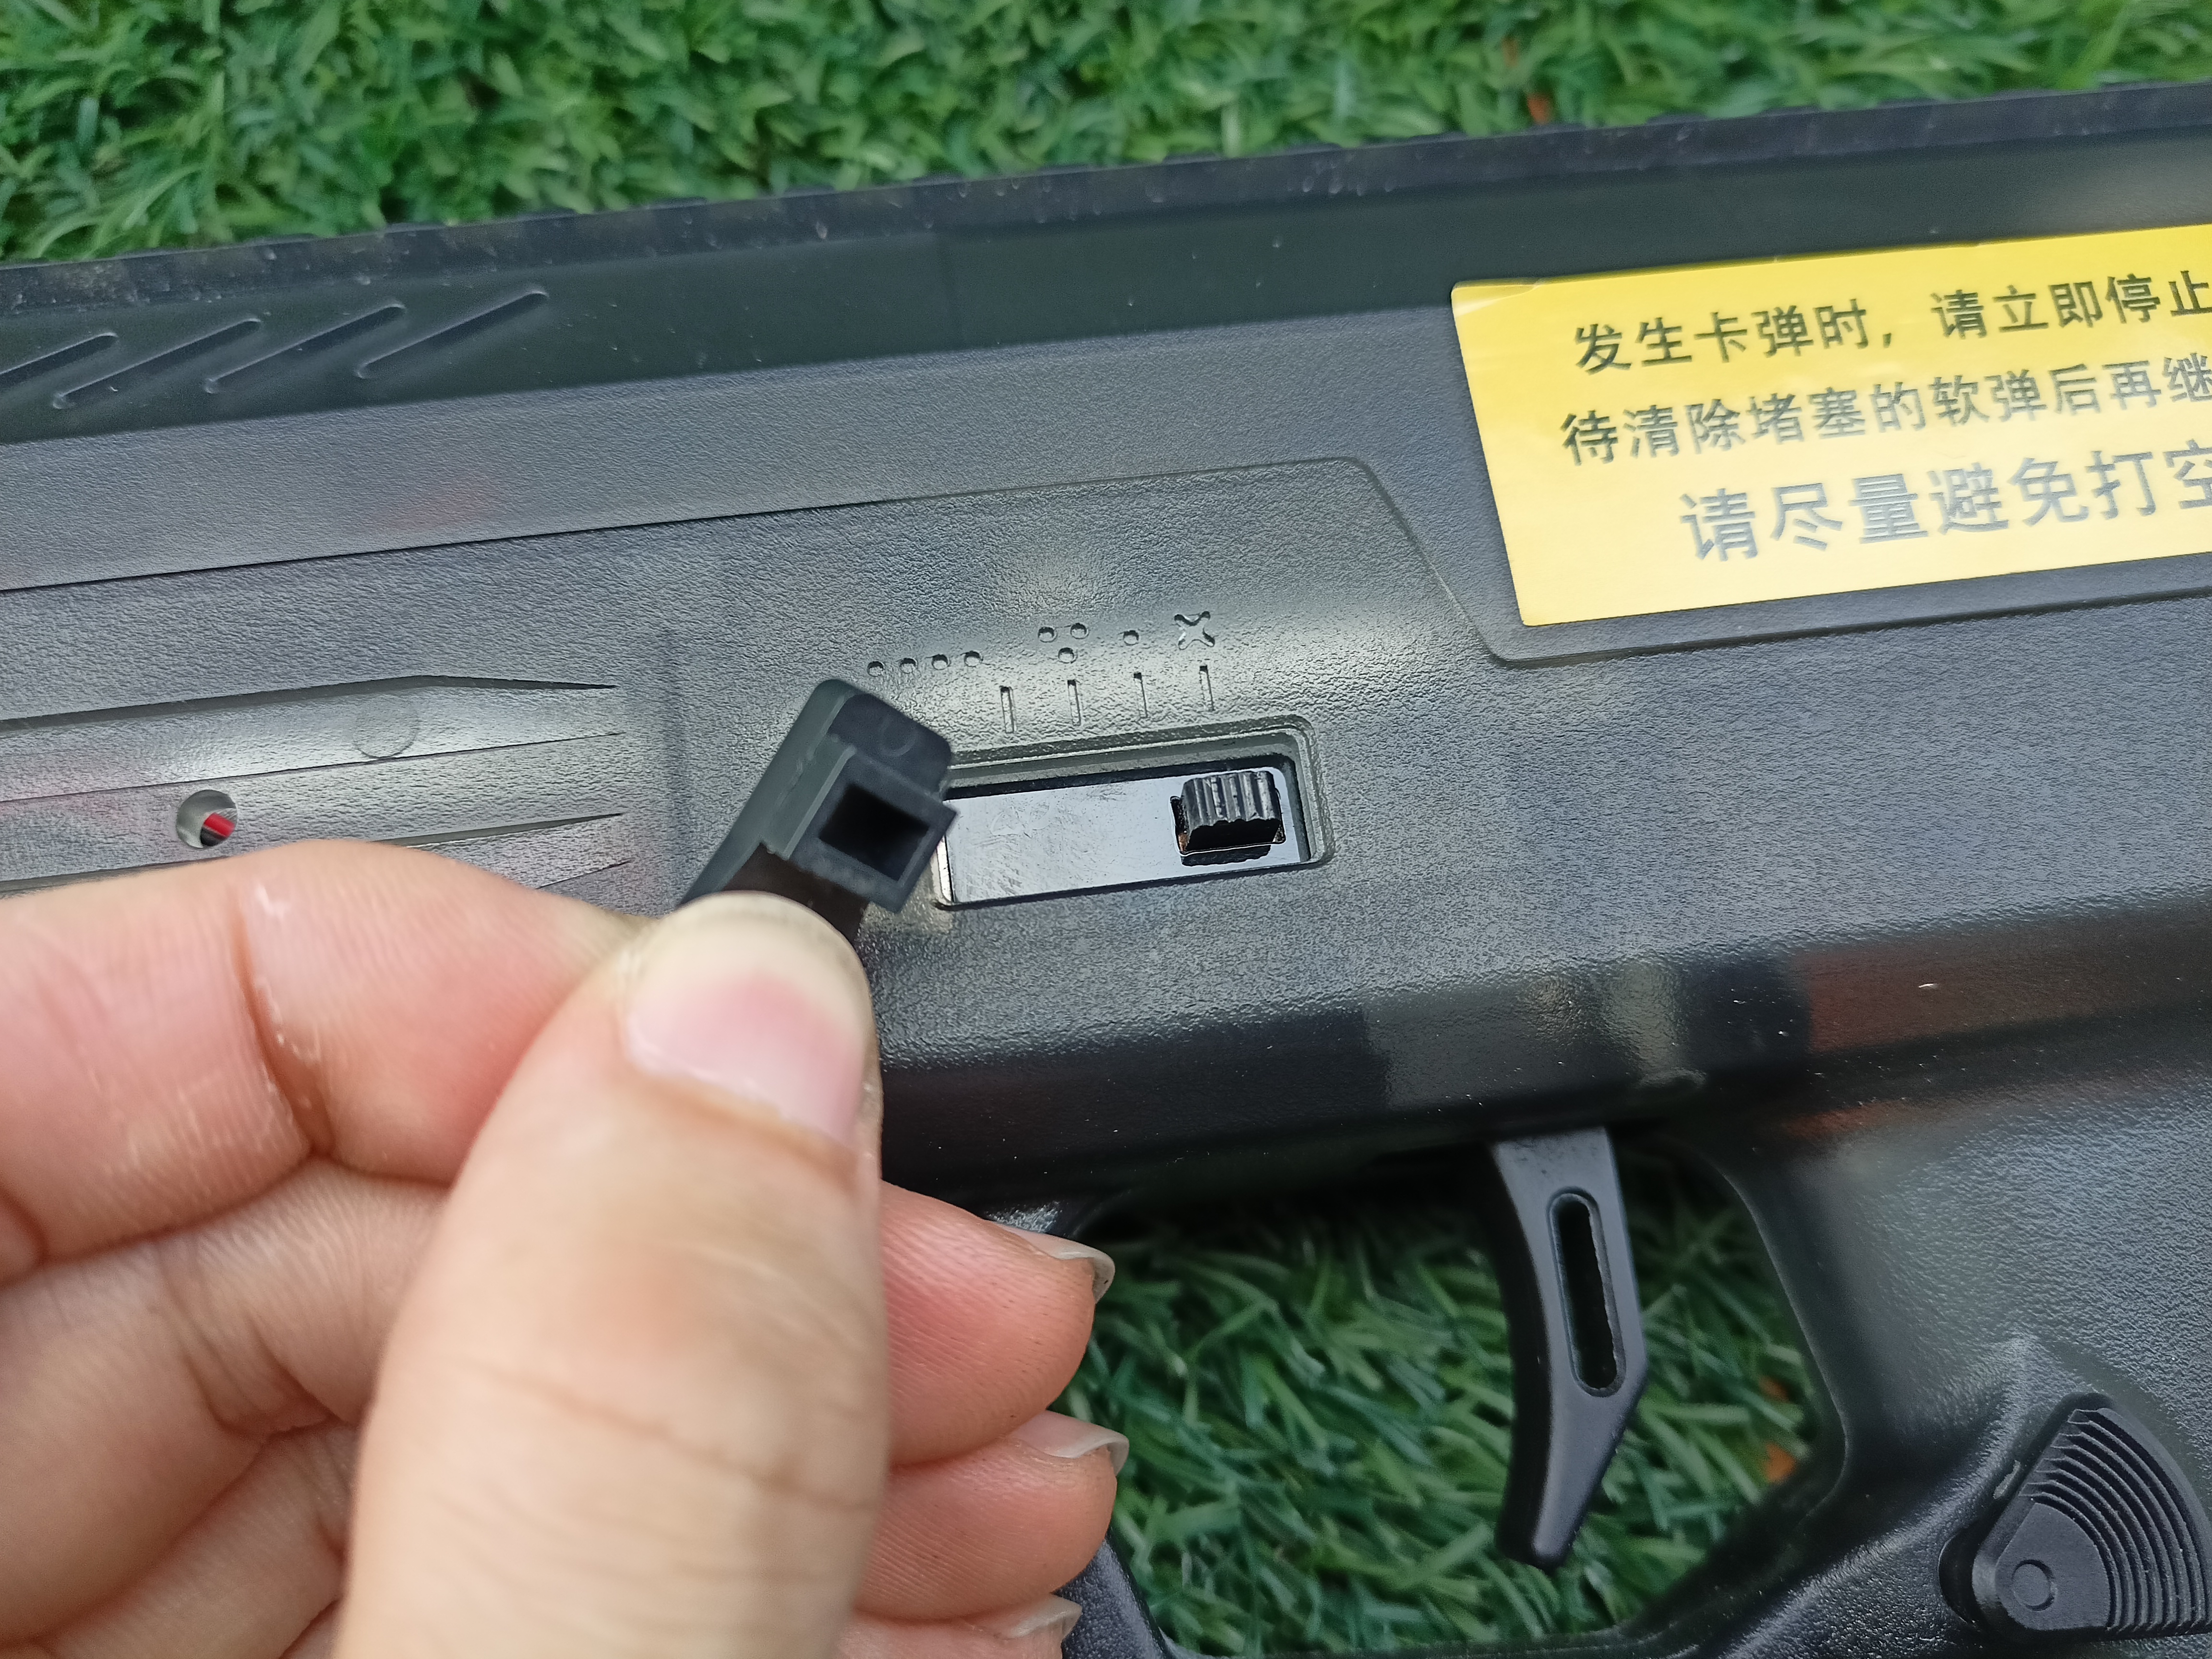
So immediately you can tell that the Challenger Mk3 is not an ambidextrous blaster, it has most of the control on the left side of the blaster such as the Fire selector, Bolt release latch, mag release button. With only the bolt charging handle located on the right side of the blaster, meaning the AK style charging handle. The only thing that is ambidextrous is the Buttstock adjustment paddle.
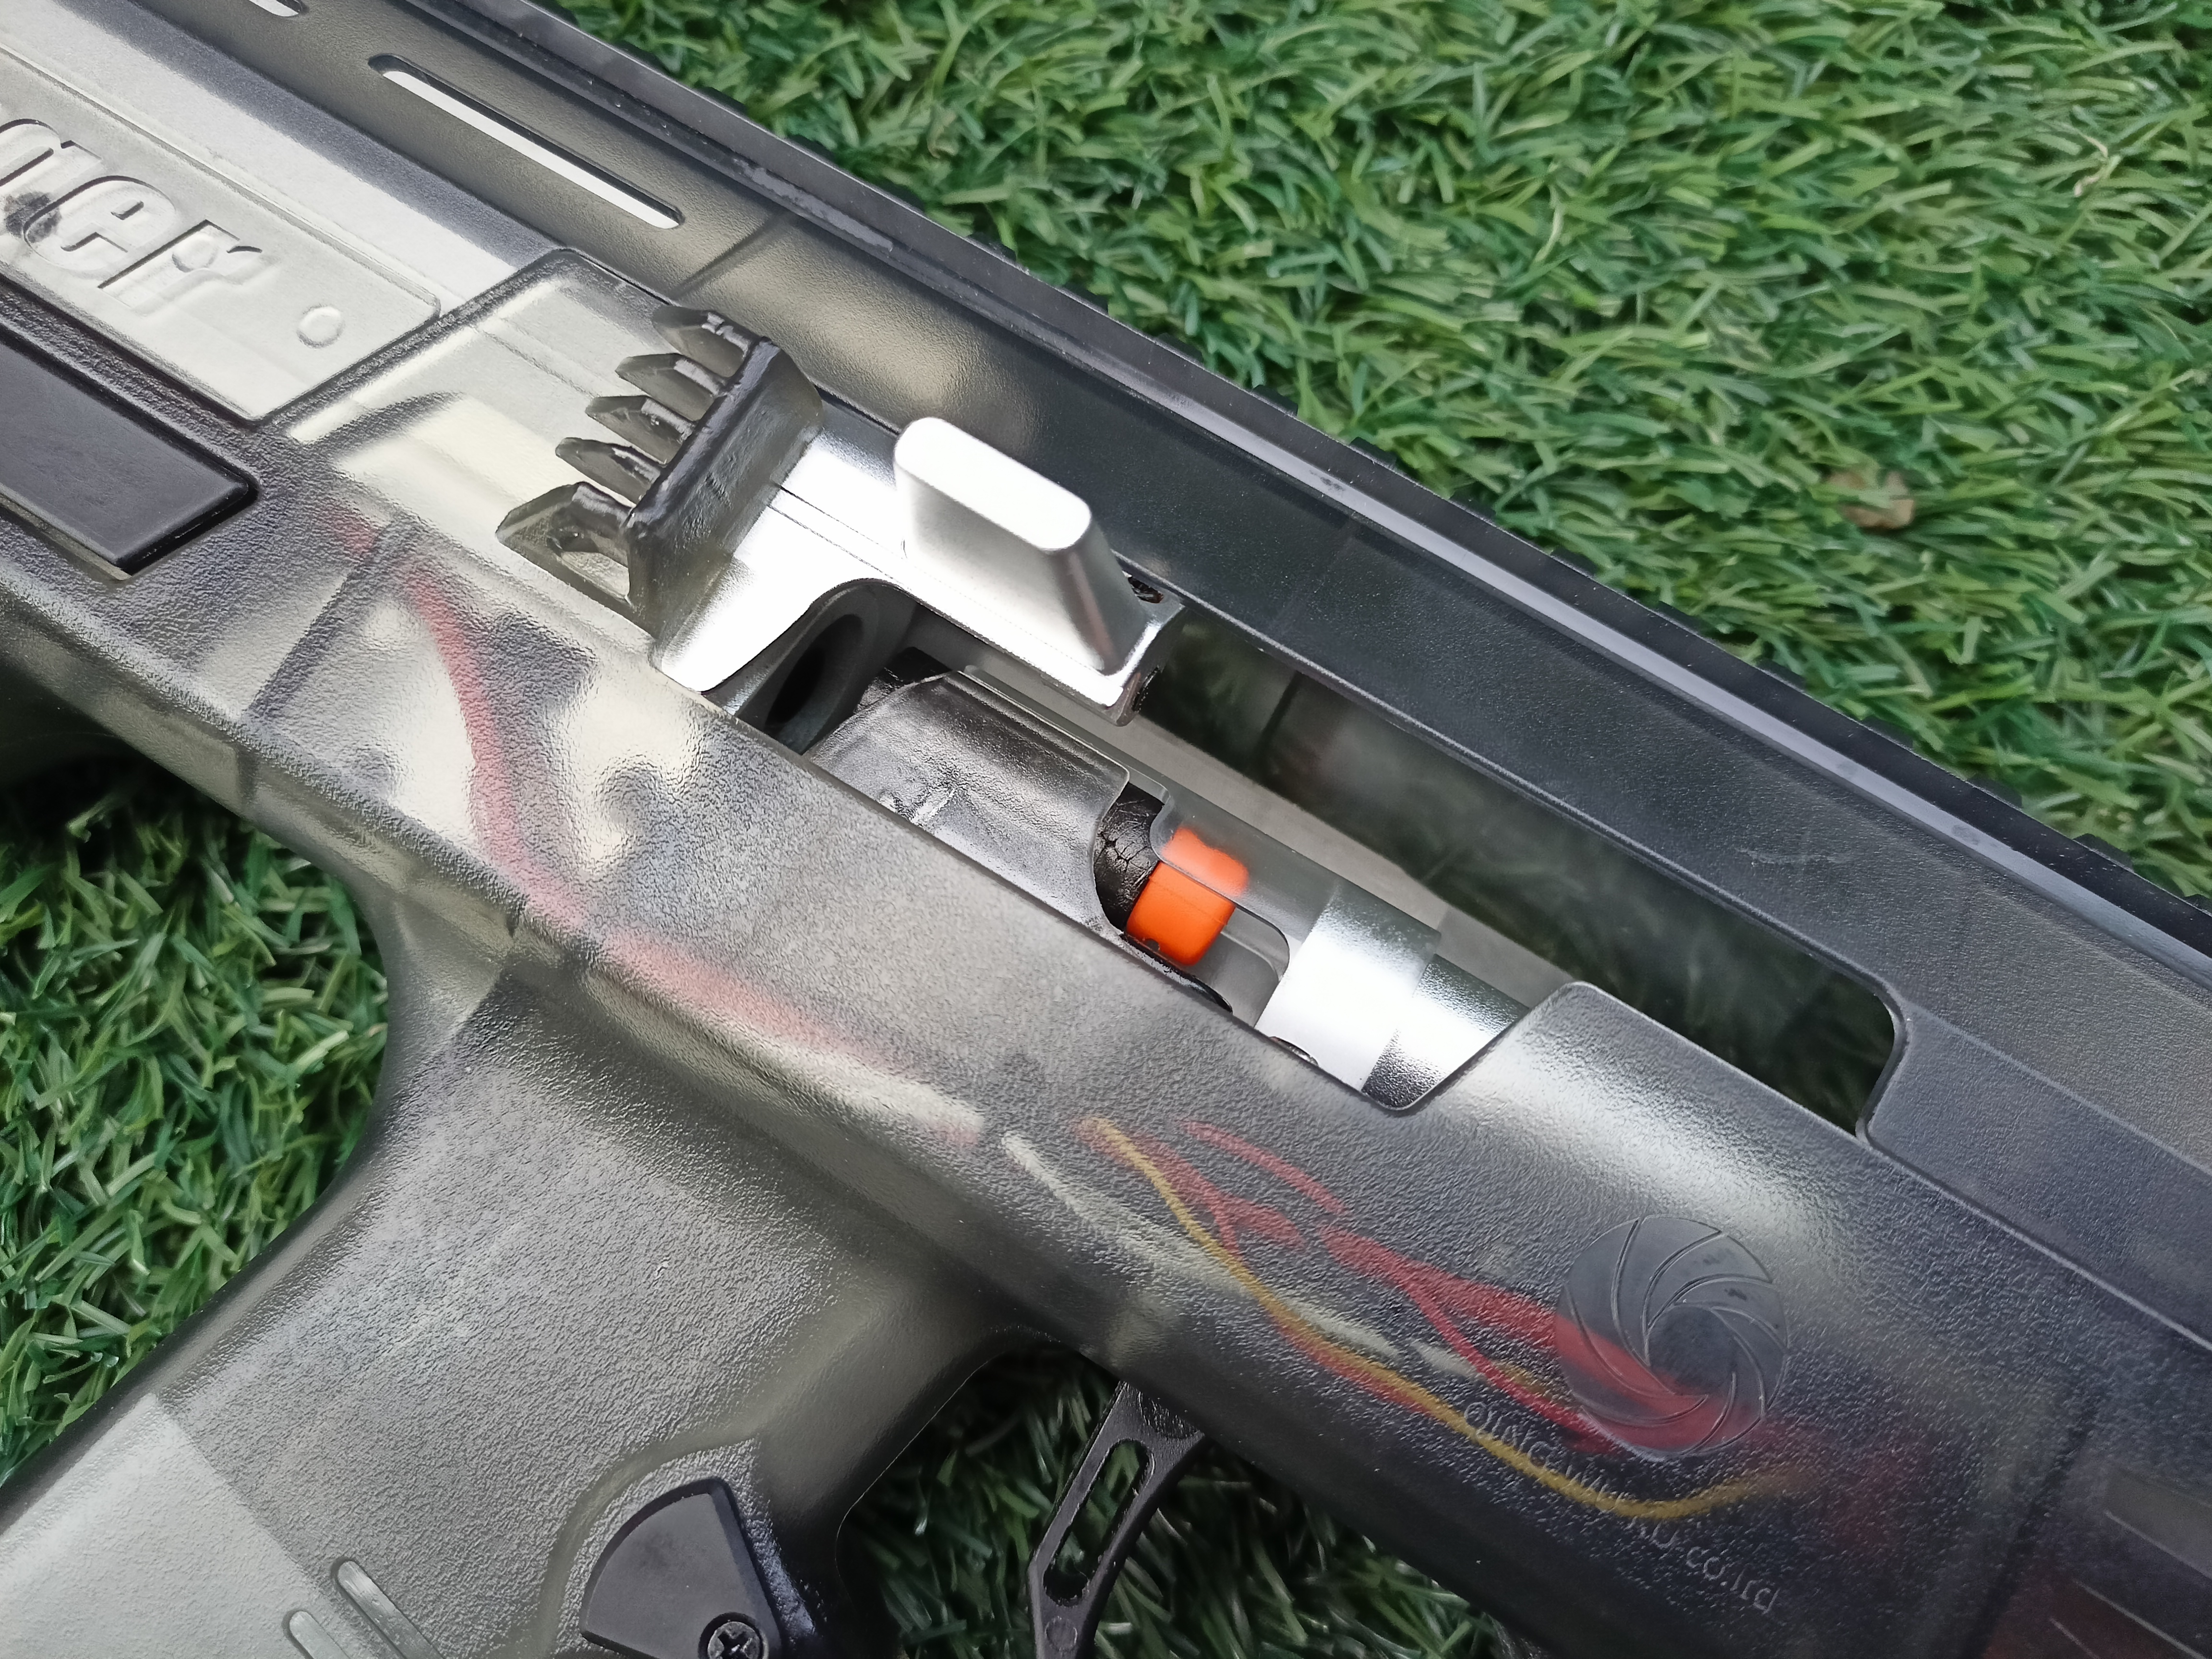
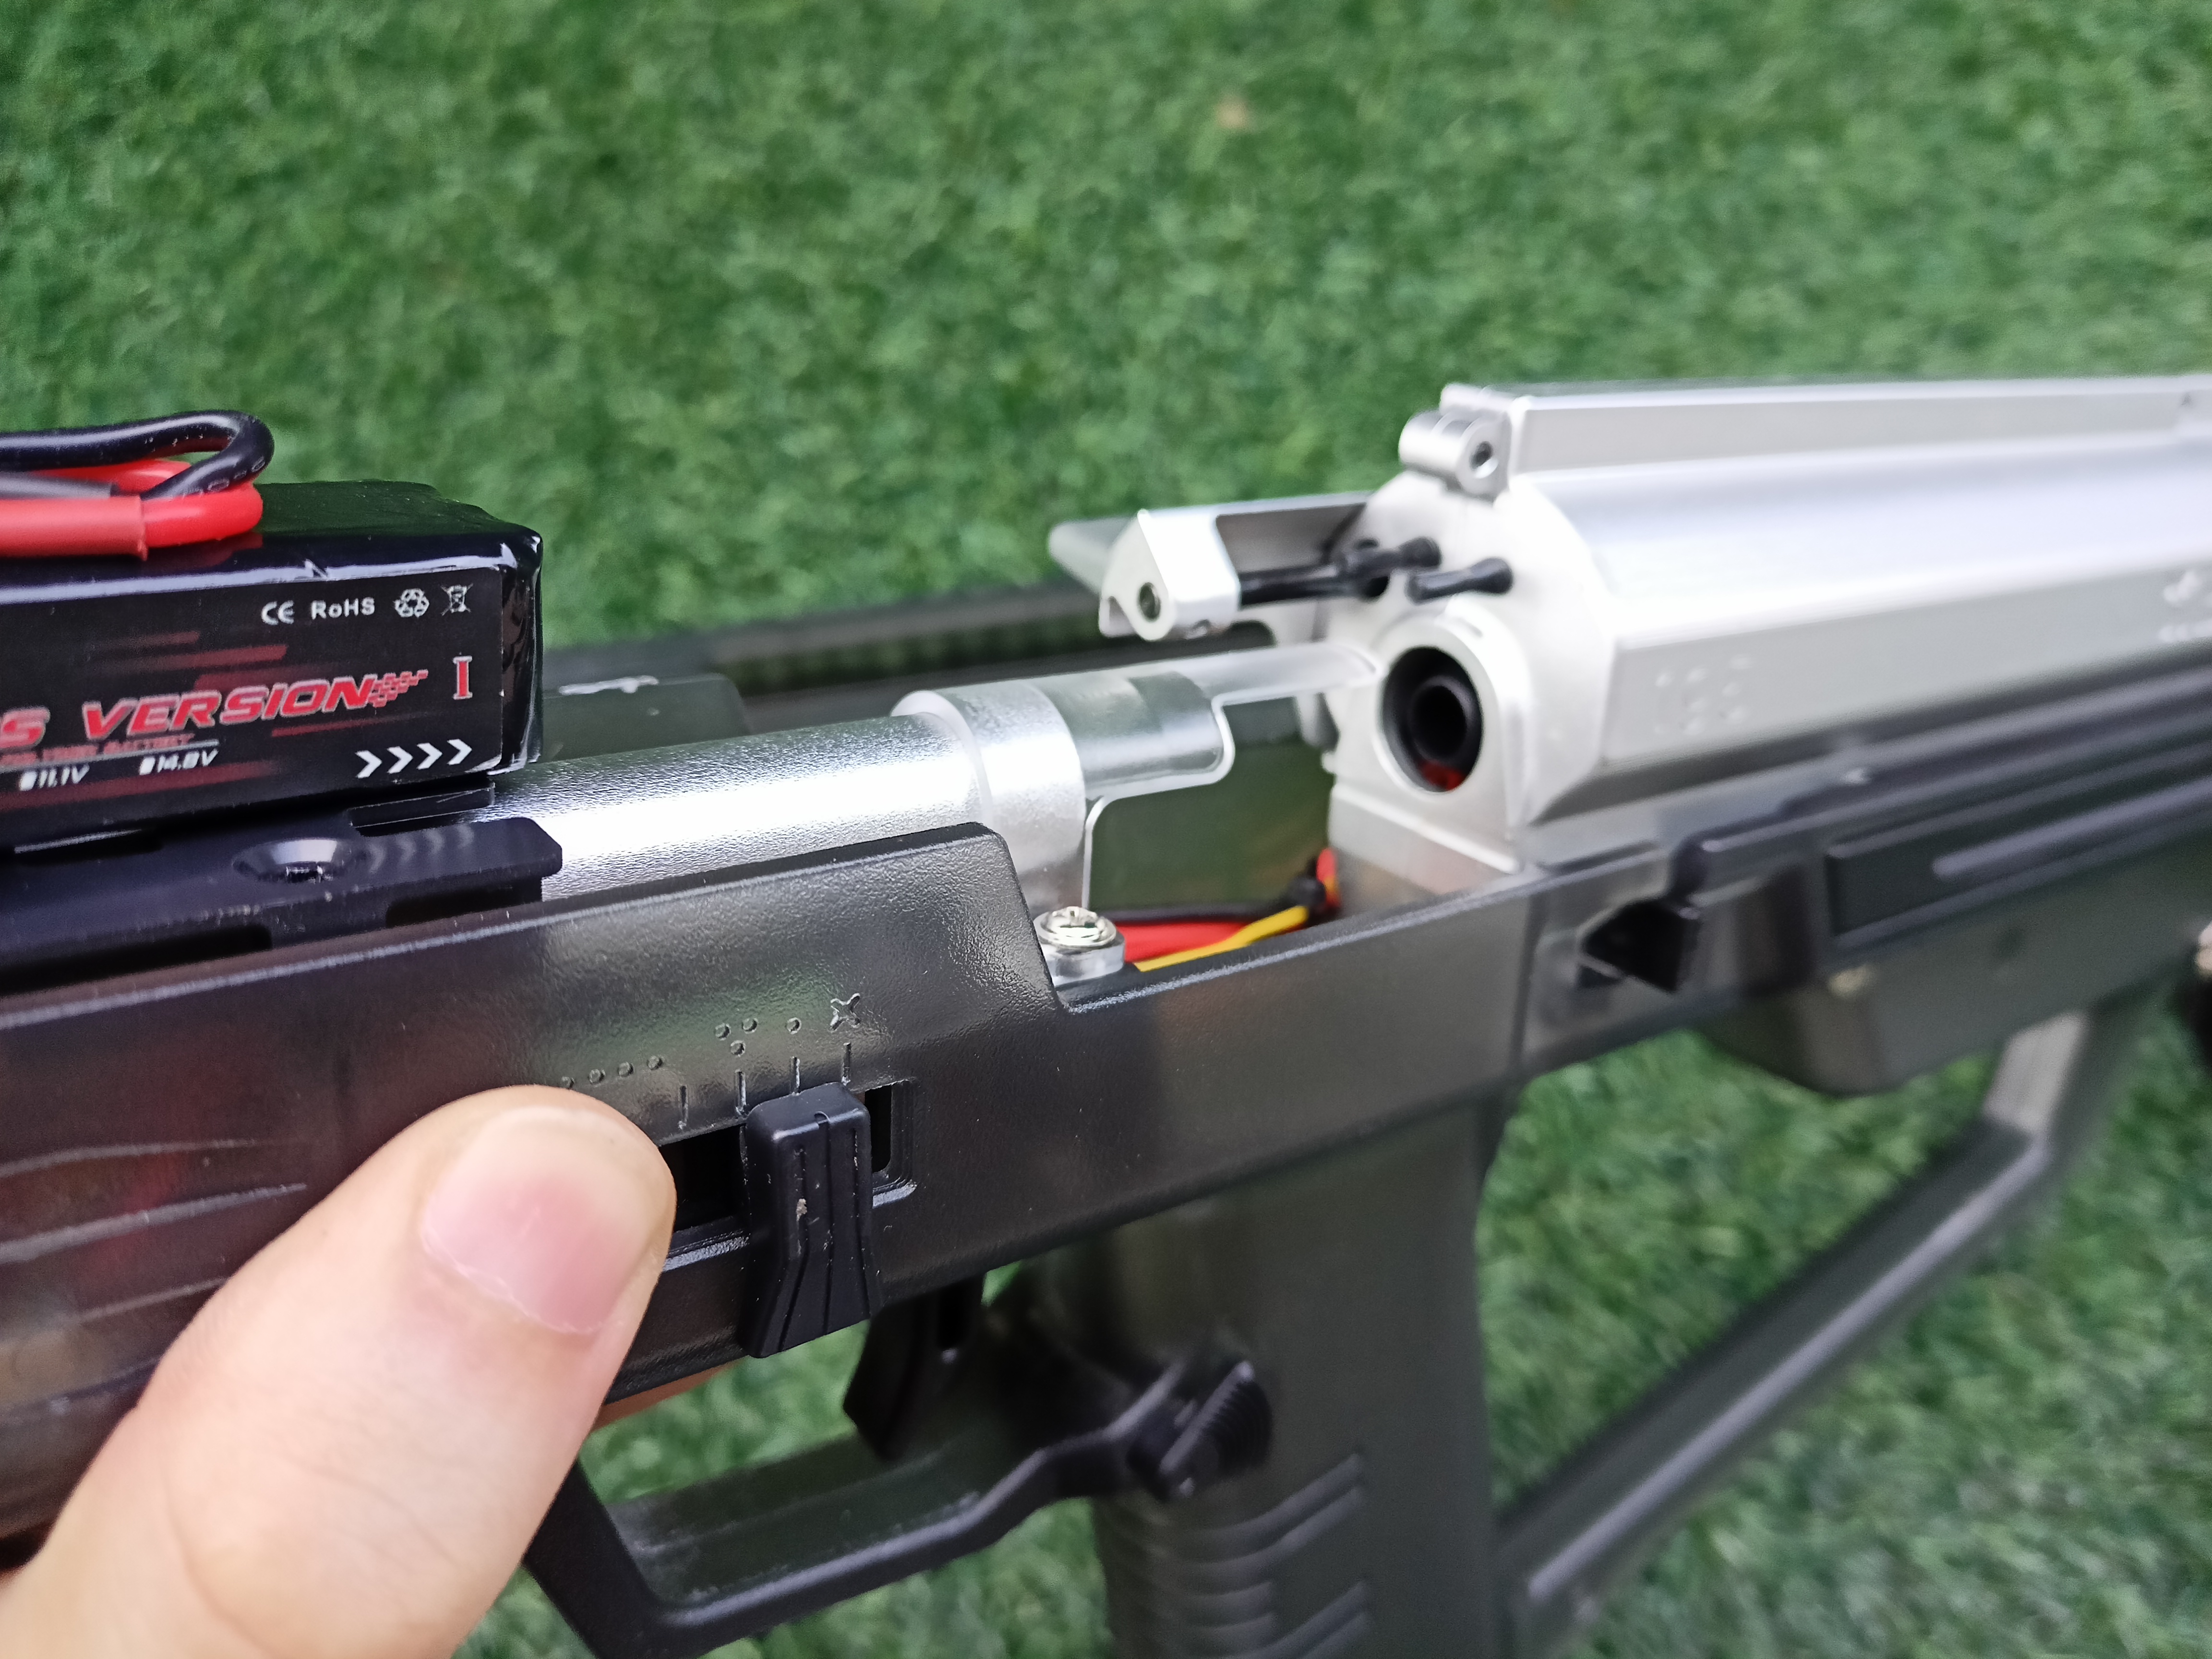
The fire selector with indicator (Safe, semi,3 shot burst, full auto)
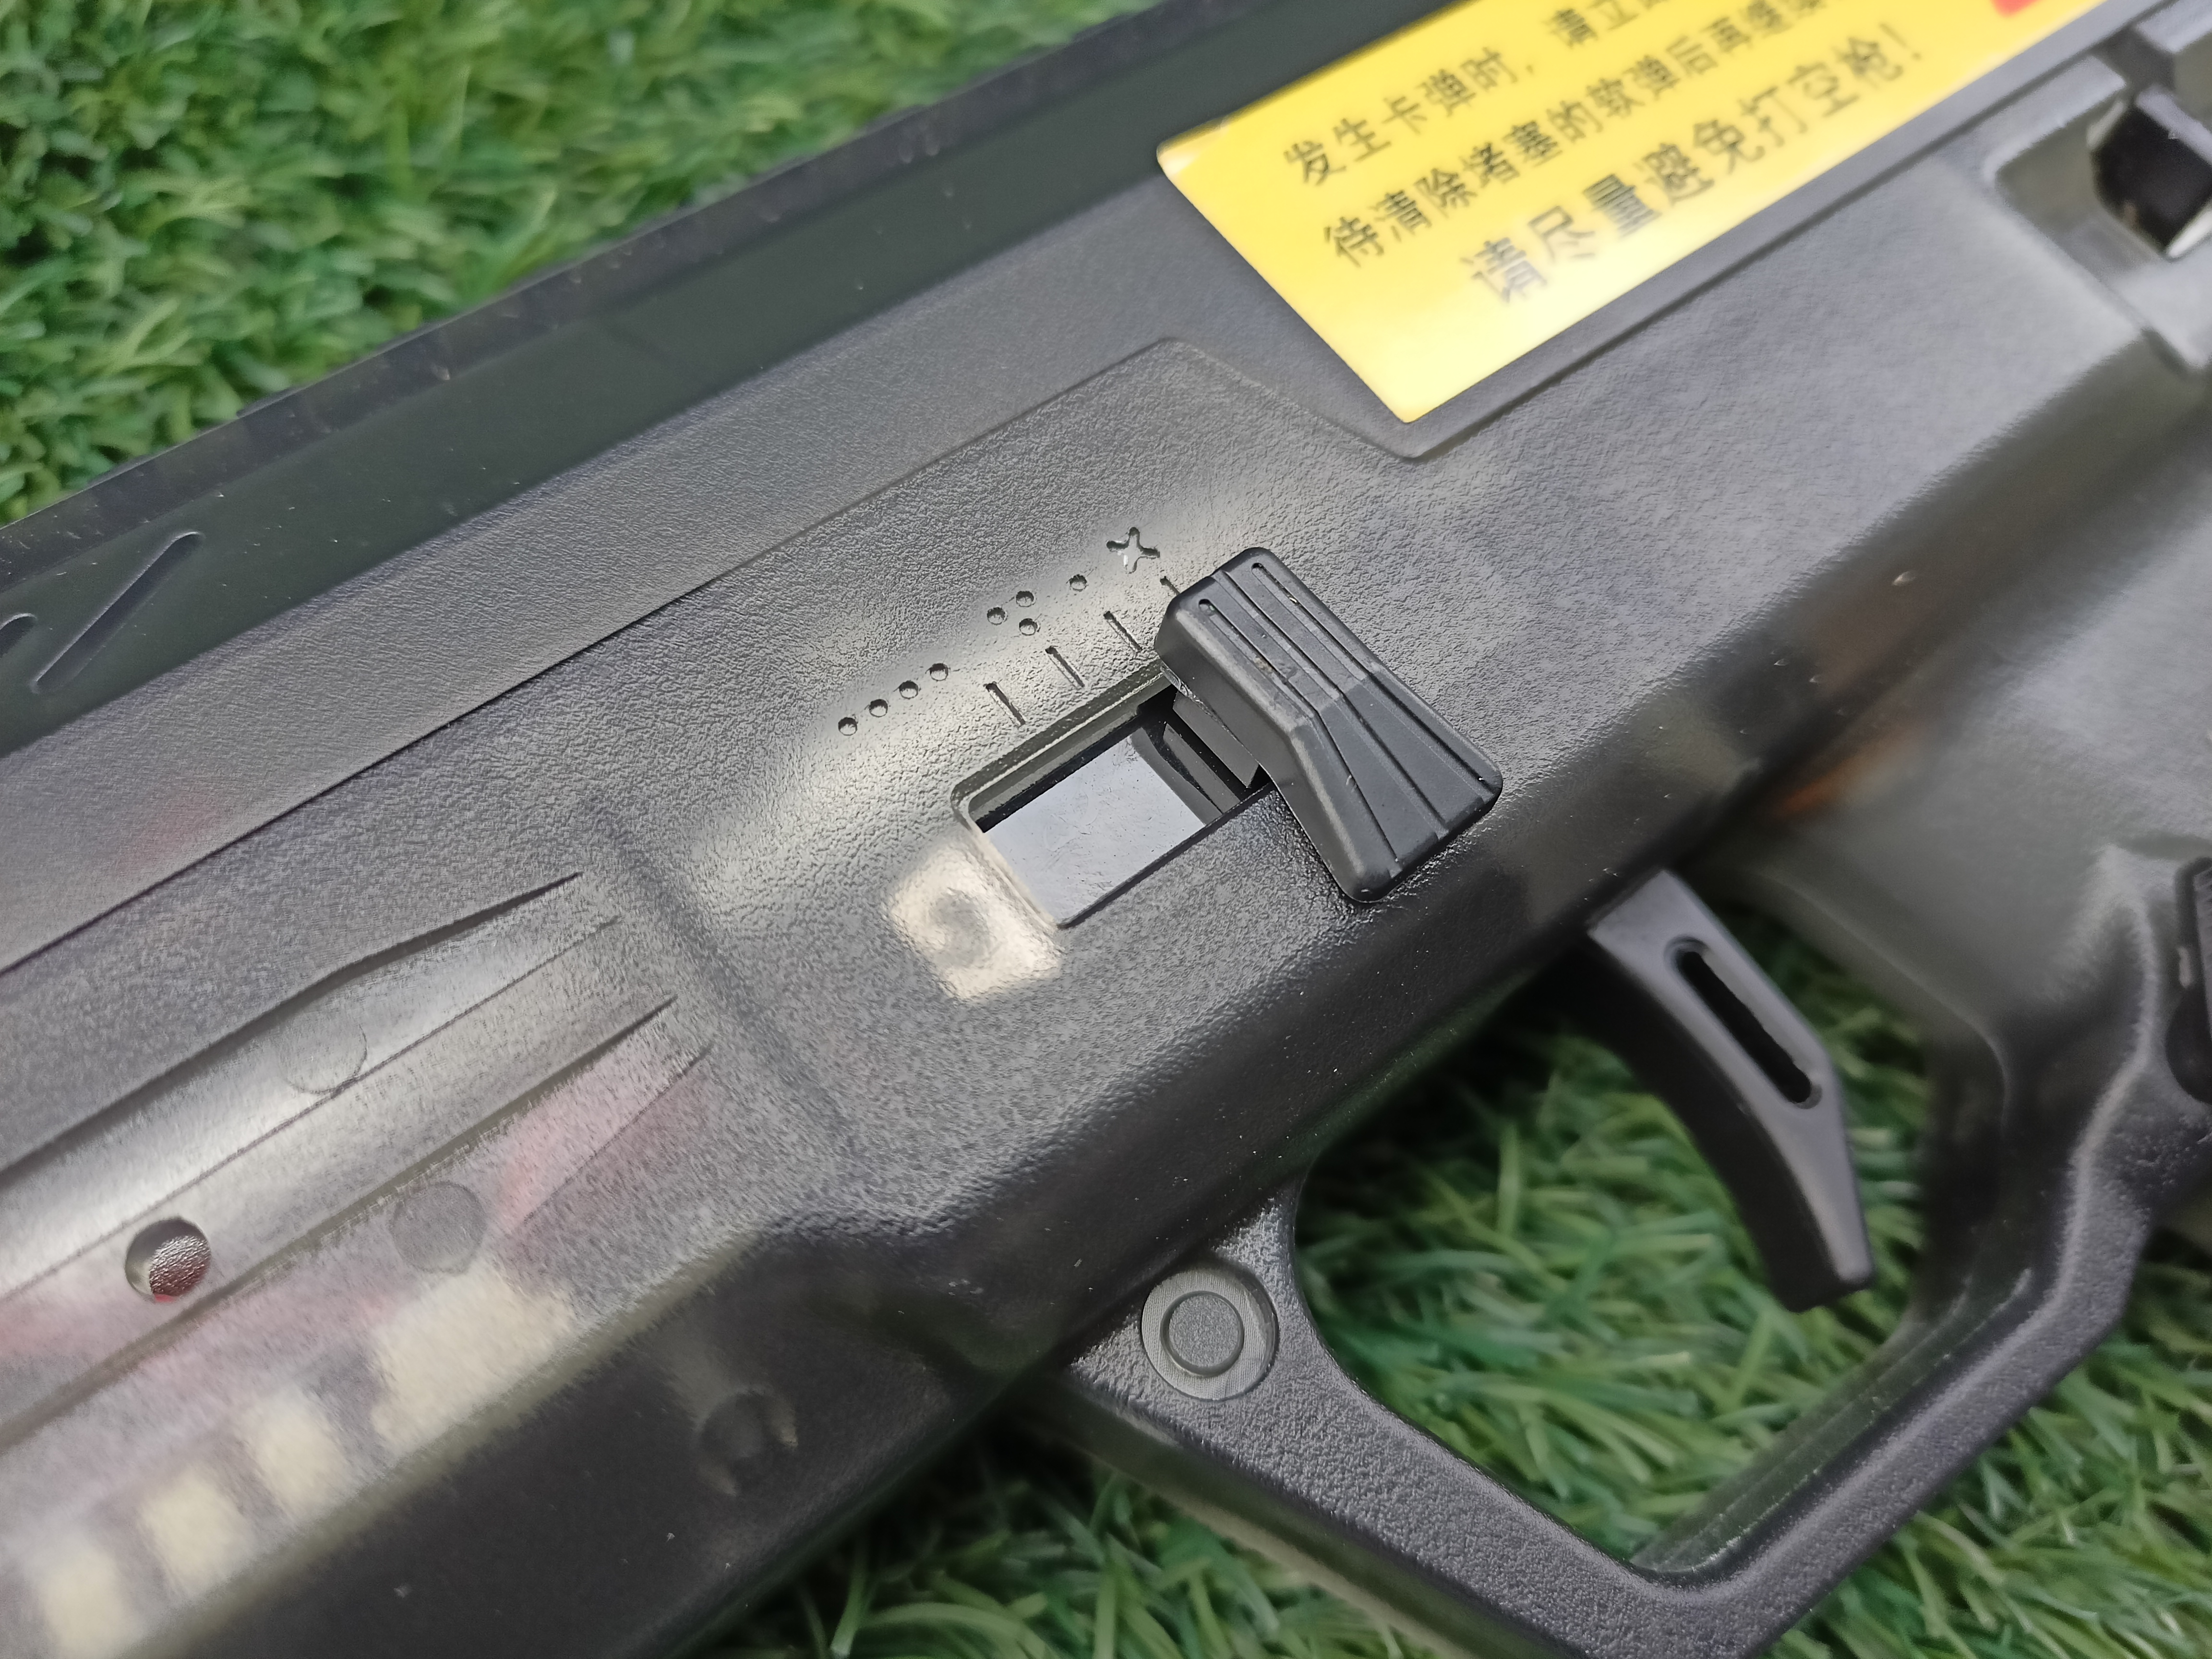
I personally really dislike this style of fire selector because it feels very ambiguous and offers very little tactile feeling. Yes it does click noticeably into place when you slide it, but man in the heat of a battle, you won't be able to switch the slide to the mode you want with absolute confidence and without looking at it. This seems like a minor set back but it's bad enough to ruin my experience somewhat using it while I test it.
For example, you wanna go from Semi straight to Full auto, but you accidentally flip it to the 3 shot burst, now you fire the blaster, expecting it to go full auto, after 3 shot the blaster stopped, you will think the blaster is jammed! And given the sophisticated and delicacy system of the Mk3, whenever something goes wrong, the first thing to do is NOT TO PULL THE TRIGGER in case of a jam, it can damage the electronic system. You should instead take a close look at the bolt/breech/pusher and the barrel to identify the problem, and if there is indeed a jam, make sure to clear it before resuming using it.
And worse still? It's friction fitted to the actual switch underneath. The slider is not secured to the switch itself properly and it can be easily knock away during a game and its gone, you are not going to find such a tiny piece back in the grass lol. QWK suggested to use a dap of a non permanent glue to keep it in place. This slider cannot be fixed into place permanently or you will not be able to access into the switch boards. Well at least it won't affect the blaster operation. QWK will make this part available as spare part. Still a bummer though, however minor it is.
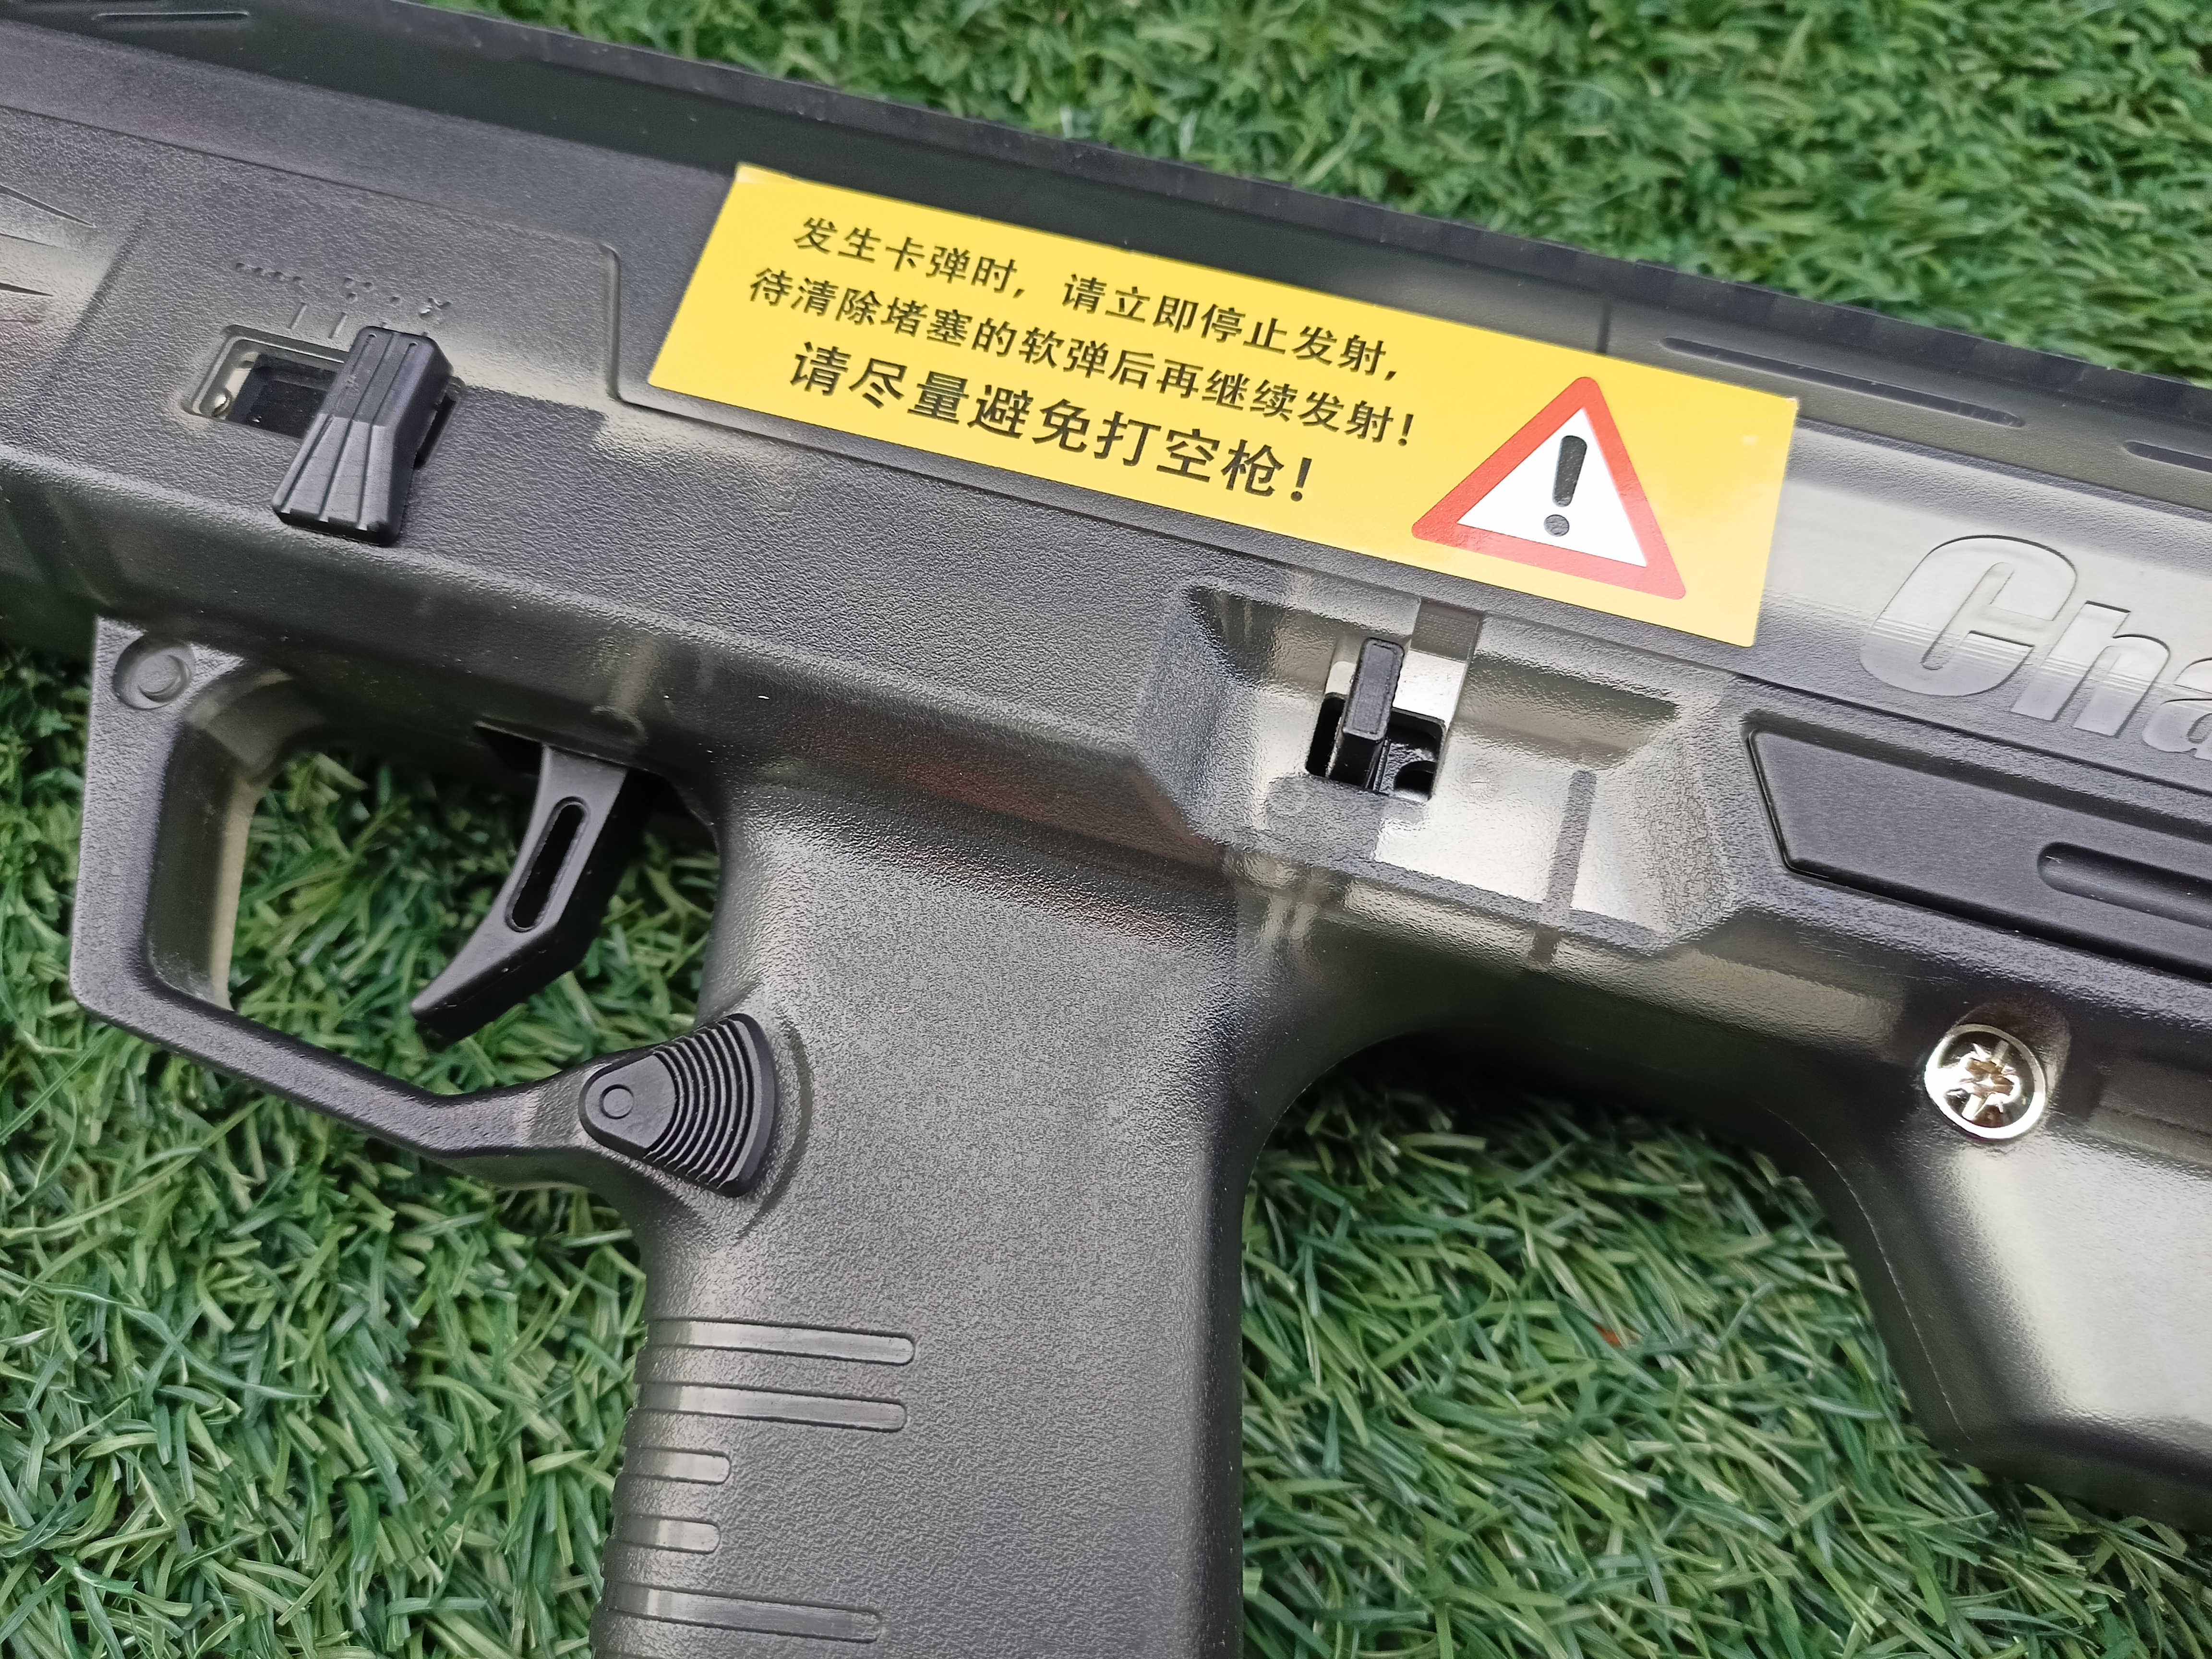
Moving on, we have the nylon Trigger with a rather large trigger guard to accommodate gloves , Bolt release latch and the magazine release button here. Alright I have absolutely no complaint with the trigger nor mag release button because their placement makes perfect sense and it really can't get any better than this.
The Bolt release latch however, leave much to be desired. Don't get me wrong, it works but whether it is intended, I wonder. You need to have a REALLY strong thumb to reach and actually activate it, I had to use my off hand to push it even though this placement seems like it is intended to be operated with your right hand's thumb without moving your main hand away from the grip. An extended bolt release would be really helpful!
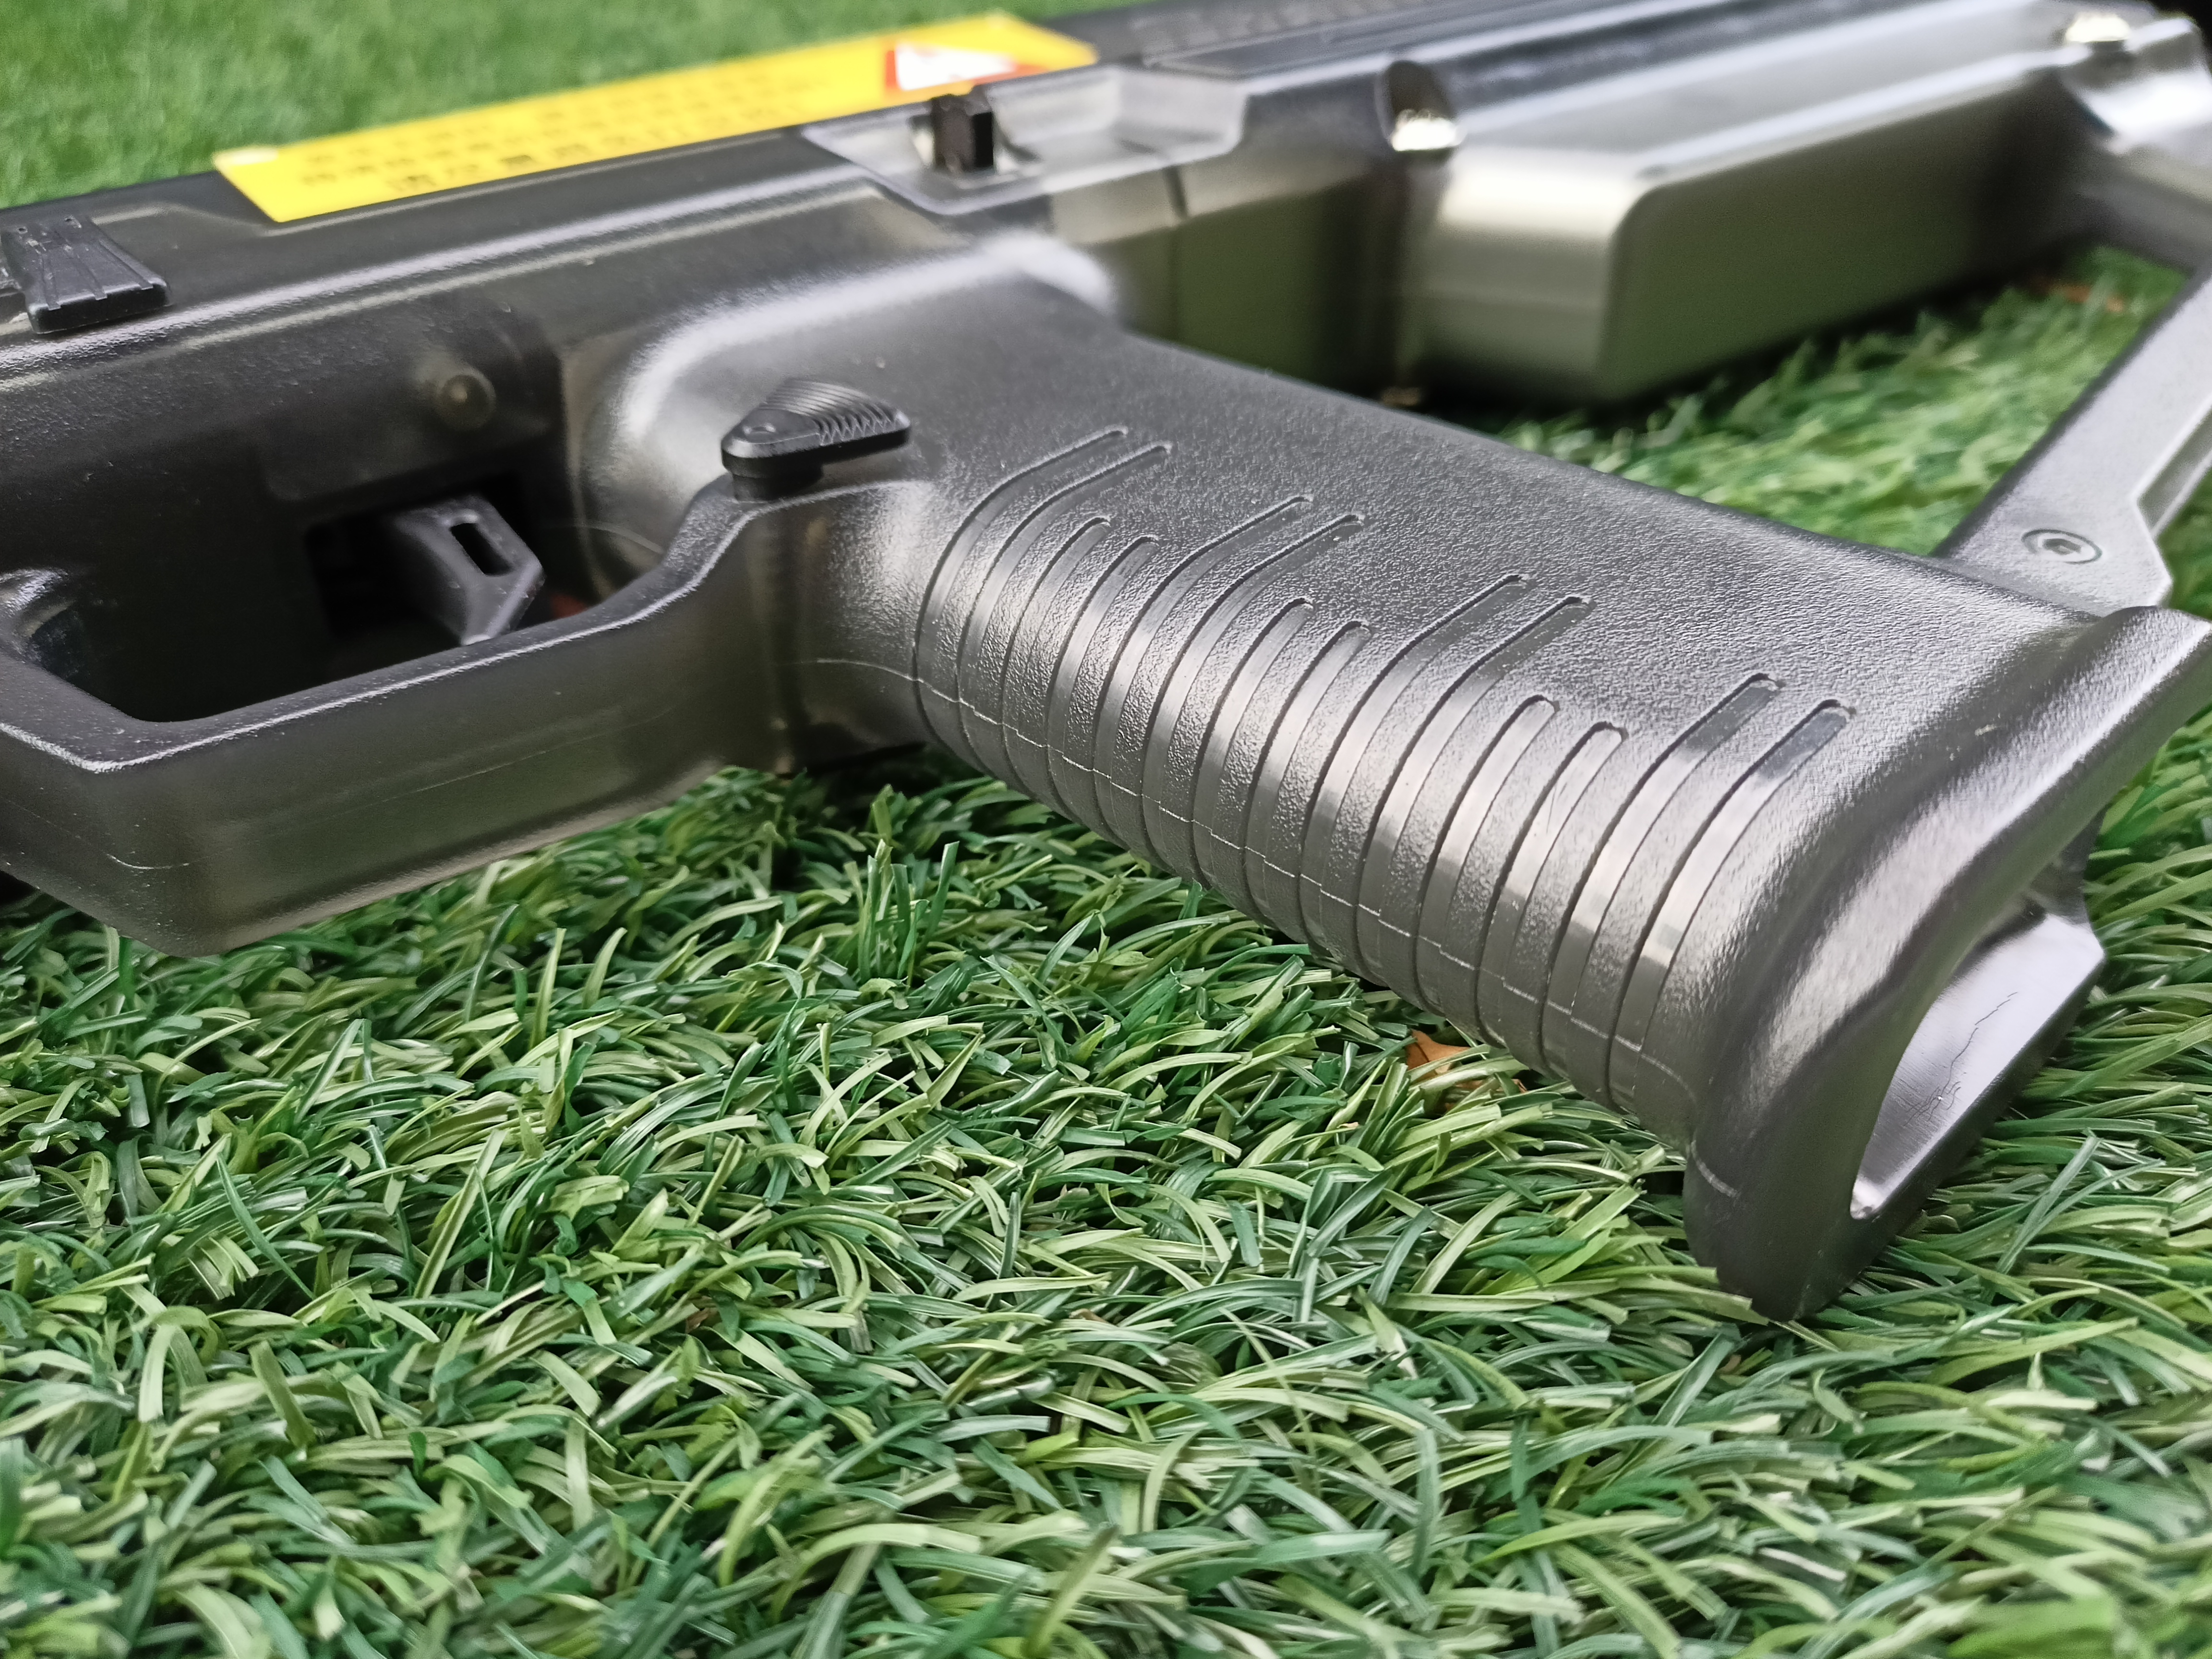
The grip is definitely one of the stronger suit of the blaster, it has a very thin lightly ribbed grip with Outer diameter of 14.5CM despite being a mag within the pistol grip design. For quick comparison, the Worker Phoenix grip OD is 16.5CM.
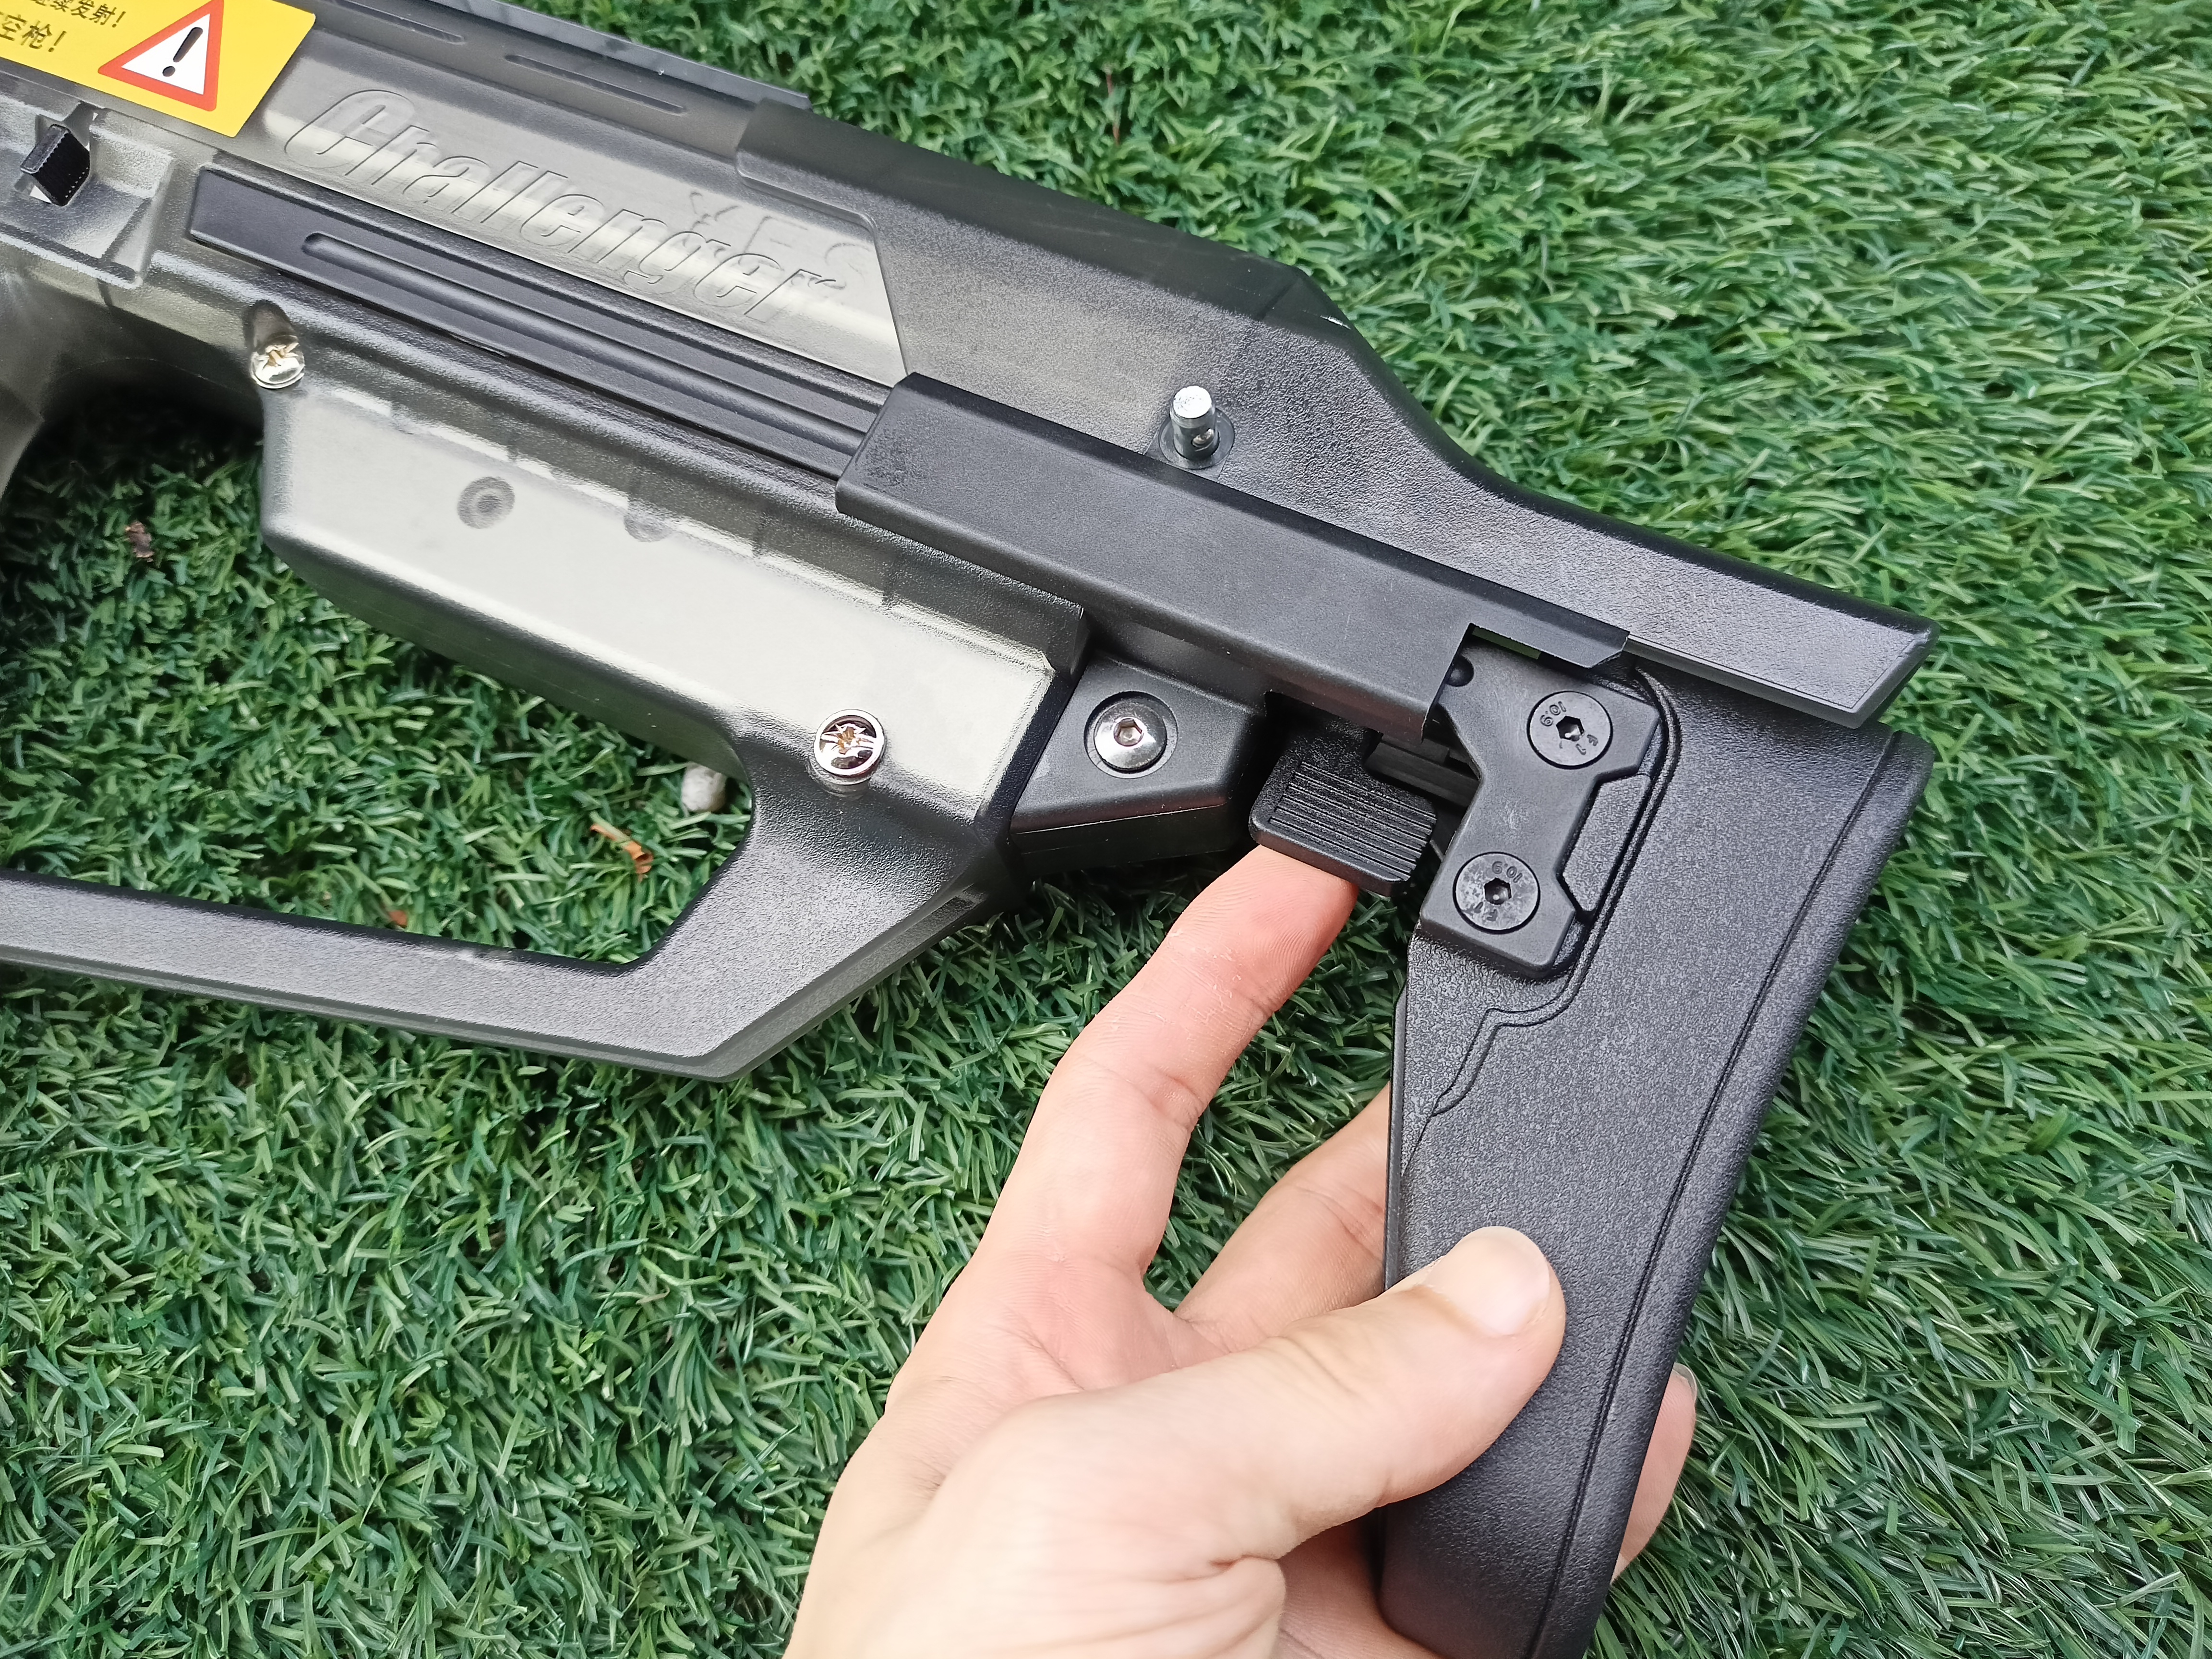
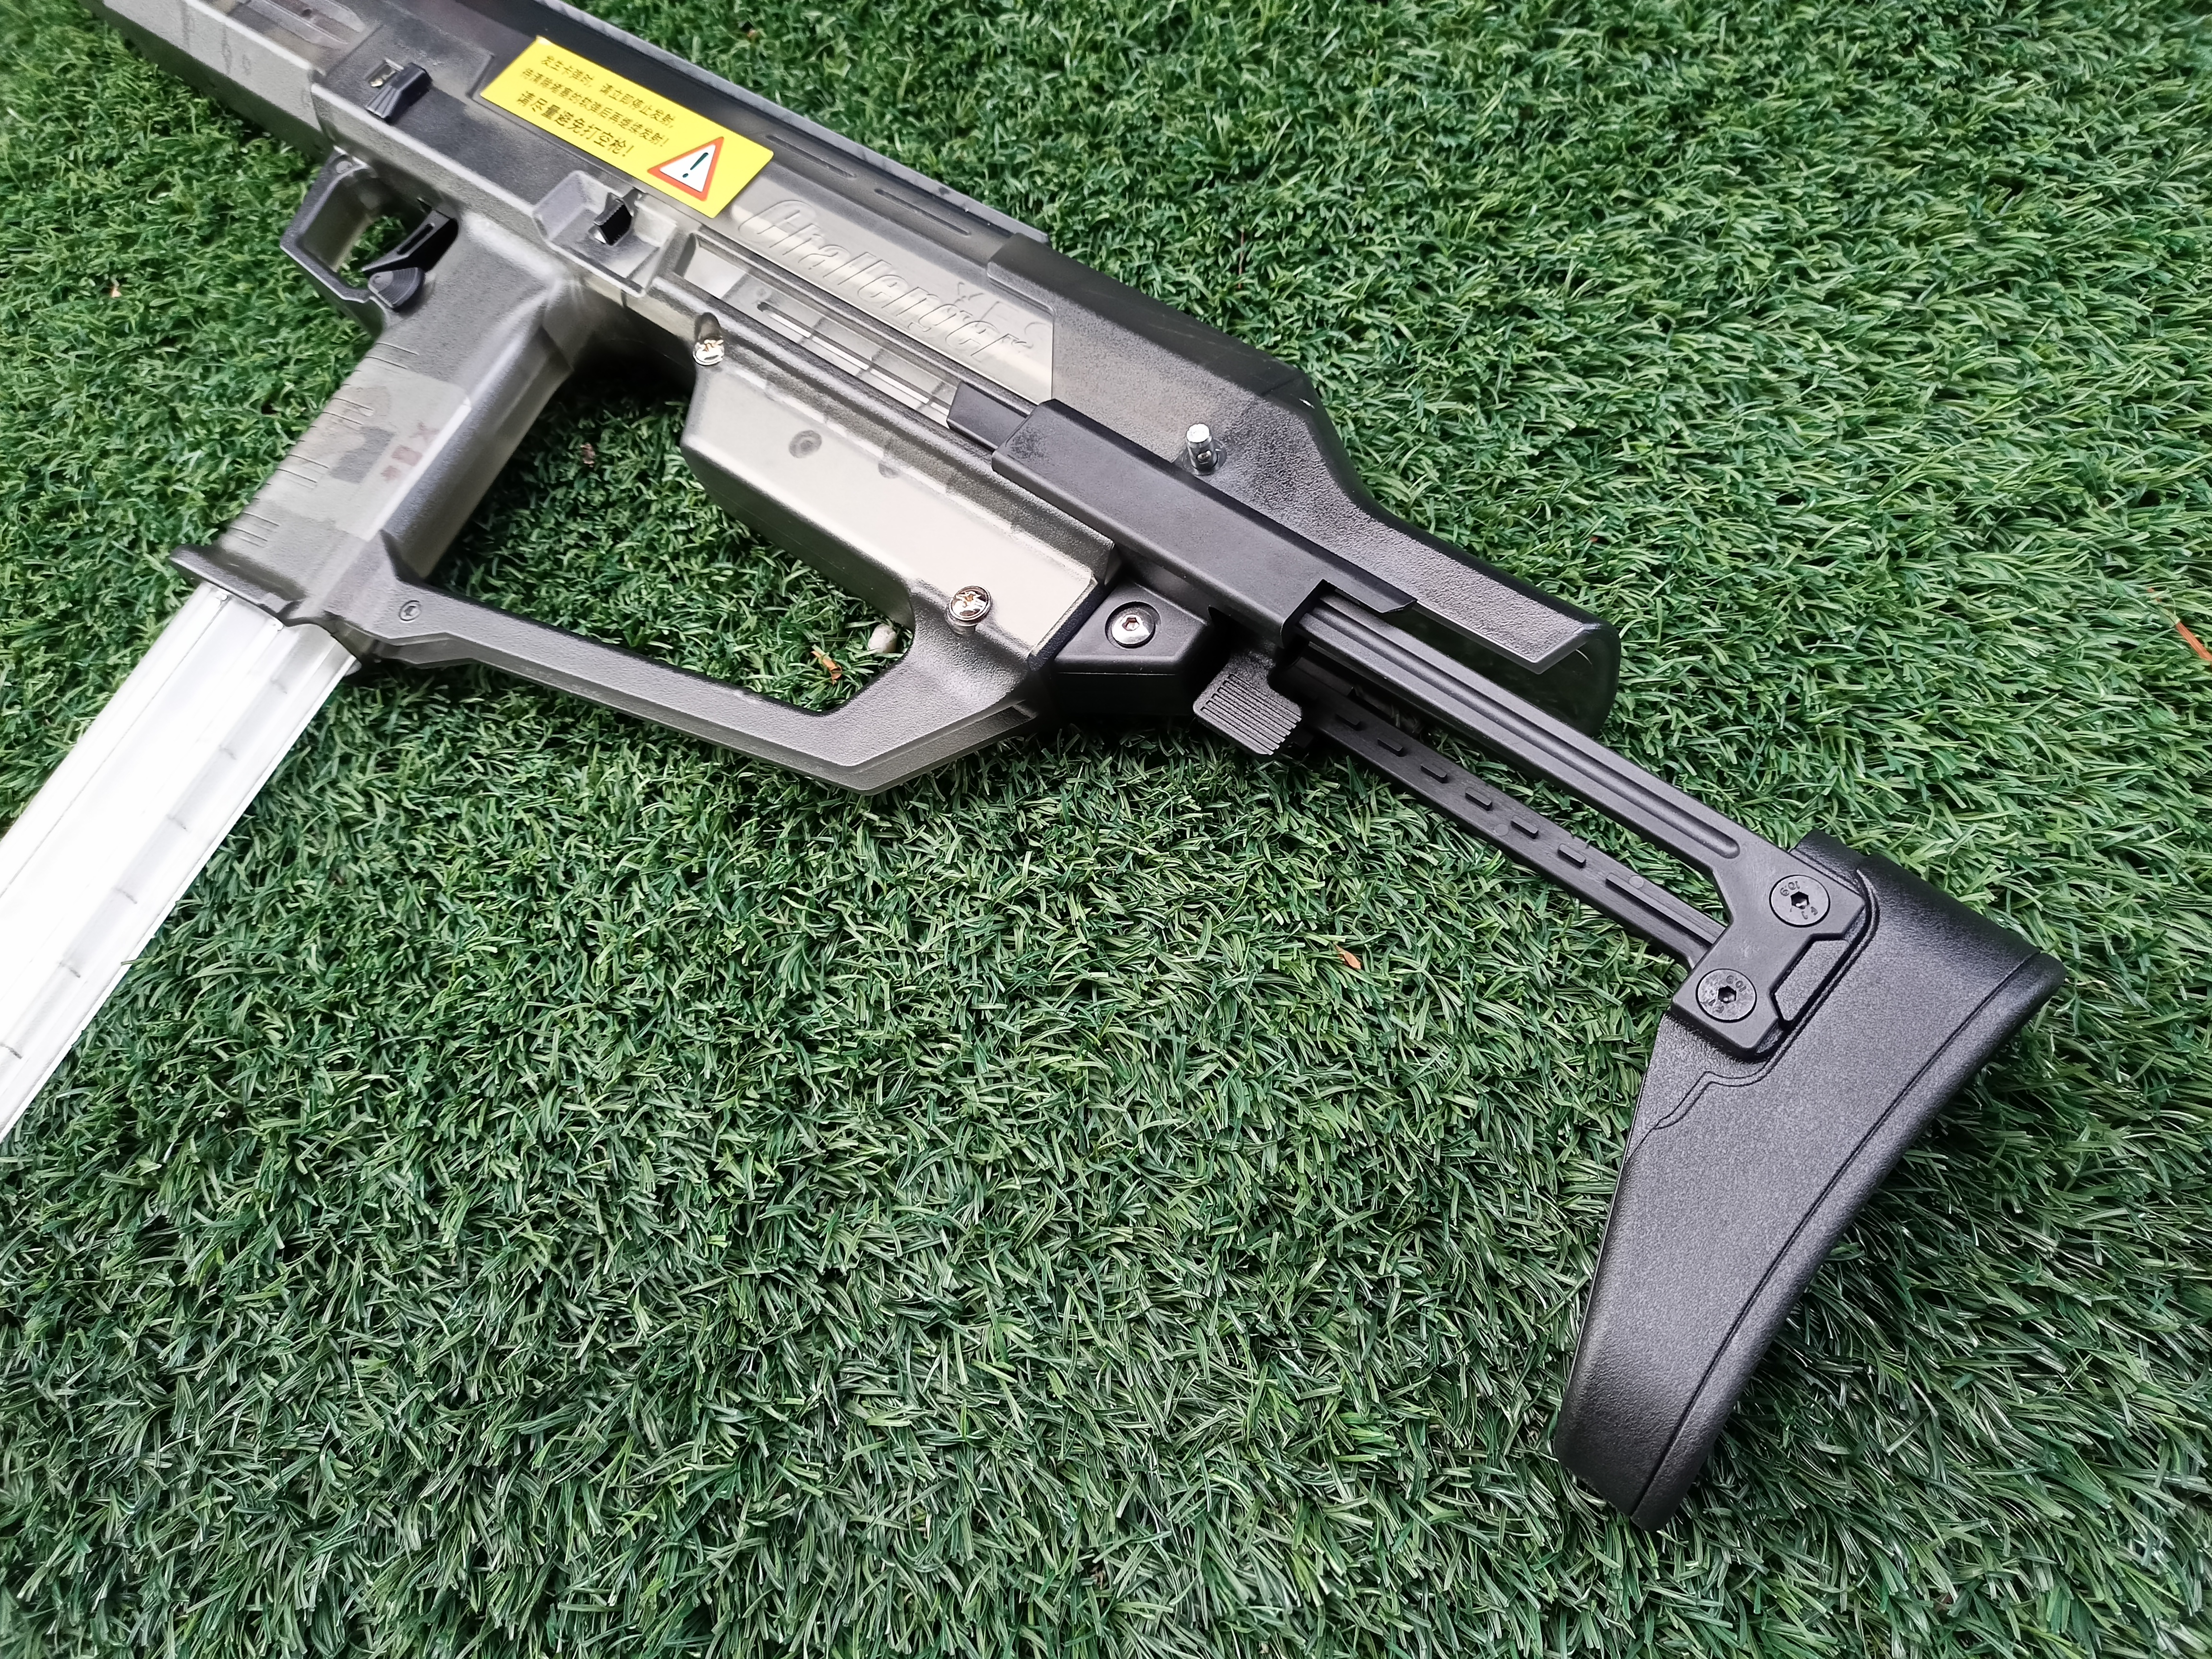
To the buttstock of the Challenger Mk3 you will find a paddle that you can swing either way to adjust the buttstock, good and intuitive design.
The buttstock length can be adjusted in many steps. once it clicks into place it is very solid and it cannot be collapse or extended.
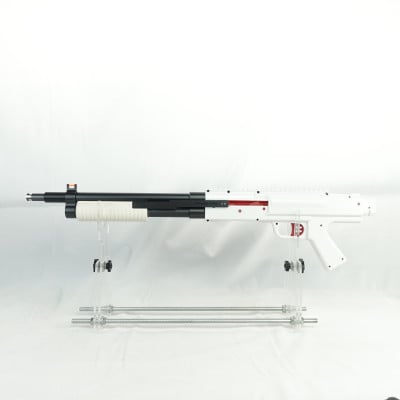
This is the buttstock fully collapsed.
Fully extended. Though, if you can already noticed, at fully extended position, you most probably cannot reach the cheek rest comfortably unless you are a giraffe, or a horse, or whatever.
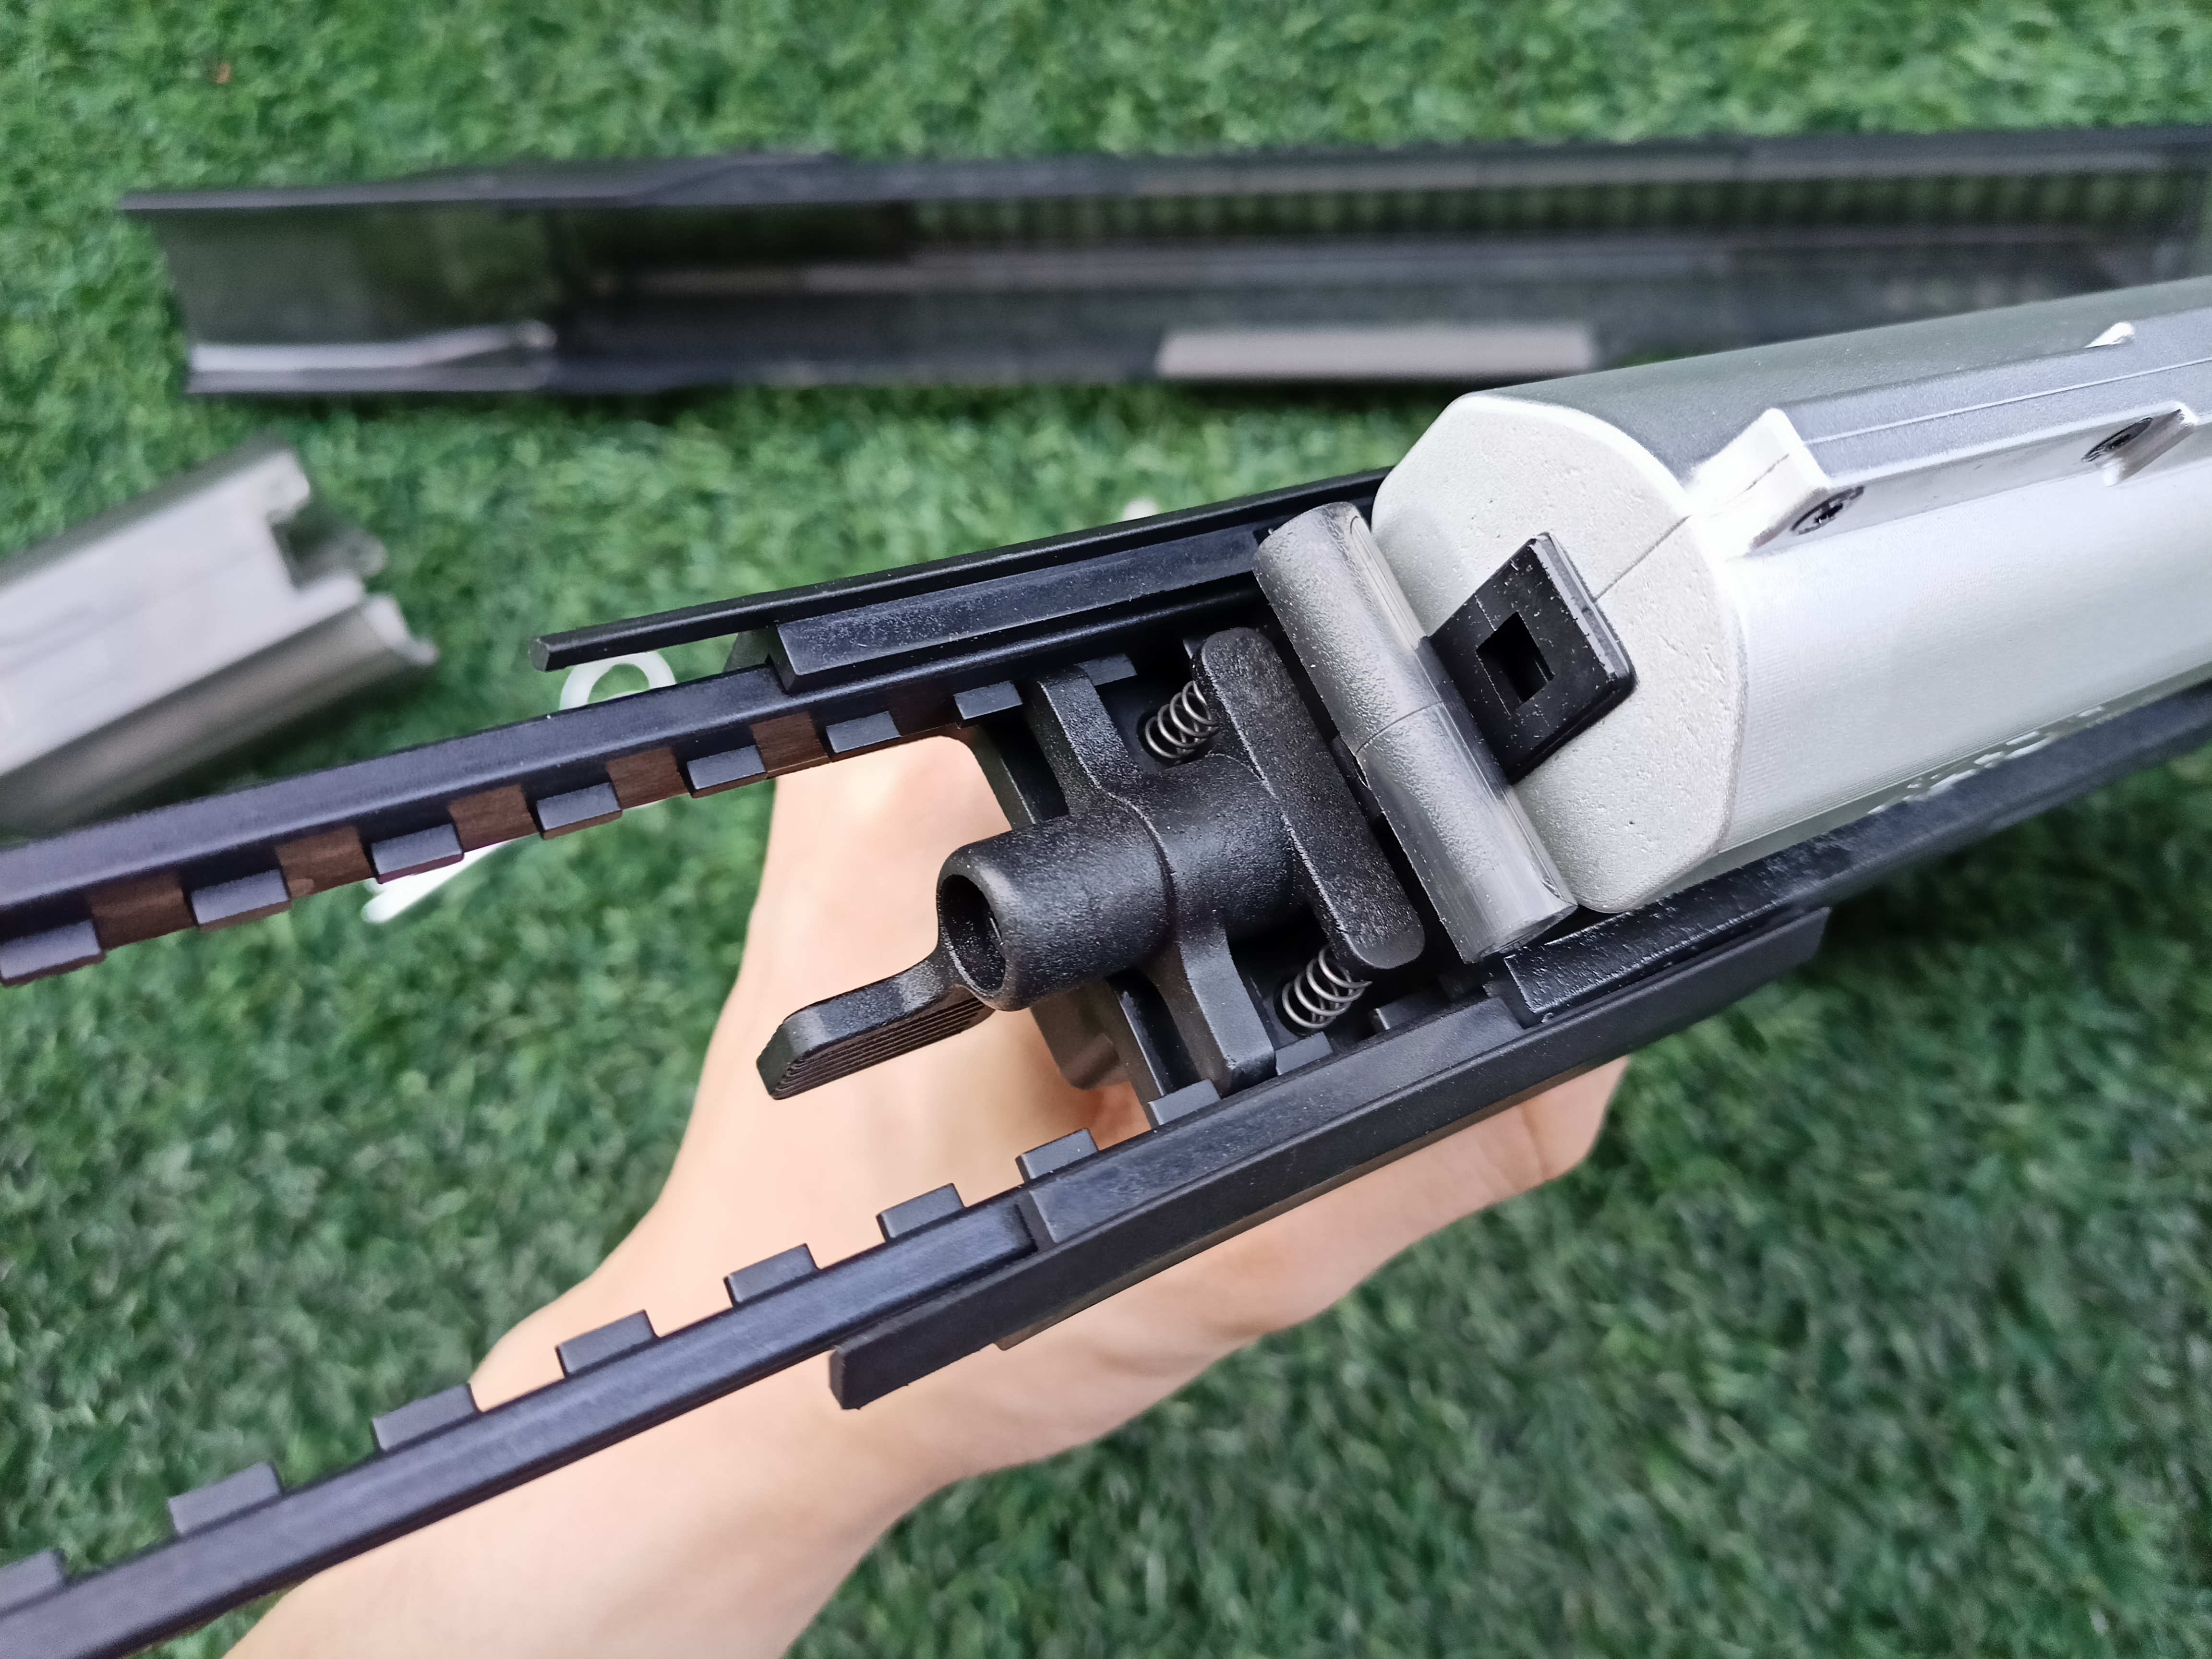
Now on to the other side of the blaster, probably the highlight of the Challenger Mk3, the functional Bolt with Charging handle. It is made of CNC aluminum alloy, anodized in silver color. The QWK logo is also visibly engraved on this side. Personally I feel they should have this this bolt ambidextrous and its probably very doable with some changes of design on the upper receiver but oh well charging the Challenger Mk3 AK style is pretty cool too!
Doesn't this look exciting? Yes, the bolt is functional because it works very similar to a real firearm or the Airsoft Gas Blowback Rifles. The bolt will cycle back and forth to chamber the dart from the magazine into the barrel. As a result the recoil is a fortunate by-product of the system. I call it fortunate because using this thing is a blast! The recoil sounded gimmick but it does offer a very tactile feeling when you pull the trigger, it's really amazing and it's something you need to experience for yourself to believe. The bolt will also lock back when the magazine is empty on the Pro version. This is achieved by a set of electronic system utilizing sensors and the magazine's follower that has a magnet embedded into it. You can also watch a short clip of it working with the upper removed and witness the glorious system in action!
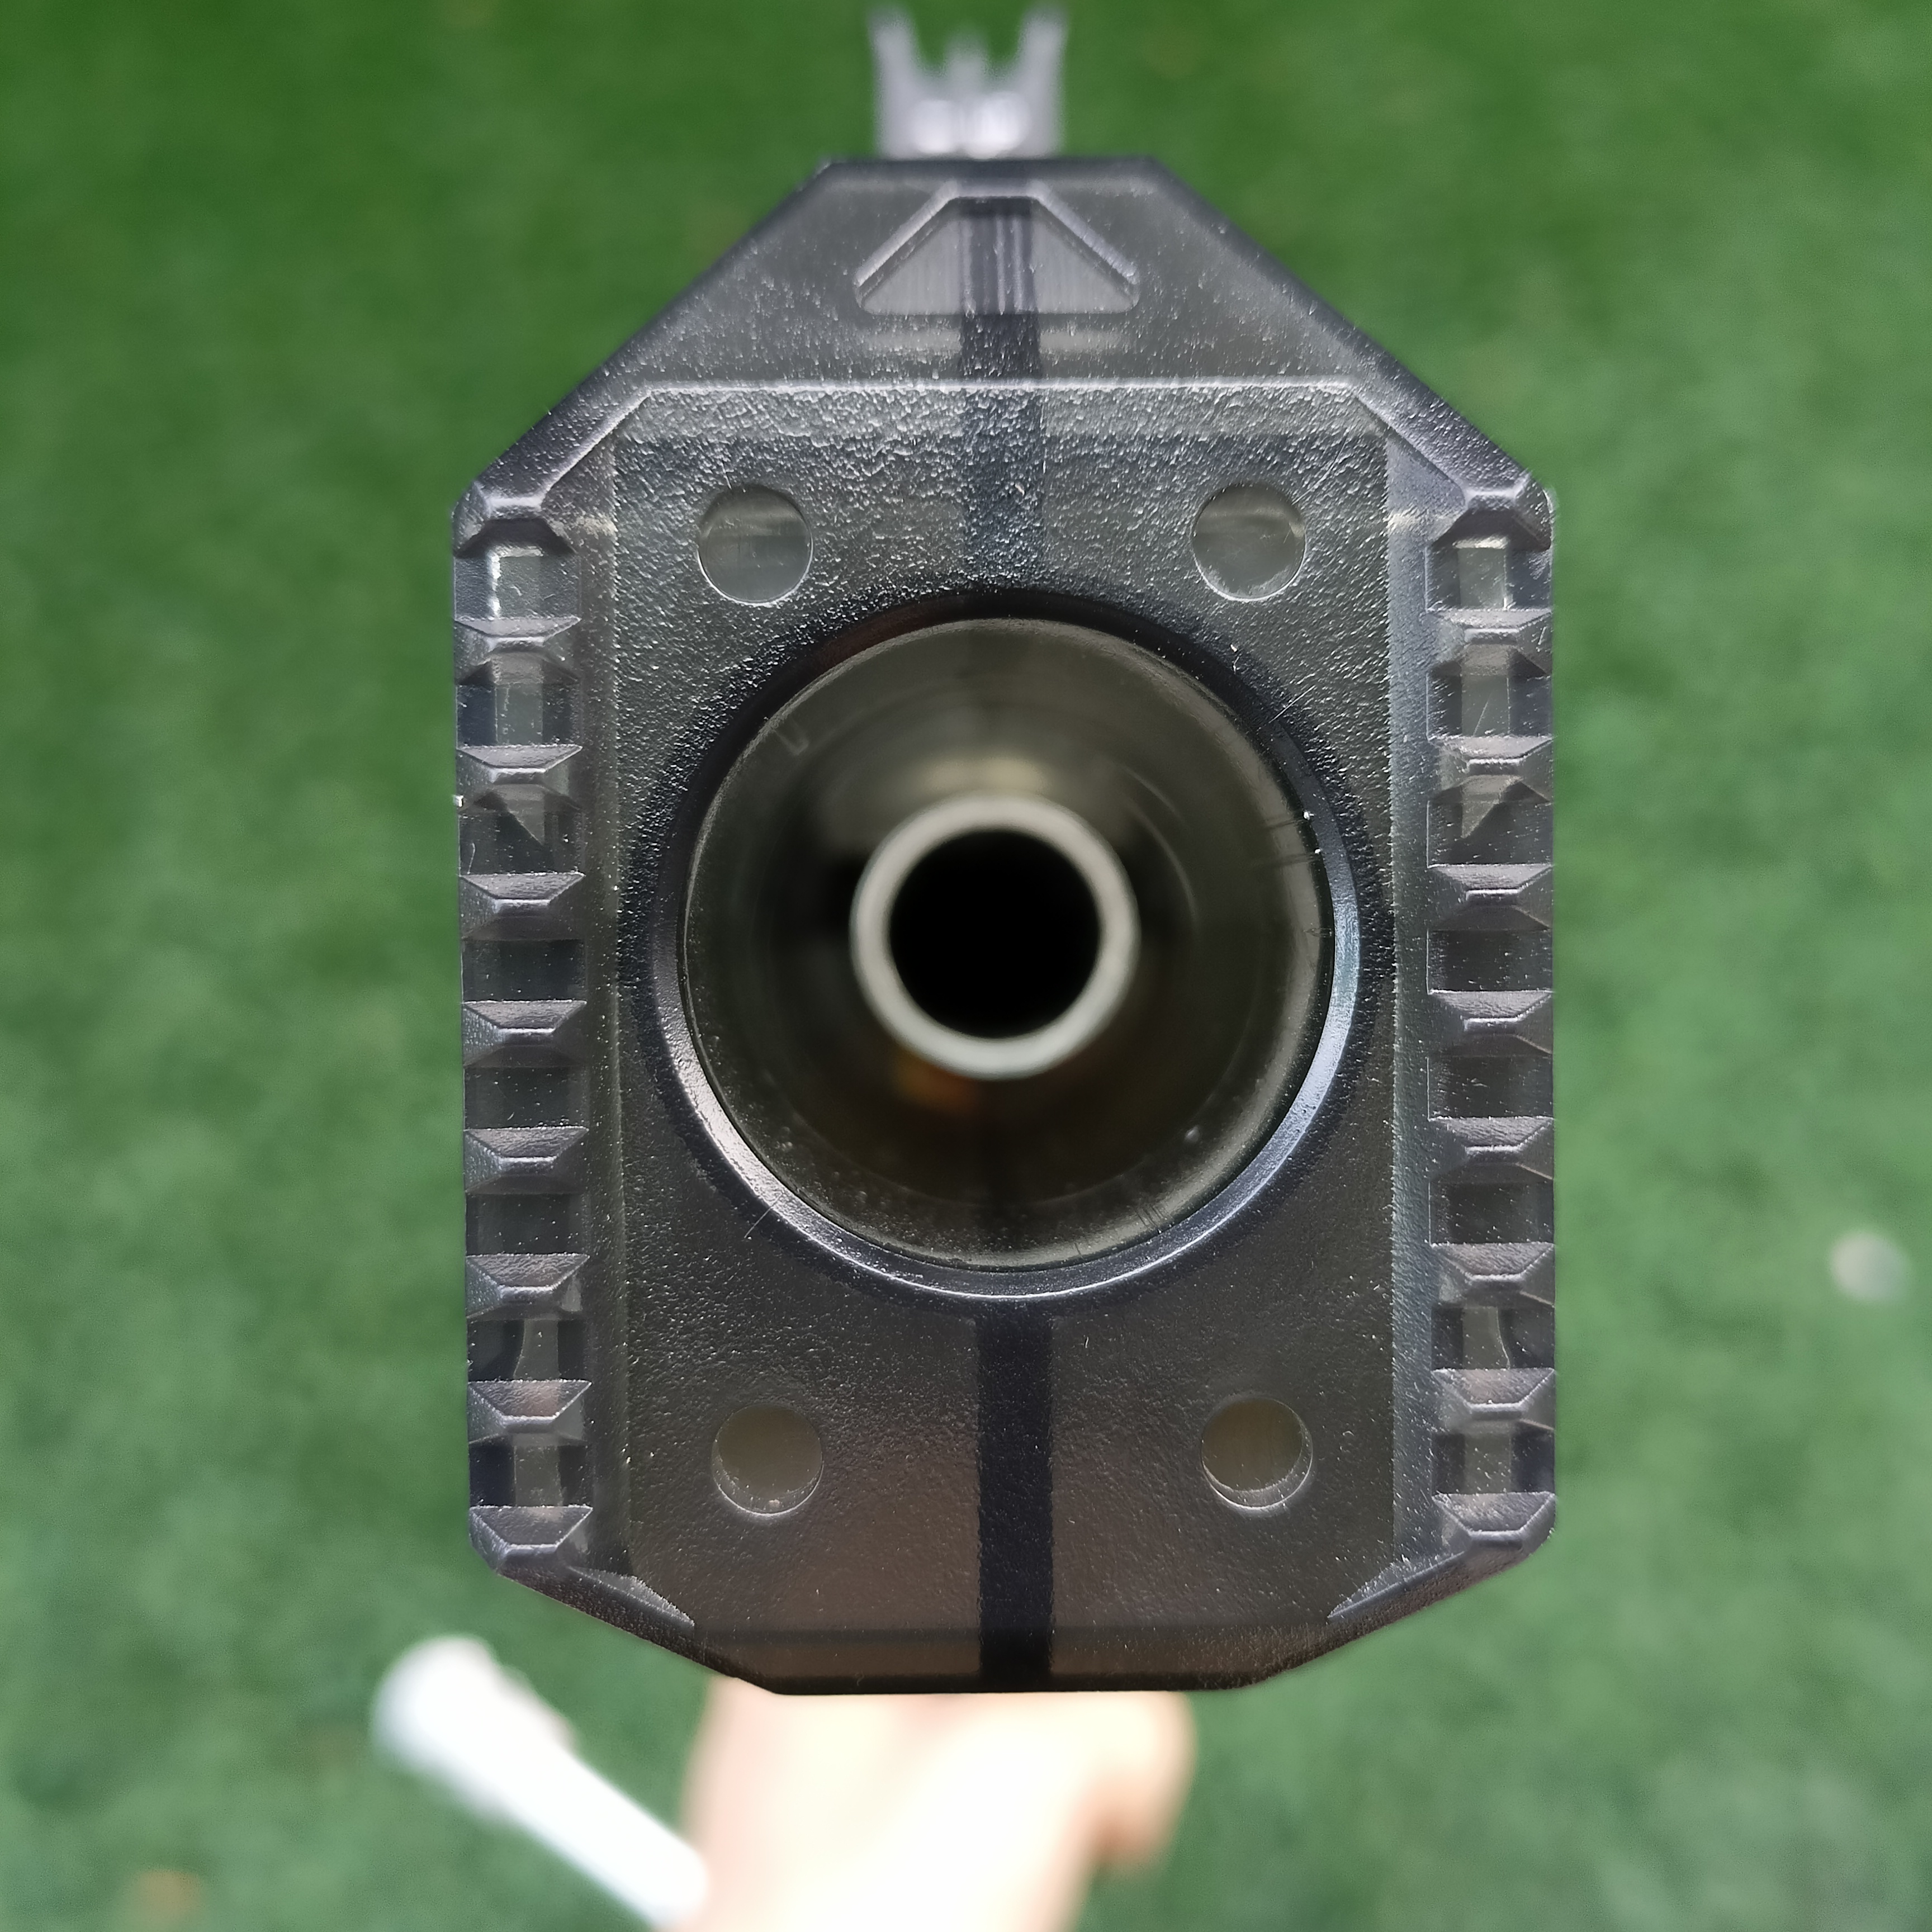

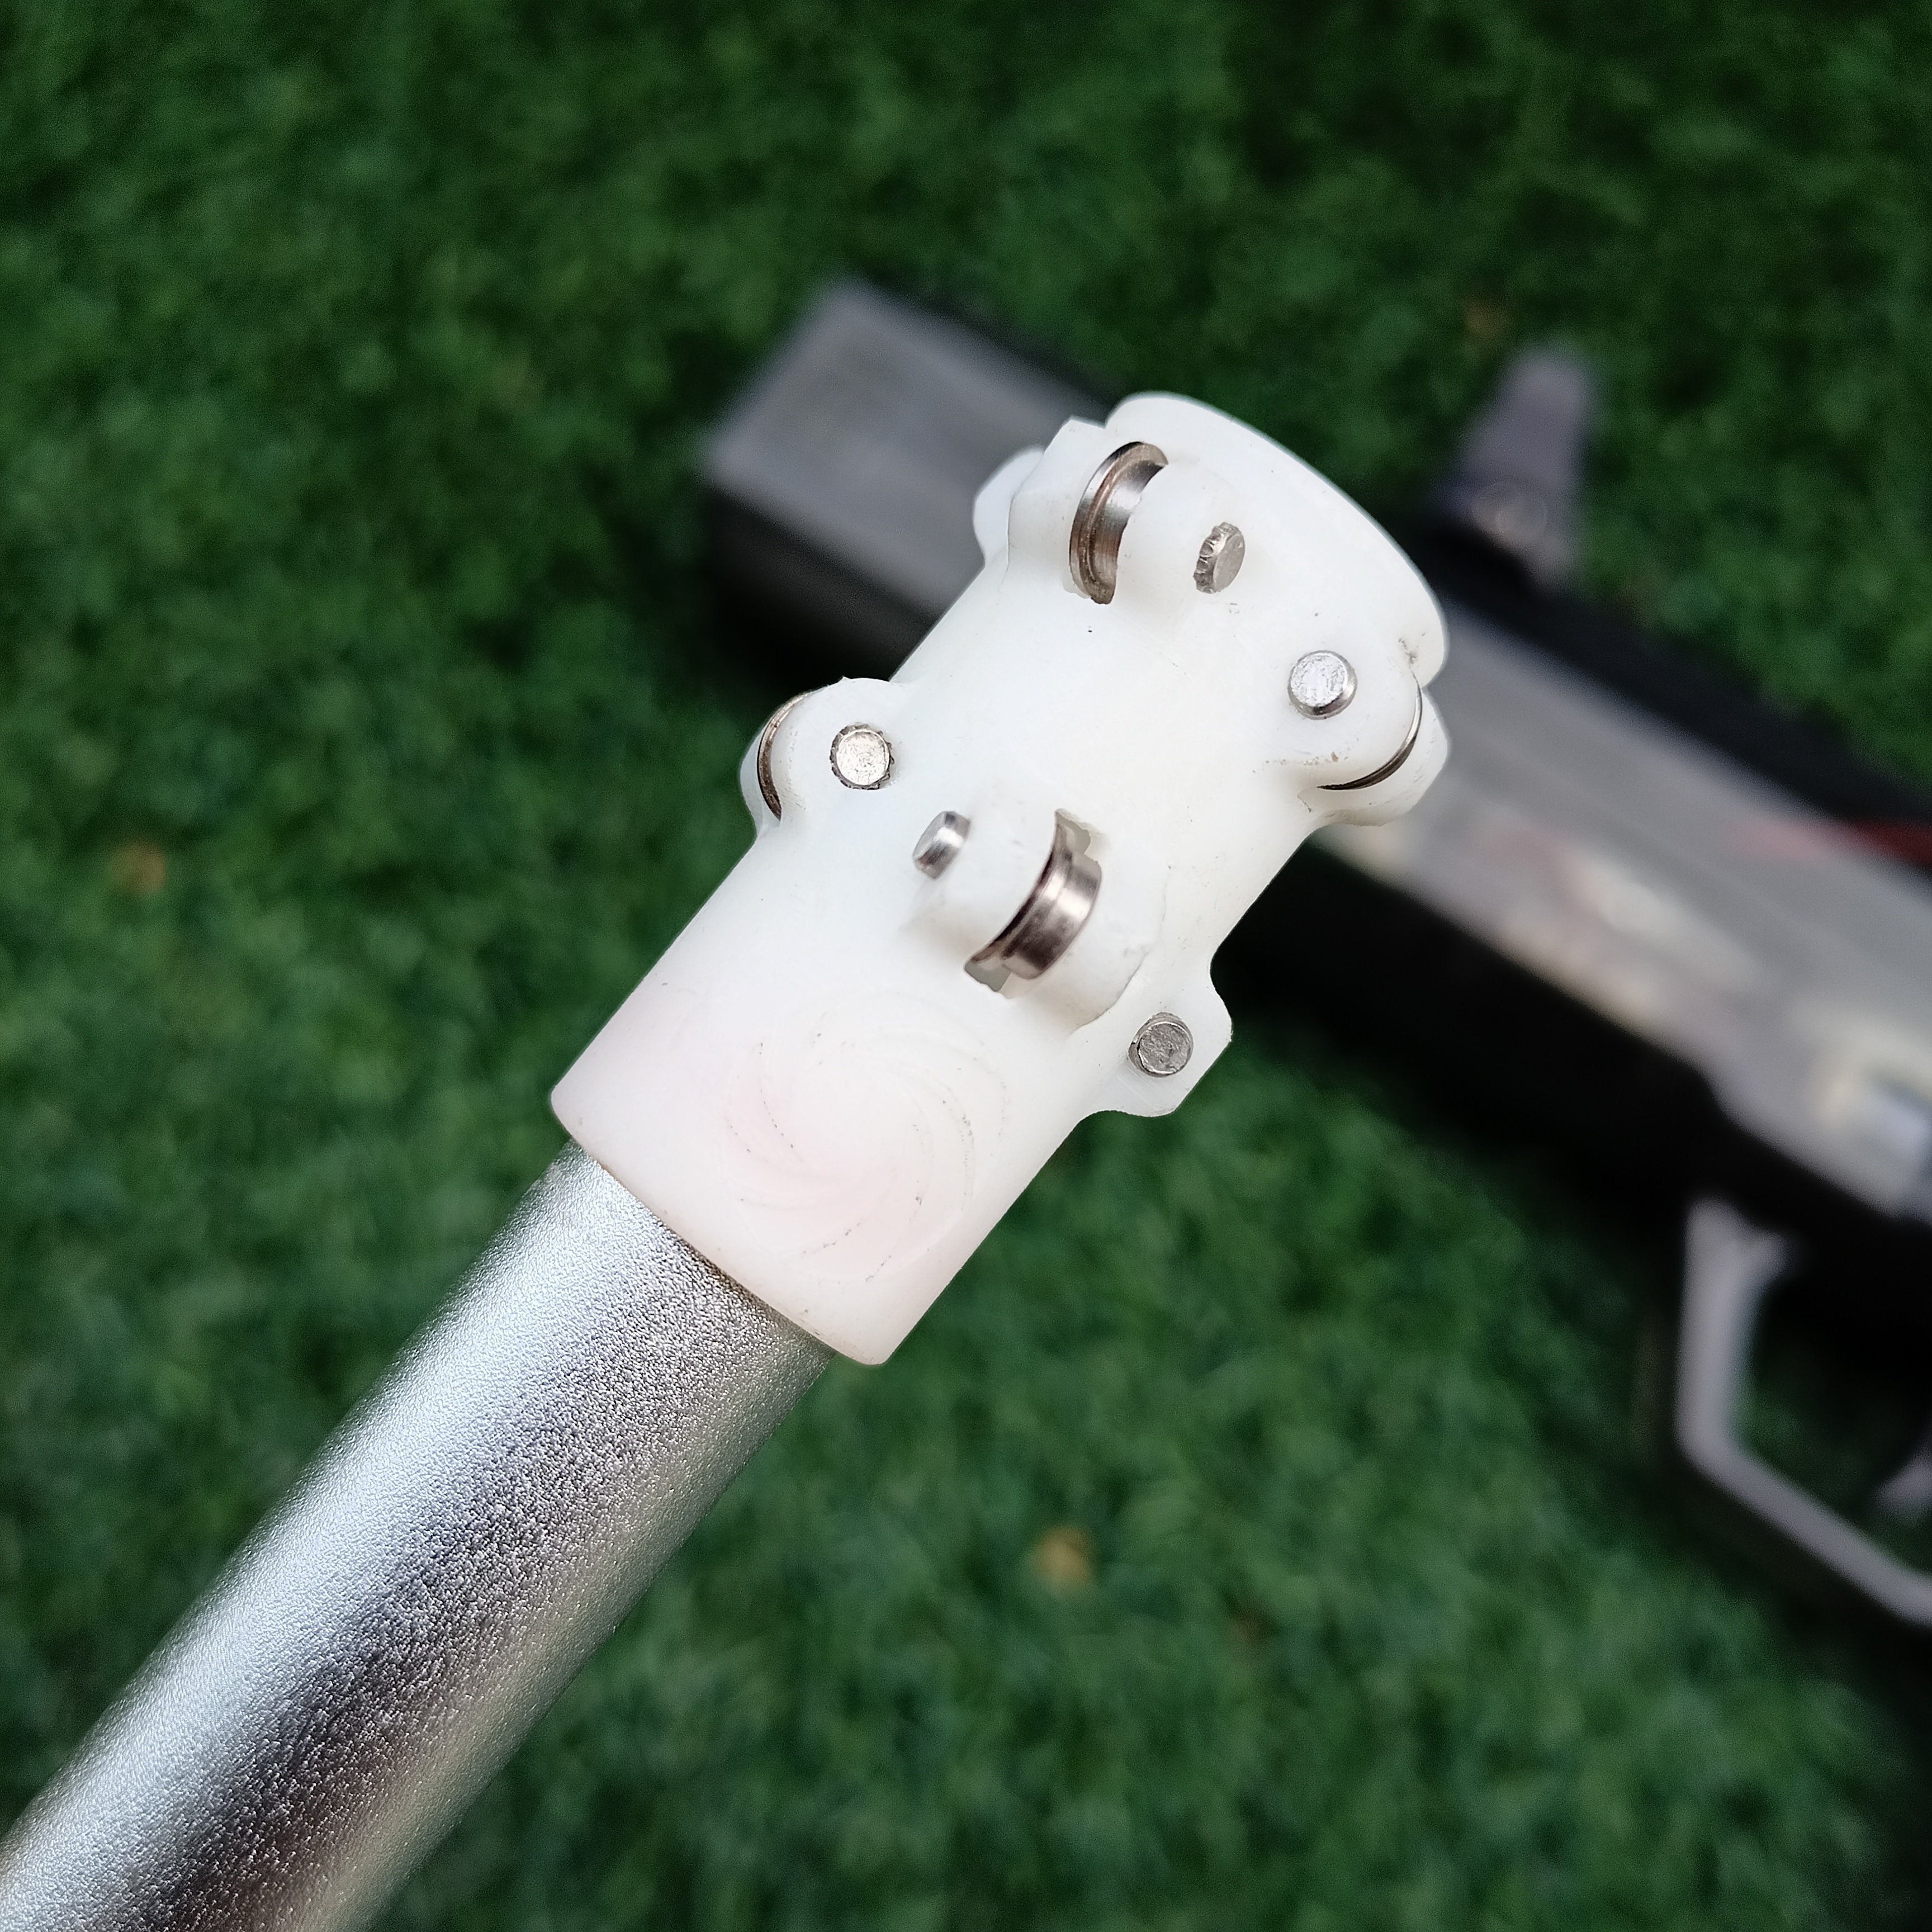
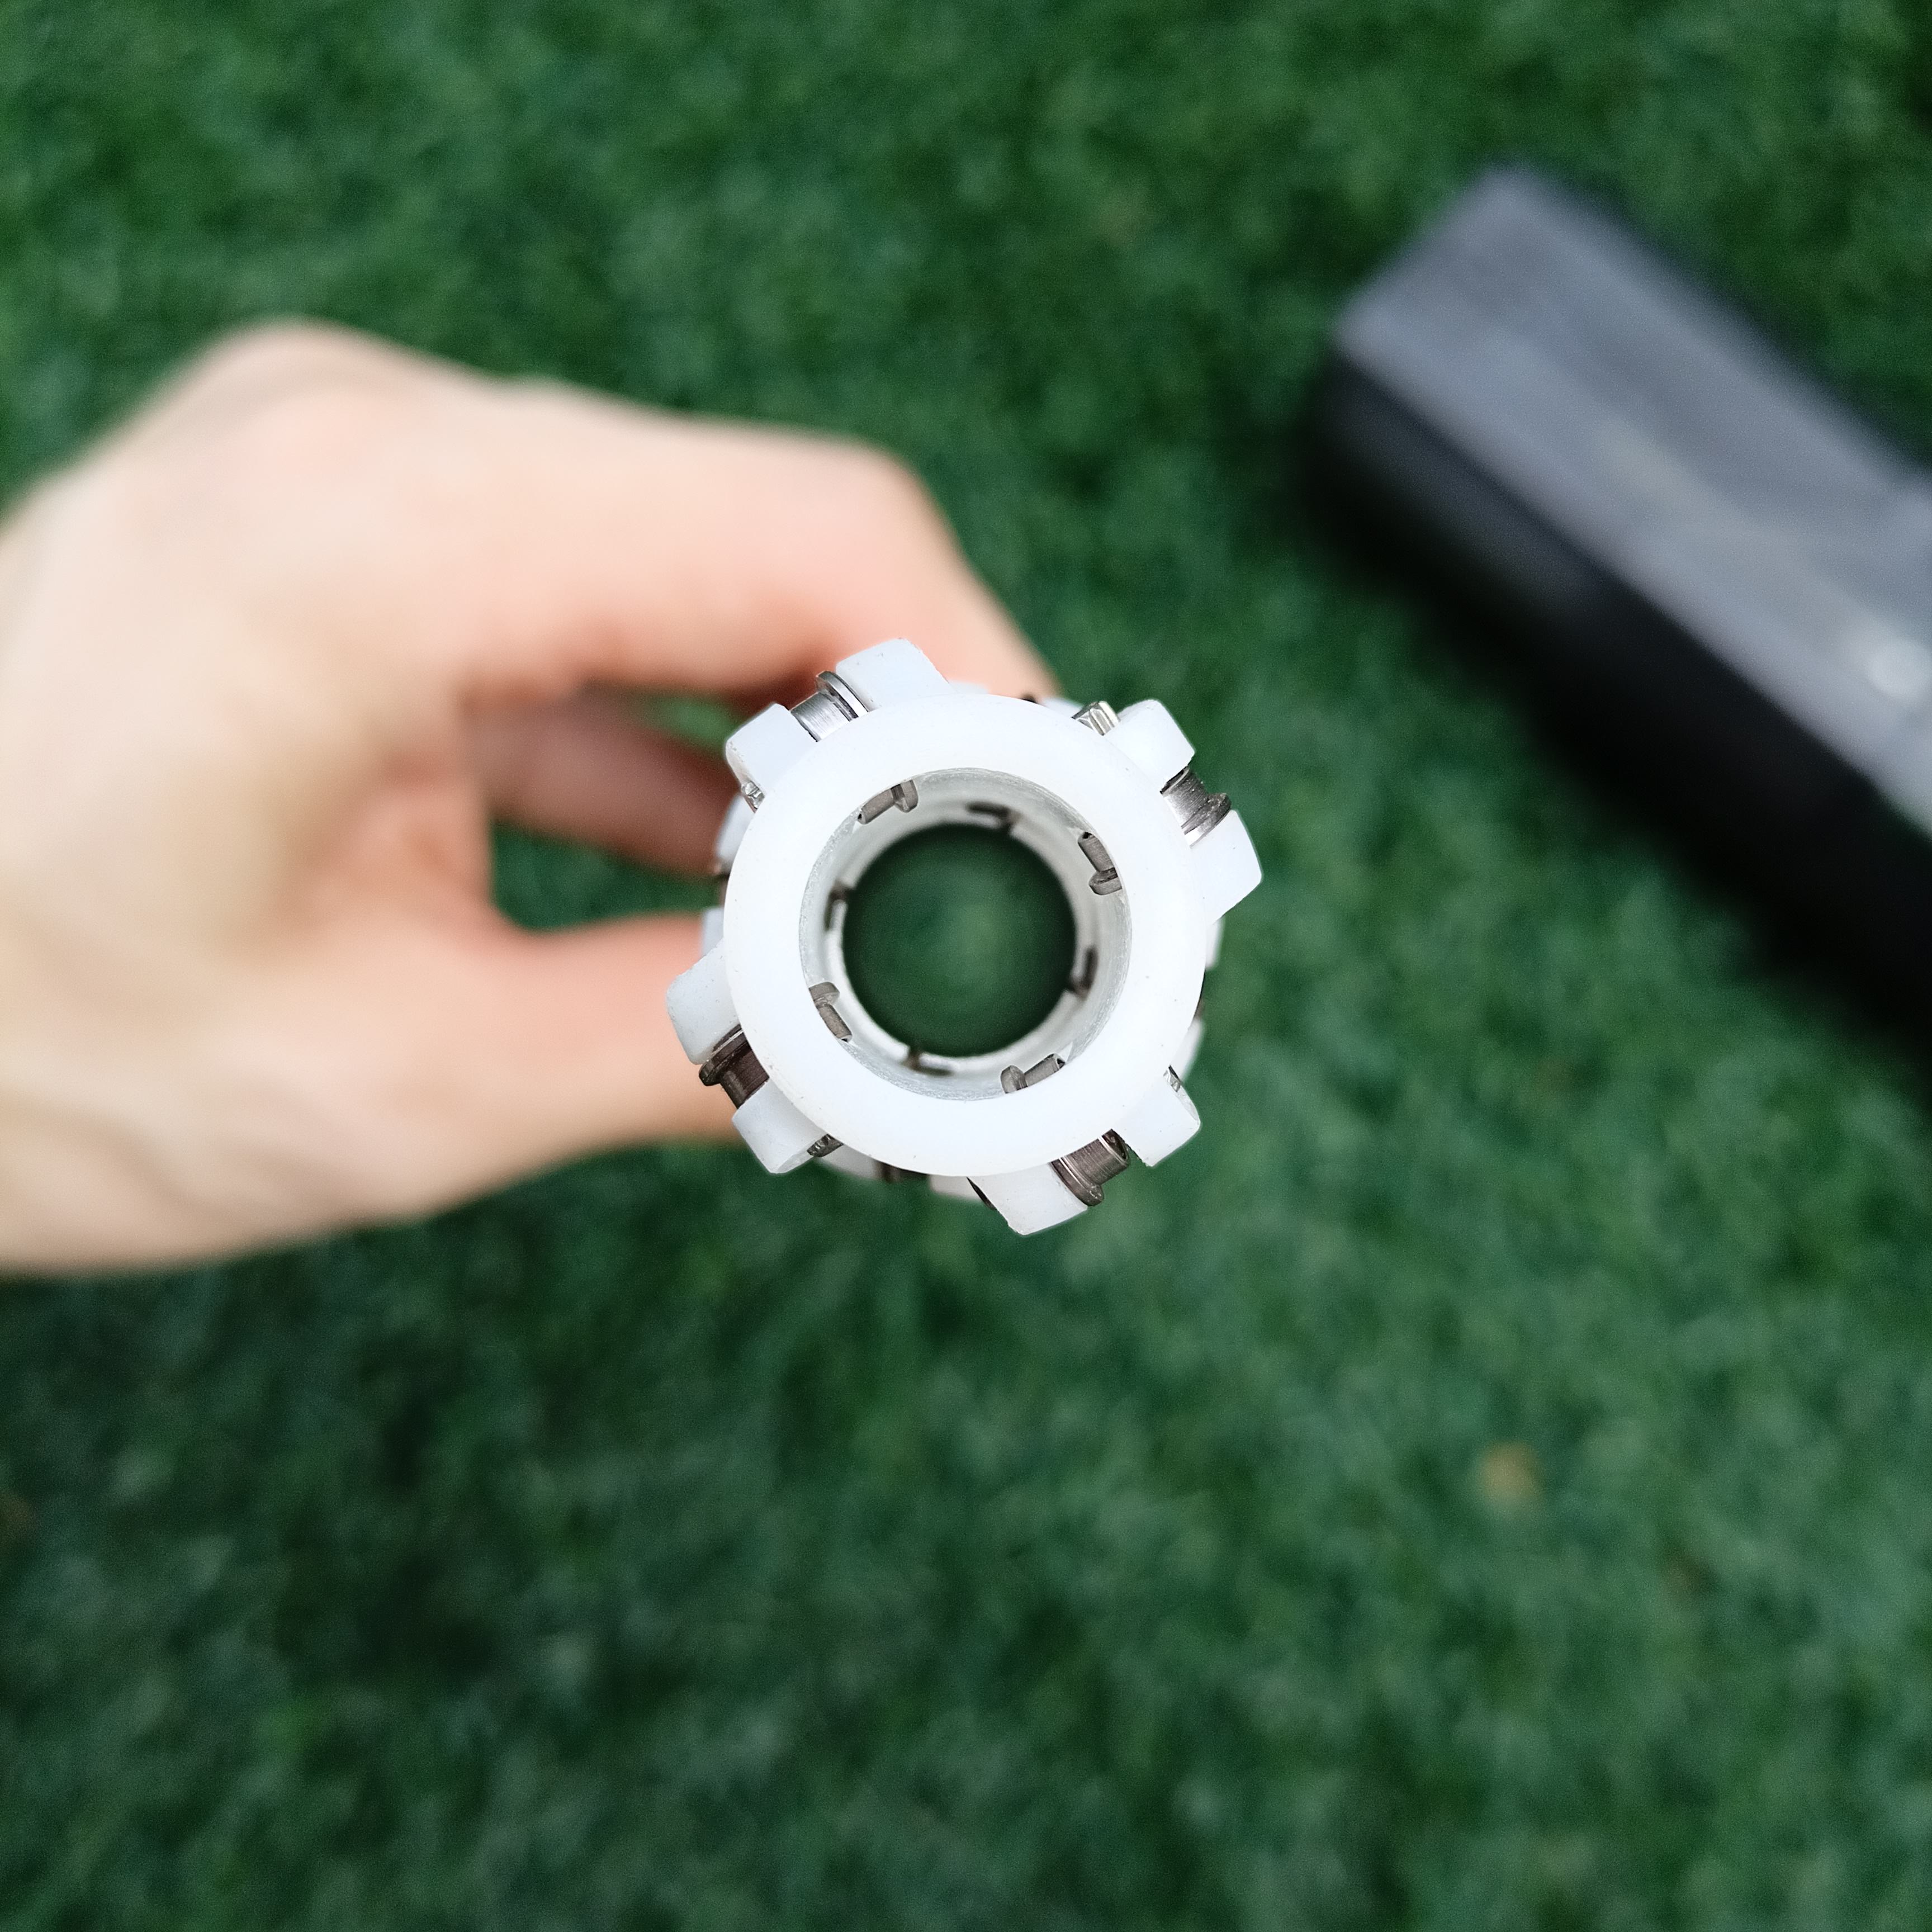
A latest SCAR muzzle design that utilizes 8 bearings will also be included with the Pro version. It is said to have the same accuracy improving property of fish line SCAR muzzle whilst keeping the FPS reduction to the minimum due to the bearing wheels. This is a rather new design for the SCAR muzzle device, and this particular bearing SCAR is made for the QWK's Black Dragon EPP Darts. I have tested a little bit and the accuracy is superb, HOWEVER, it will not work well with others dart such as the Worker Gen2 HE or Gen3, the dart will fish tail twirls/helicopter. We have notified this to QWK and they are also working on a bearing SCAR device meant for the Worker Gen2/Gen3 type dart. So that's that, it's really good to know that QWK is quick and very reactive to the user's experience and work on solutions.
Please allow me to say this first before we move on, I am EXTREMELY disappointed the Challenger Mk3 has no means of attaching a sling out of the box. I MEAN COME ON QWK. Fortunately there are plenty of ways to enable sling points to be mounted onto the blaster. We recommend the Worker screw on sling mount as it can be installed directly to the gear box screw pin and it is at a good position if you intend to use a one point sling. if you however prefer a 2 point sling, you can either attach a picatinny sling mount to the front side rail, or you can also screw the Worker Screw in sling mount directly into one of the screw hole meant for the picatinny rail. Thank god there is a solution for this or I'm gonna start drilling holes lol.
And that is it for the external of the blaster, let's take the upper off and check what's underneath.
To do this, simply pull out the 2 take down pins and slide the upper receiver off. This is a very easy task but you need to pay attention on how you slide the upper off or you risk damaging the pin hole on the receiver. Particularly the pin hole on the front of the lower receiver, it's rather thin after all. In the unfortunate event you did crack or damage yours, rest assured that QWK will be making spares upper/lower available as spare part later on.
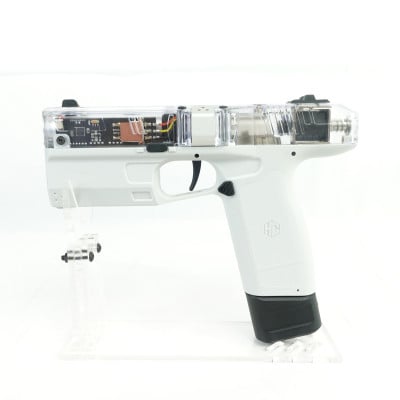
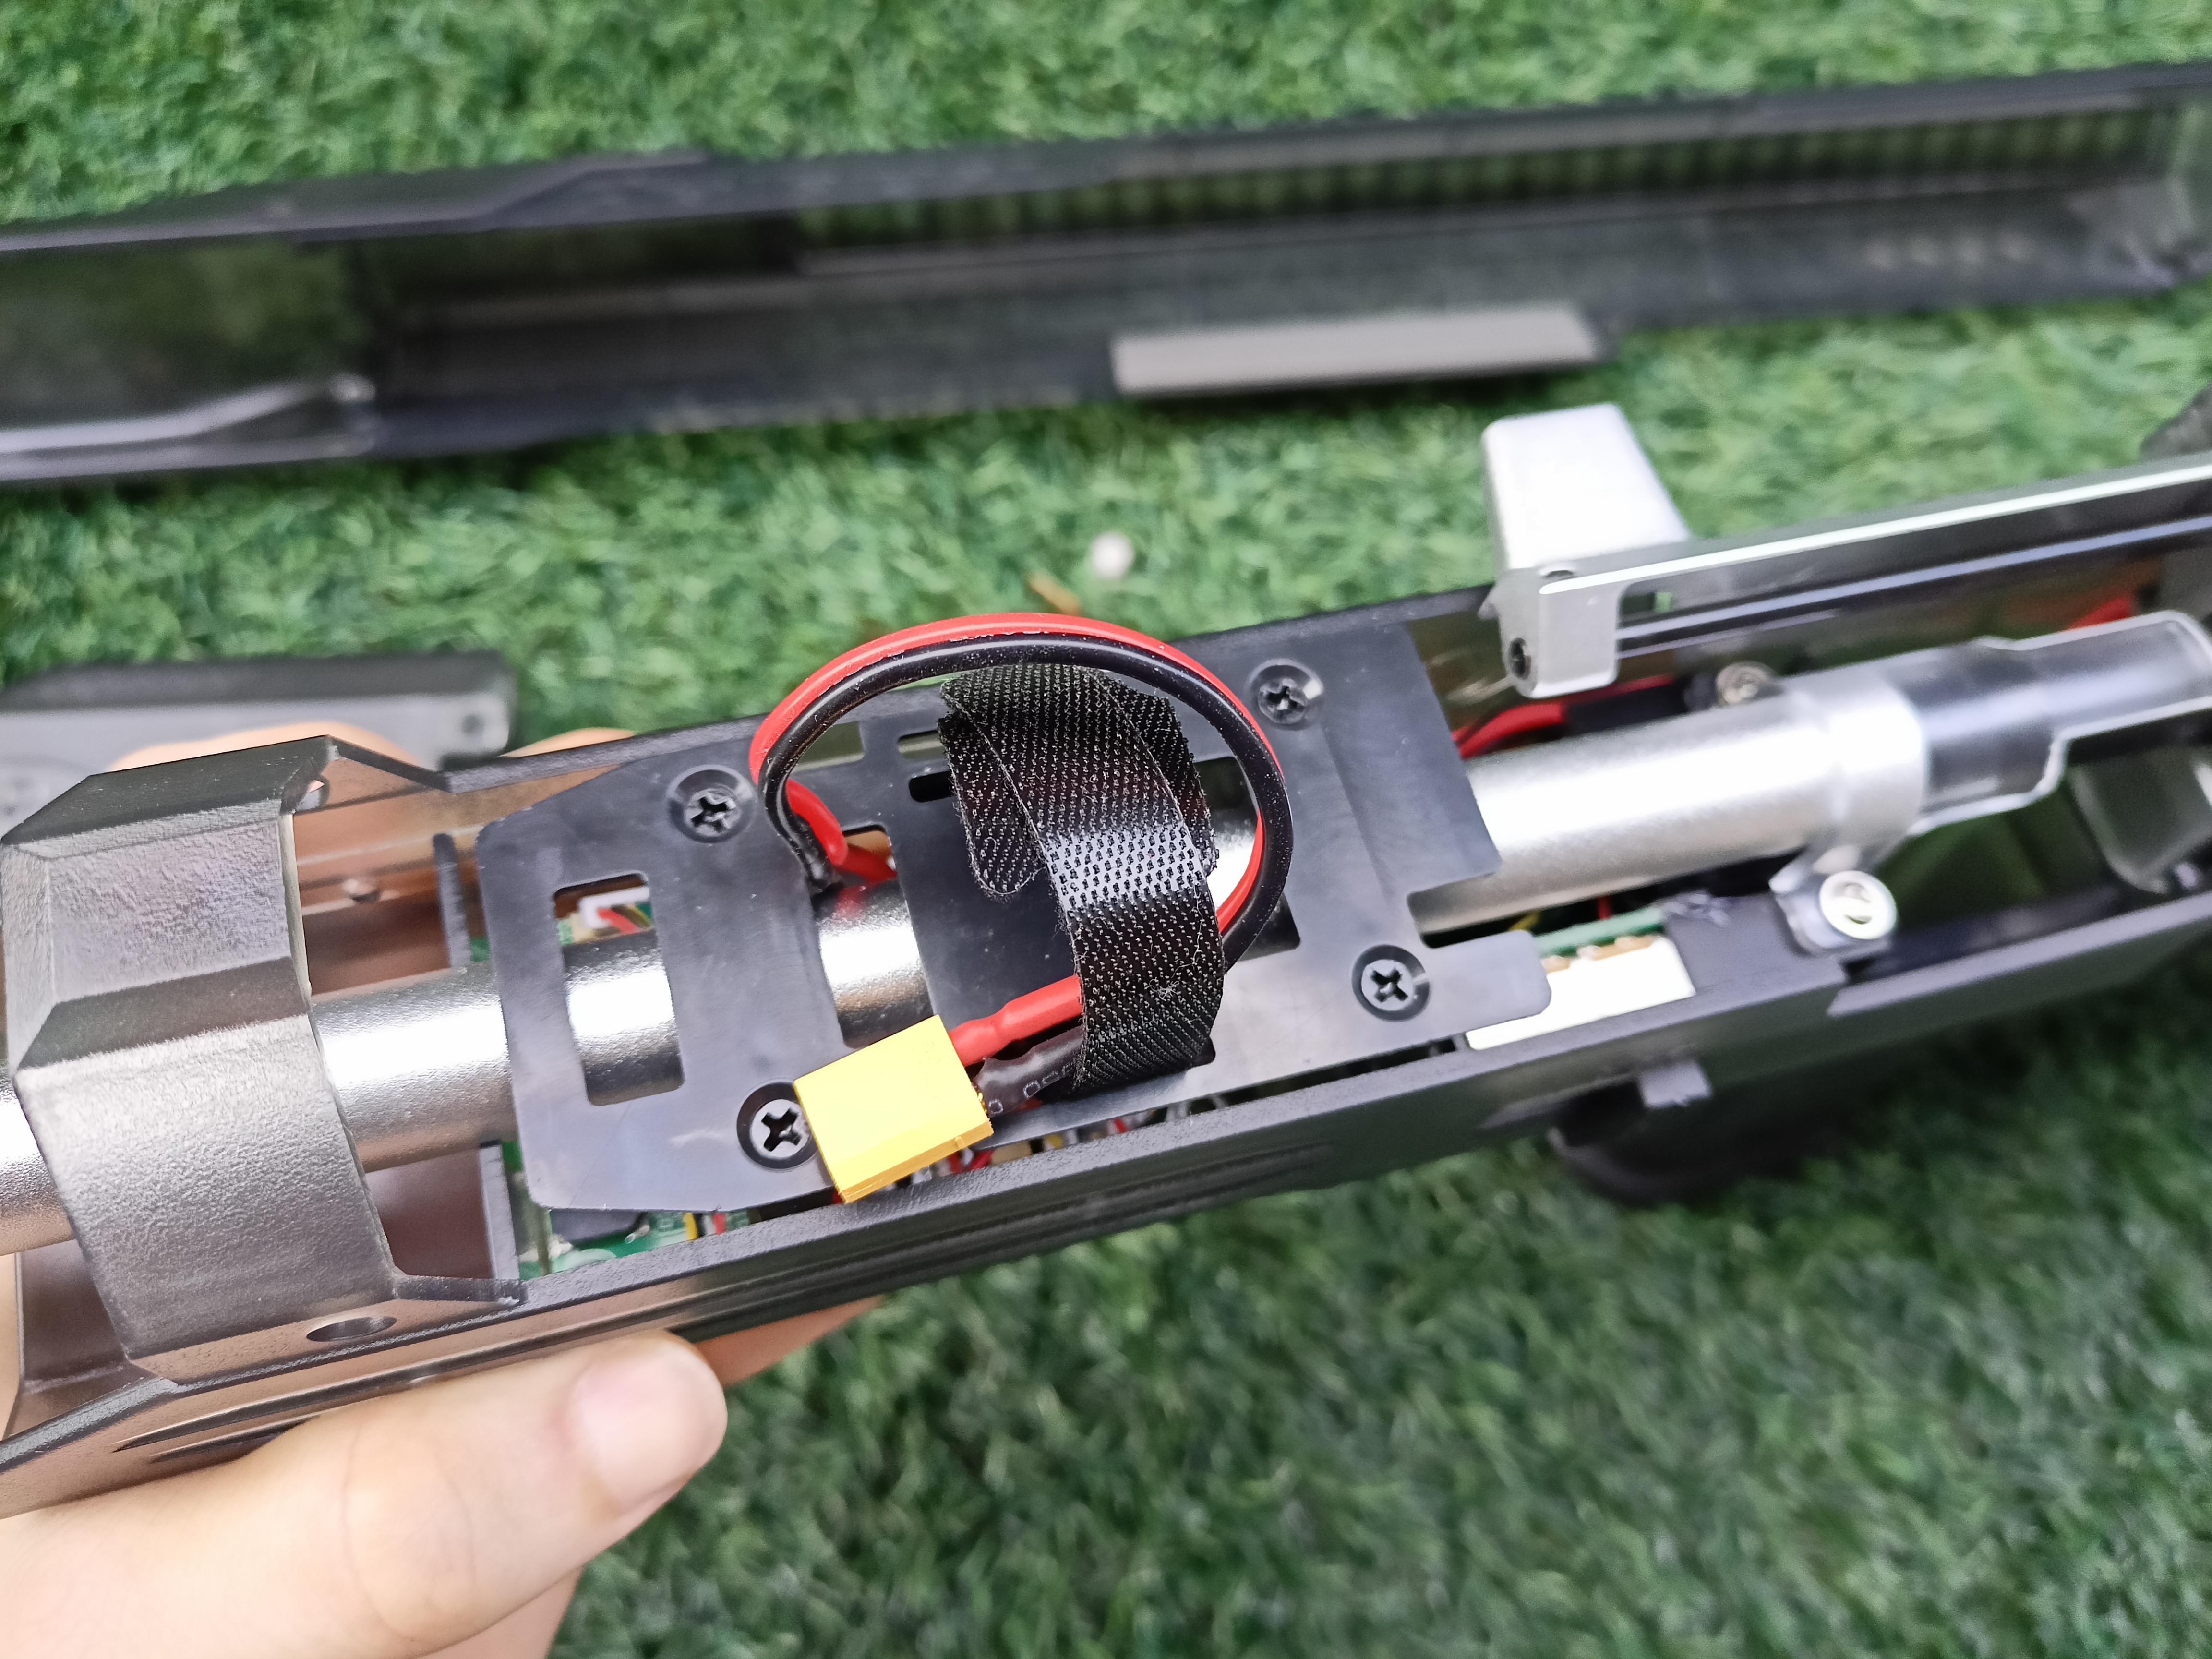
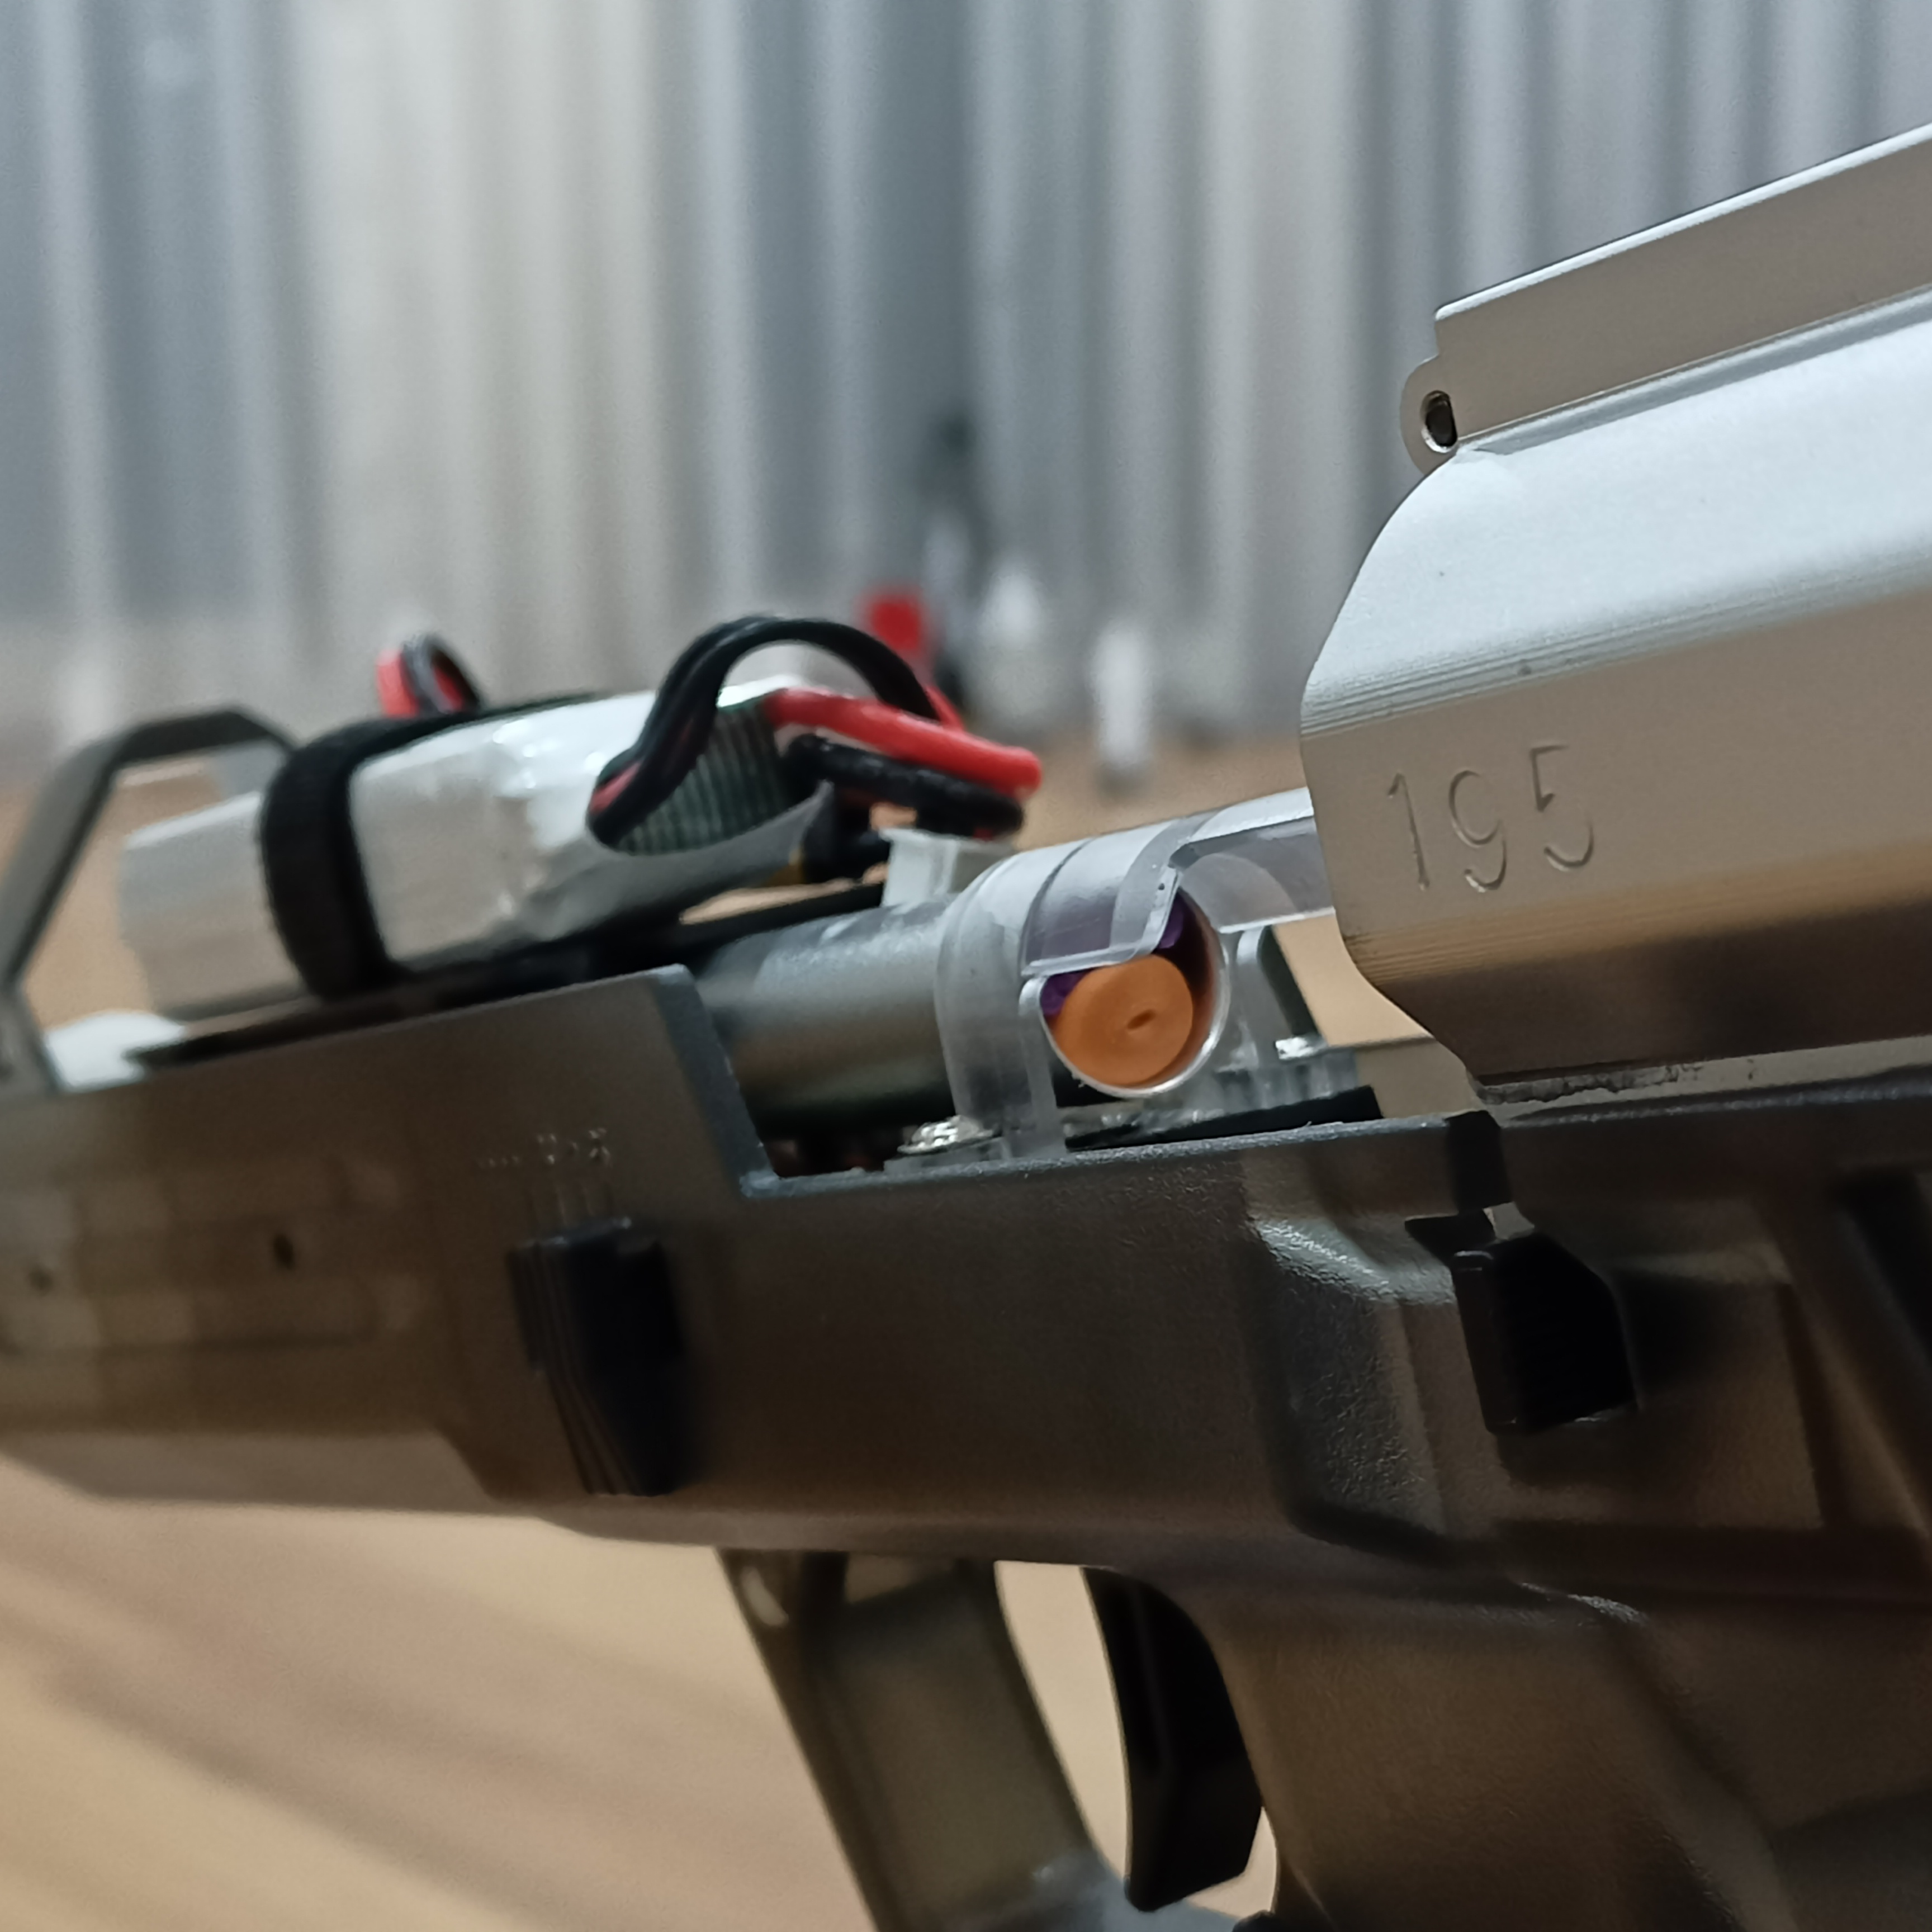
Once the upper is removed, you will see the battery compartment with a velcro strap to secure the battery. The Challenger MK3 uses a XT30 connector for the LiPo battery. You will also see the bolt, breech, dart gate and the upper portion of the huge gearbox. I particularly love testing the Mk3 with the upper removed because it allows me to see clearly how the breech moves back and forth chambering darts into the barrel, it's super satisfying for some odd reason.
While we have the upper taken off, we can check it out too, and can we just agree that such simple design will encourage more 3D prints designer to design more awesome looking upper for the MK3?
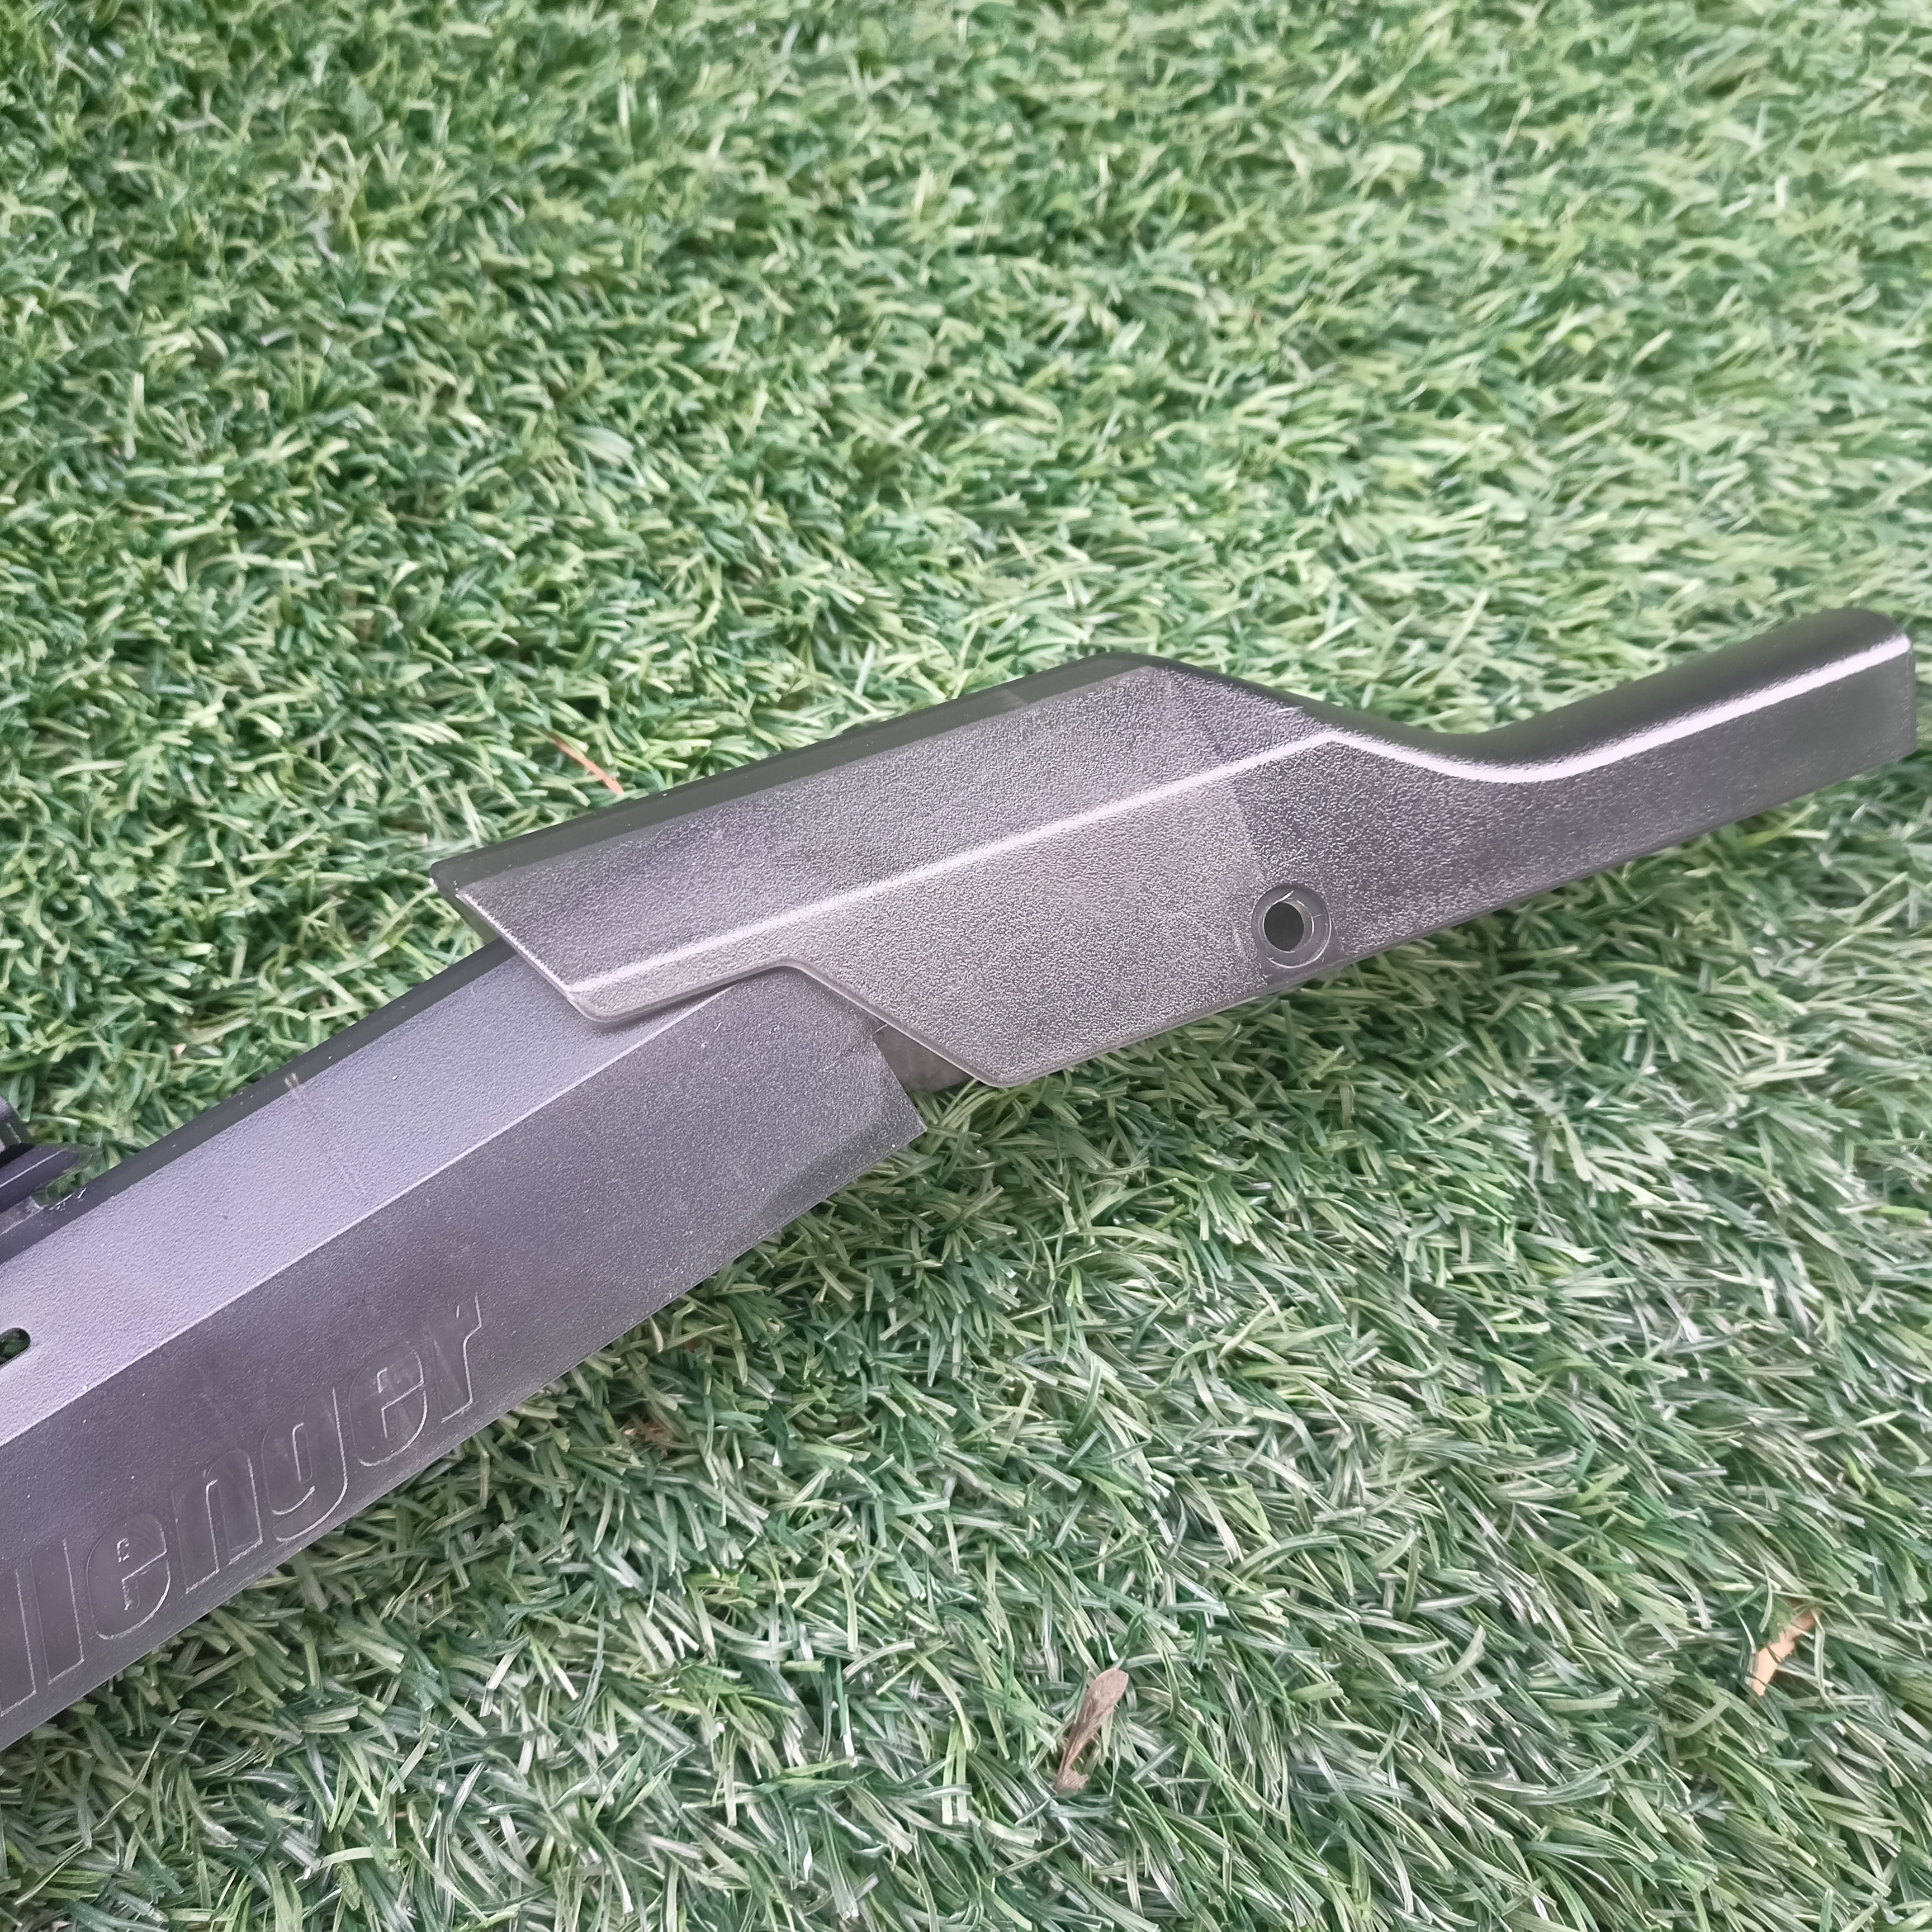
The cheek rest is also a separate piece where the pin hole is located at, great news too if you need a longer cheek rest piece that can be a 3D printed option now. Maybe QWK will make a longer cheek rest piece in the future, who knows?
Please bear in mind the battery compartment space of the Challenger Mk3 is quite limited so becareful with the battery you purchase for it. We recommends 3S LiPo with dimension no larger than 75 x 25 x 20mm (Length x Width x Height).
This battery compartment is held down by 4 screws which also serves the purpose of securing the inner barrel, and it also act as a cover for the electronics underneath.
The electronics goodies located right below the battery compartment cover. I'm not going to pretend like I know exactly what these electronic does but all these are the electronic and MOSFET that control the blaster firing system. It has a board for battery monitoring/overdischarge protection, a main MOSFET board, and another one for the trigger/fire select and etc.
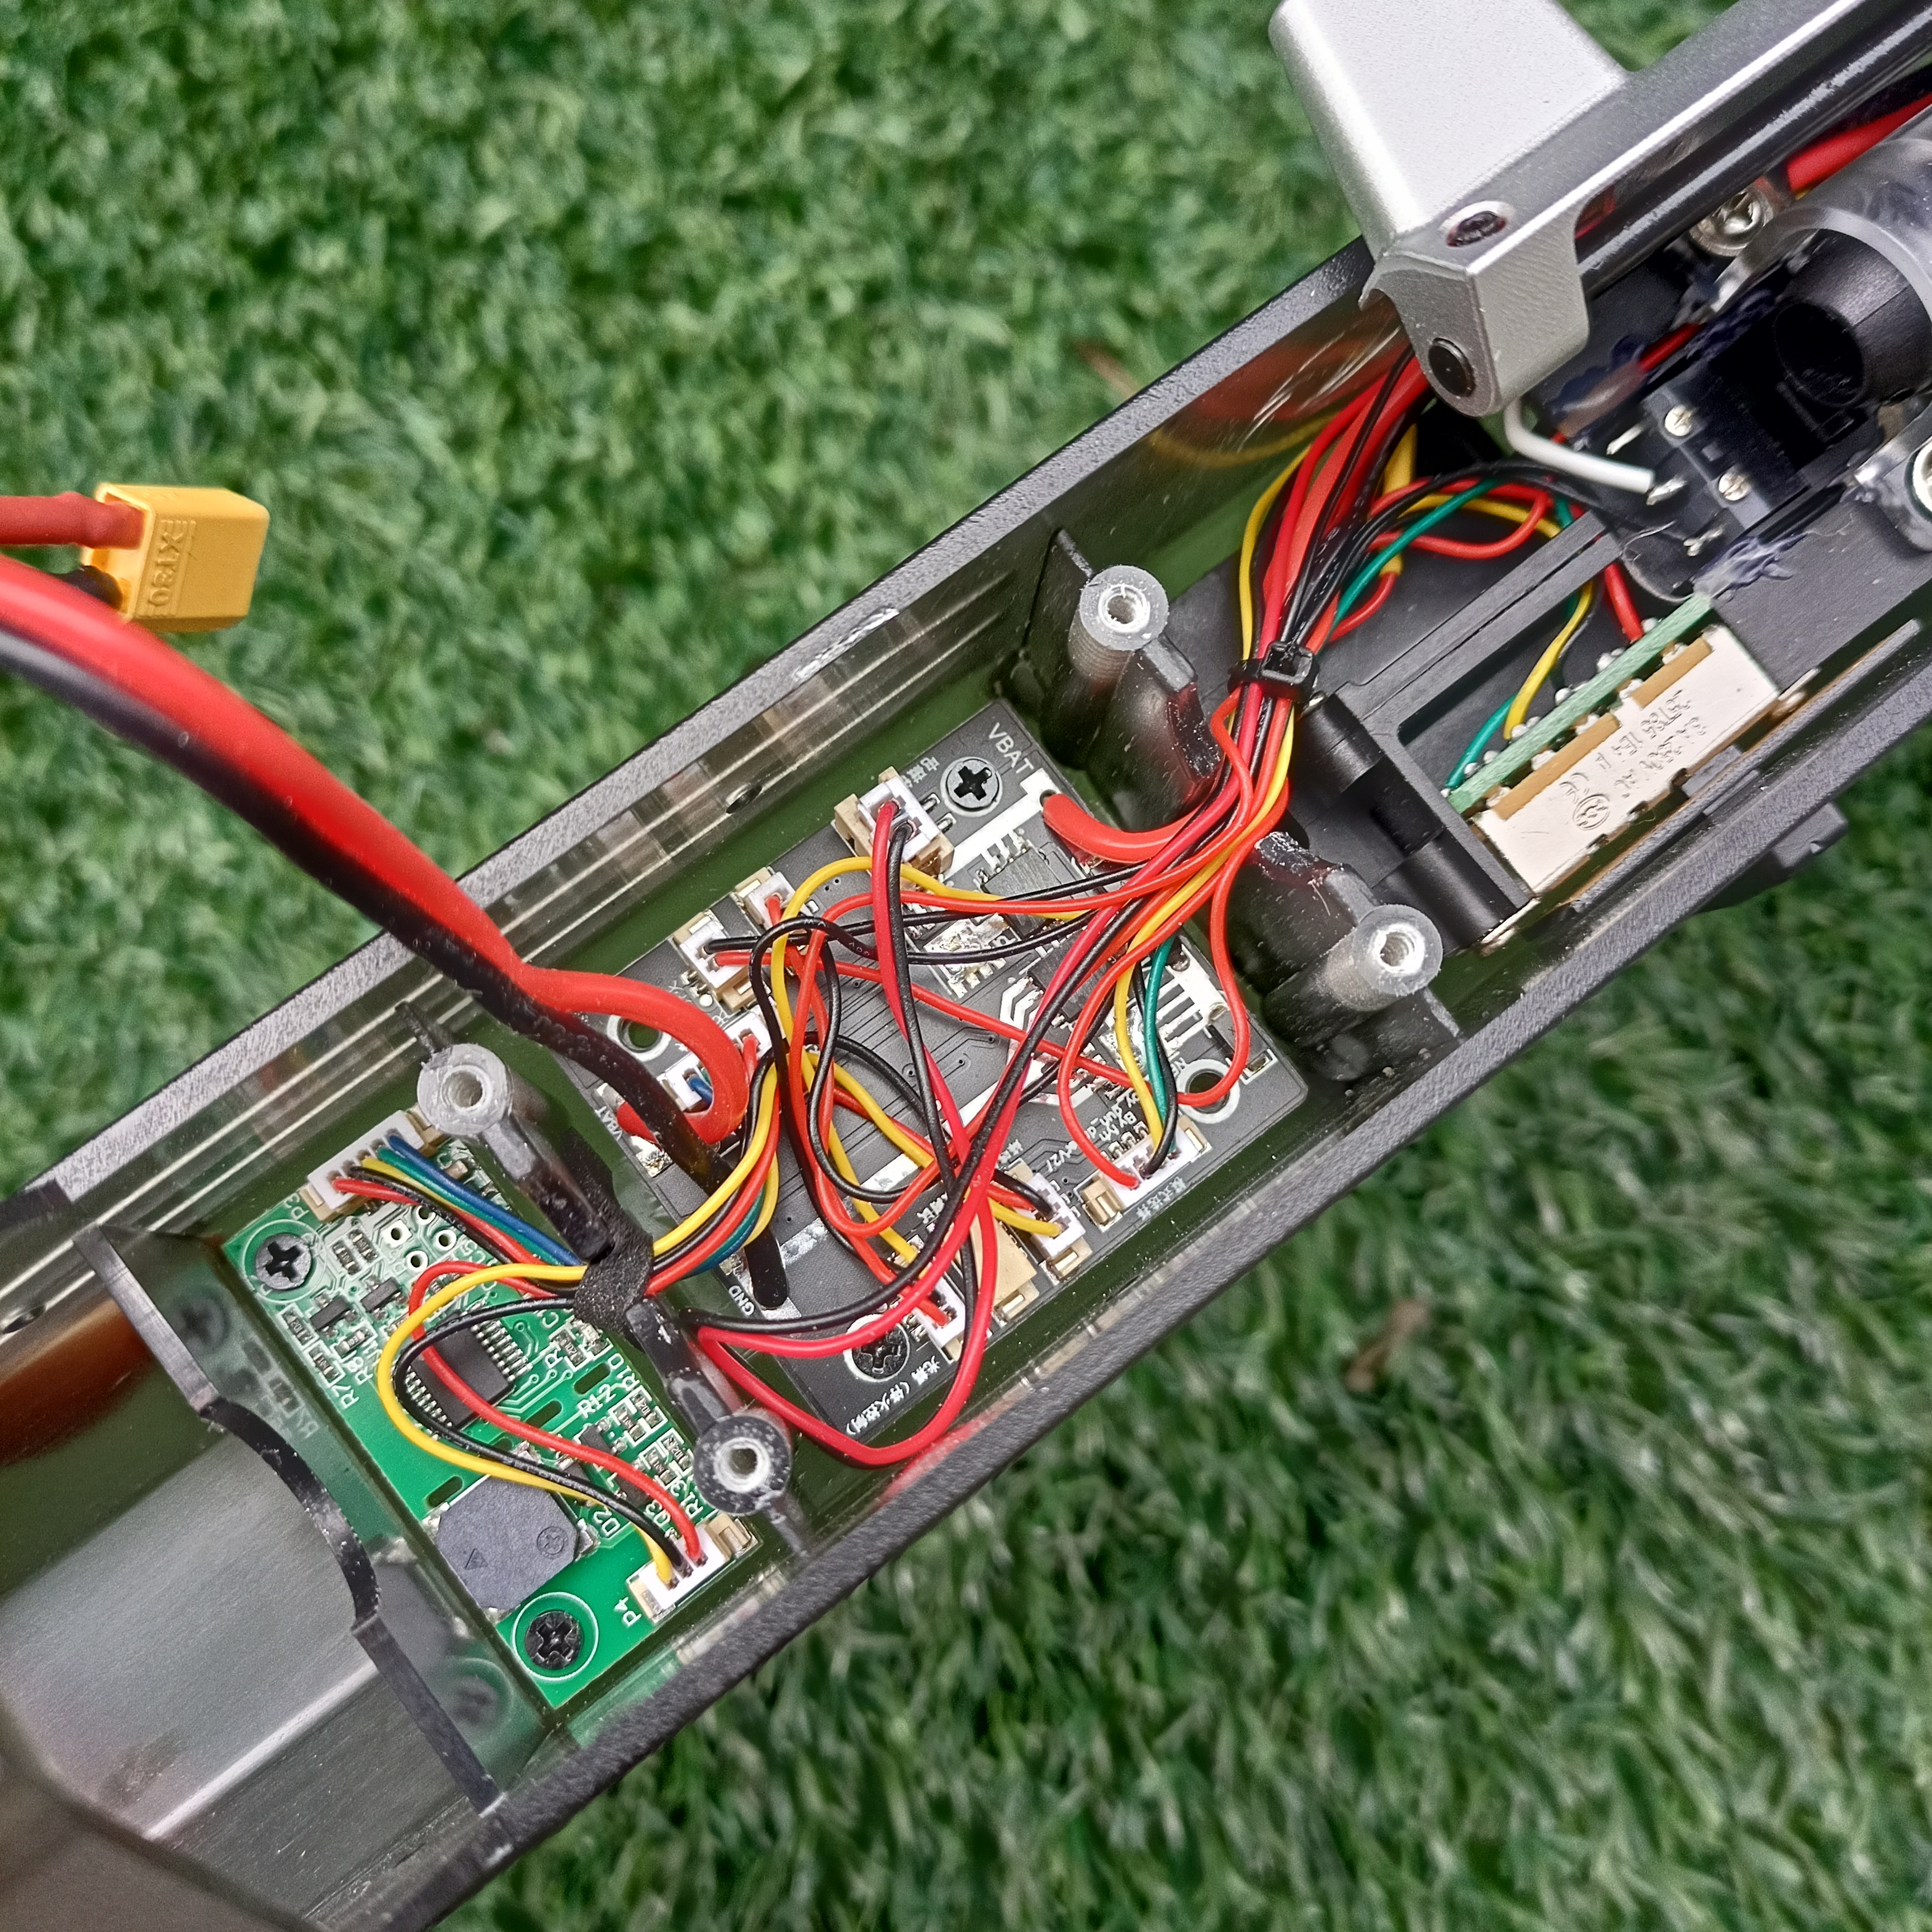
But the point here is that despite how intimidating the wires make them looks like, they are actually modular. Meaning to say if one of the electronic board is damaged, you can simply swap that board out with a new one, plug the sockets back in and the Mk3 is fixed. The main board and the motor does have some wire soldered into it so it may be trickier to replace it but I'd say its a fair design that allow the tech literates to easily repair the Mk3's electronic system.
Great if you support the rights to repair movement! :D
Let's move on to the back of the blaster now where the dart gate,Bolt/Breech and gearbox is. Nothing much to see here but a huge serialized CNC 6061 aluminum gearbox shell that houses all the mechanical components like the motor, gears, cylinder, piston, spring etc within. We will explore inside of the Gearbox in another post in great detail.
At the back of the blaster you can see the retractable buttstock locking mechanism, and also a mechanical spring release latch that you can use a long hard object to poke to release the spring for storage purpose.

And we are done with the Challenger Mk3 Pro Blaster! Let's move on and check the functions and performance of it.
As mentioned earlier the Challenger Mk3 has 3 firing mode, semi, 3 shot burst and fully automatic that can be selected with the fire selector with indicators shown on the receiver. The semi-auto is probably the highlights and most used firing mode of choice for most users. The 3 shot bursts are insanely fun and satisfying to use, the full auto will empty your mag in a couple of seconds. It does 5 darts per second, so thats about 4 seconds to empty a fully loaded 20 rounds magazine, which is not too fast compare to most Flywheel blaster, but it is adequate enough that you won't feel its sluggish or unsatisfactory.
But trust me, you WILL want to stick with the semi-auto mode because each trigger pull is extremely satisfying and addictive! You can literally feel the blaster working to give you that warm and fuzzy feeling when you pull the trigger, feels the thump when the gearbox releases the piston to launch the dart, and immediately the bolt/breech is pulled back and forth to chamber another round into the inner barrel, and this is when you feel the "recoil" produced by the gearbox. All these happen in split second, there is zero delay when the blaster is fired when you pull the trigger. When the blaster fired the last round, the bolt will be locked behind, indicating that the blaster is now currently out of ammo, you press the mag release and drop the mag, reload the blaster with a fresh mag, press the bolt release latch to chamber a dart into the inner barrel and you are good to go.
It is unfortunately very hard to explain this awesome feeling with texts, you really need to experience it yourself to believe.
The FPS is rated at about 150-170FPS, depending on the dart used. I have the chrono average FPS shown below testing 3 type of darts, Worker Gen 2 High End, Worker Gen 3 and QWK Black Dragon EPP dart. You can also watch the short video on our channel demonstrating the firing mode and FPS test.
| Dart type used | Highest FPS | Lowest FPS | Average FPS |
| Worker Gen 3 (20 Darts) | 182 | 28 (One Bad dart lol); second lowest: 128 | 163.9 |
| Worker Gen 2 HE (20 Darts) | 180 | 156 | 169.7 |
| QWK Black Dragon EPP (19 Darts) | 192 | 181 | 187.6 |
As the data show the Gen 2 HE is marginally more stable and output higher FPS than the Gen 3, but because of the stiffness of the foam on the Gen 2 HE, I will always prefer it over the Gen 3. Needless to say the Black Dragon EPP's FPS output and consistency is superb and it outright beats both the Gen 2 HE and Gen 3. The only downside is it really is very expensive compare to the Worker darts, lol.
We unfortunately do not have a range test data at this moment, but it's what you can expect from a Nerf blaster that does 160FPS~ with half-length darts.
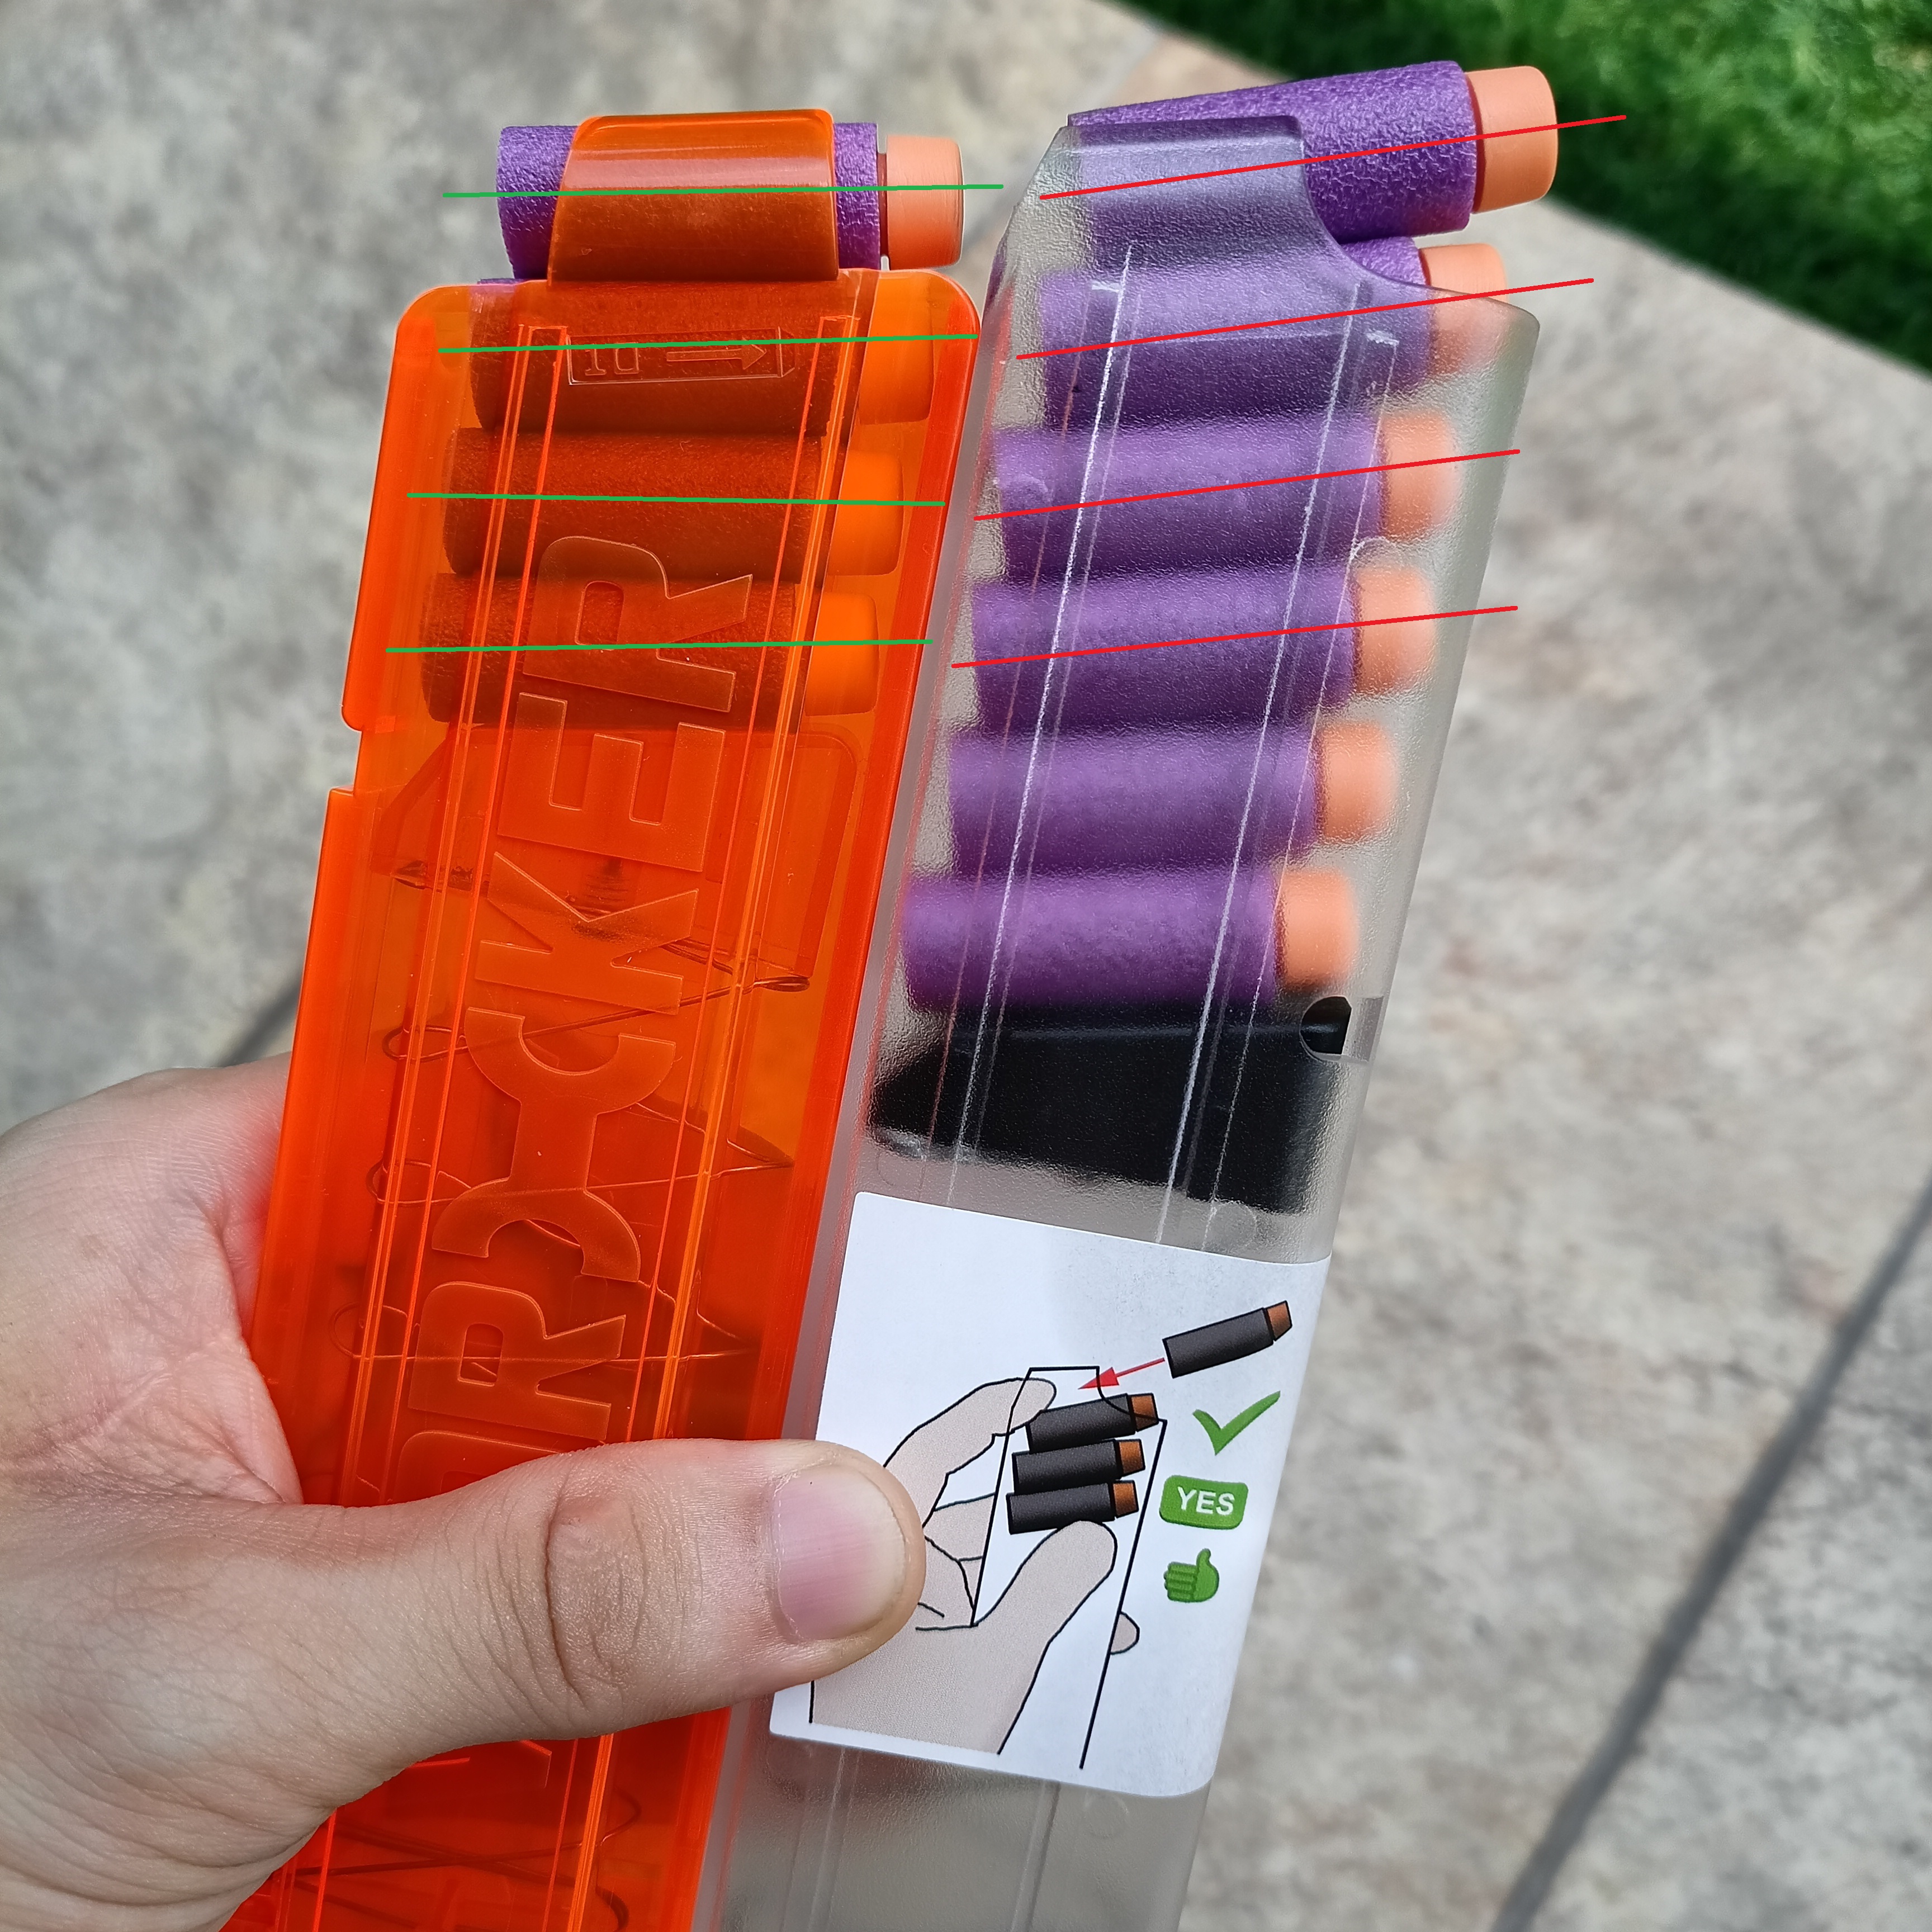
Now let's talk a little bit about the magazine itself, it's a proprietary magazine and the Mk3 will not take any other brand of existing magazine. Bummer? Maybe, I have separate post written to discuss this particular matter in detail, you can check it out too. But anyway, when I say the blaster require delicate operation, this is one of the reason. You need to pay close attention when you load darts into the magazine, make sure to follow the picture guide that's stick onto the magazine or the MK3 will jam a lot! Take a look on how the darts are seated in the magazine compared to the slanted Worker Talon mag and you will understand. If the blaster is experiencing a jam, you need to immediately stop using the blaster. You need to identify and rectify the issue first before you can resume using the blaster.
If the blaster is jammed and the operator don't understand and just keep pulling the trigger hoping for some miracle to happen, the electronic/gearbox may be irreversibly damaged. This is the number one reason why the MK3 can be malfunctioned and it is mostly due users' errors, as tested and reported by the first batch of MK3 user in China. QWK is developing an anti-jam system for the MK3 that will significantly reduce the chance of the blaster malfunctioned due to bad/jammed dart, and also a blaster force stop function when the system detected a jam. This system is still under testing and will be further updated on a later date.
Here is an example of a bad jam during one of my test where a dart gotten a "U shaped" fed into the barrel. A long stick is needed to clear this type of jam before you can resume using the blaster or risk damaging the blaster irreversibly.
I have personally tested this Challenger MK3 Pro for an extended period of time, firing over 5000 darts in 2 weeks time, I've had only managed to jam the blaster 3-4 times due to extremely worn Worker Gen2/3 darts, or I have loaded the dart into the mag the wrong way. Otherwise the blaster works relatively well and I see and feel no sign of premature wear at any part of the blaster. But of course, this has to wait until we crack open the gearbox to see the parts within to verify.
Obviously, the Challenger MK3 is not without flaws and the flaw is further magnified when I test the blaster using any darts thats not the Black Dragon EPP. Sometimes the breech could not return to the battery (Breech at the most forward position) because the darts are simply too fat to be pushed by the breech/pusher's return spring into the barrel and causes some FPS inconsistencies. This could also be due to the vacuum loading effect, but this can be fixed by drilling a hole or shave the pusher's head a little bit. In any case, QWK recommended using the Black Dragon EPP darts for maximum performance of the Challenger MK3.
The modification potential is also limited by the gearbox design, as the size of the Challenger MK3 is very compact, it also has a rather small plunger tube (Around the size of an Expanded Retaliator plunger tube), so the FPS ceiling is relatively low. QWK claimed with fully upgraded kit, the peak FPS the Mk3 Pro can achieve is 250-260FPS with the Black Dragon EPP Dart.
Here's another video of me feeding random darts to the Challenger MK3 to test its reliability.
I have fielded the Challenger Mk3 once in a 5v5 and rather small environment using Worker Gen2 HE and Gen 3 and I am extremely satisfied and impressed with how the Mk3 performed out of the box, it is a killer at close to mid range (30 to 80 feet) and you can hit a human size target very easily with just a few tap of the trigger. I can't wait to run it with the Black Dragon EPP! The biggest advantage of the Challenger MK3 offers, others than the impressive accuracy, is the speed that you can shoot, eye ball trace the dart and quickly make adjustment to the follow up shots. It isn't something you can do with a manual springer easily. See your target trying to dodge your dart? Yeah, you can make him move that much more with just a few more trigger tapping before they succumbs AND before they even thought of priming their springer blaster to return fire, because unlike most typical Flywheelers, the shots from a springer will always be more stable and accurate. You also can make use of the 3 shot burst and full auto if you need to lay down some suppressing fire with excellent and predictable groupings.
The Challenger Mk3 is no long range sniper rifle type of a blaster so I find it irrelevant comparing it to a high powered longshot-type FPS powerhouse, it's a different blaster category. So if you are into that type of blaster, the Challenger MK3 will surely disappoint you. But pick the Mk3 for the right reason, which is the CQB environment? It can absolutely destroy your opponents. Flywheelers nowaday are amazing don't get me wrong, I personally also use the Worker Phoenix and I love it for what it is too, but if you need to be stealthy and that instant trigger responds? Good luck with that.
I hope to record an actual gameplay footage next time the Mk3 is fielded! But for now I have a video of me shooting a still target utilizing the different shooting modes of the MK3.
Conclusion
So what do I think about the blaster? I personally think the Challenger MK3 is indeed a game changer to the Nerf blasting scene, it offers unrivaled foam flinging experience that I have never felt before in my 4-5 years of foam flinging career. We've always quite clear about the role of the variety or "classes" of Nerf foam blaster ie if you want to be a long range Sniper role, pick a high FPS blaster like a Longshot/Worker Swift; if you want to be at a closer range, you can pick a Retaliator/Prophecy/Nexus Pro etc blaster with good accuracy and moderate rate of fire; if you like spamming darts very quickly and don't mind losing some accuracy, you pick a noisy Flywheel blaster to overwhelmed your opponents. The Challenger MK3 basically is the hybrid of the Retaliator and a Flywheeler, offering the advantageous accuracy and consistency of the Retaliator, and the automated operation from the battery powered Flywheeler, minus the motors whirring noise. Basically the best of both world if you will.
But will I recommend this to everyone? No, and that is a strong NO. Because let's face it, for the price QWK is asking, 400USD+ (Estimated) is very very steep, and it starts to make very little sense to spend this much for a foam flinging blaster. It also requires some know-how knowledge on how mechanical/electronic devices works to fully understand how the MK3 behaves and to be able to identify when a problem occurs, rectify and keep the blaster going. All these are not exactly fun for most foam flingers that just want to fling some foams, and at some point it can actually be daunting and seemed too troublesome to enjoy. Hence I will always recommend a Flywheeler over the Challenger MK3 if you really just want to enjoy some automated foam flinging action, it's easier and you don't need to be too mindful about the blaster jamming or breaking down. I haven't get to test the DZP MK3 yet, but I already can tell I will easily recommend a battery powered blaster like the DZP Mk3 over the QWK Challenger MK3 to most casual foam flingers out there.
BUT, if you can look past all that and decided that you are able to handle a little bit of a delicacy, I think you should definitely give the Challenger MK3 a try because I promise you, you will be impressed by this piece of Foam flinging gadget blaster and appreciate the things that it does and offer. QWK has done something that many people have been doubtful and skeptical about successfully. Whether you are going to support it or not, makes no mistake this is a great news to the foam flinging scene because the success of the Challenger MK3 will be celebrated in the way of encouraging many other manufacturers to start making their own AEG/AEB blaster!
Let's not forget about the Standard version of the Challenger MK3, which we suspect will be way more popular than the Pro version because of the price! We cannot wait to get ours to try and compare it to the Pro version!
Finally, thank you very much for making it all the way through the post and I appreciate your patience very much! Stay tuned to our Facebook page and blog as we make more updates about the Blaster!
Leave a Comment